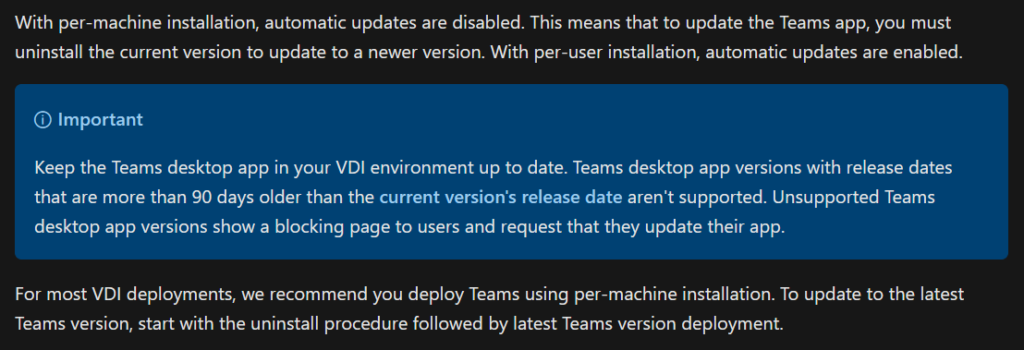
You may or may not know that there is a specific way to install Teams when using a VDI solution. AVD is what I end up working with in almost every situation, so this article is catered to AVD. However, this solution can be used for any VDI solution that uses the Teams machine-wide installer. For details on installing Teams for other VDI solutions, see this link – Classic Teams for Virtualized Desktop Infrastructure – Microsoft Teams | Microsoft Learn). As I was writing this post and gathering information, the new Teams client was released for VDI in public preview. I won’t be going into details on that in this post since it’s still in preview, but over time, as everyone transitions to the new teams, this process may change. For now, this focuses on “classic” teams. Performing the installation is rather easy, but per Microsoft, teams MSI installs do not auto-update. Over time, you can end up with a Teams machine-wide installer that is well past the 90 days of support Microsoft offers for Teams. To make matters worse, updating teams is not as simple as running the newest MSI. Microsoft recommends removing the currently installed version and deploying the newest MSI – Classic Teams for Virtualized Desktop Infrastructure – Microsoft Teams | Microsoft Learn.
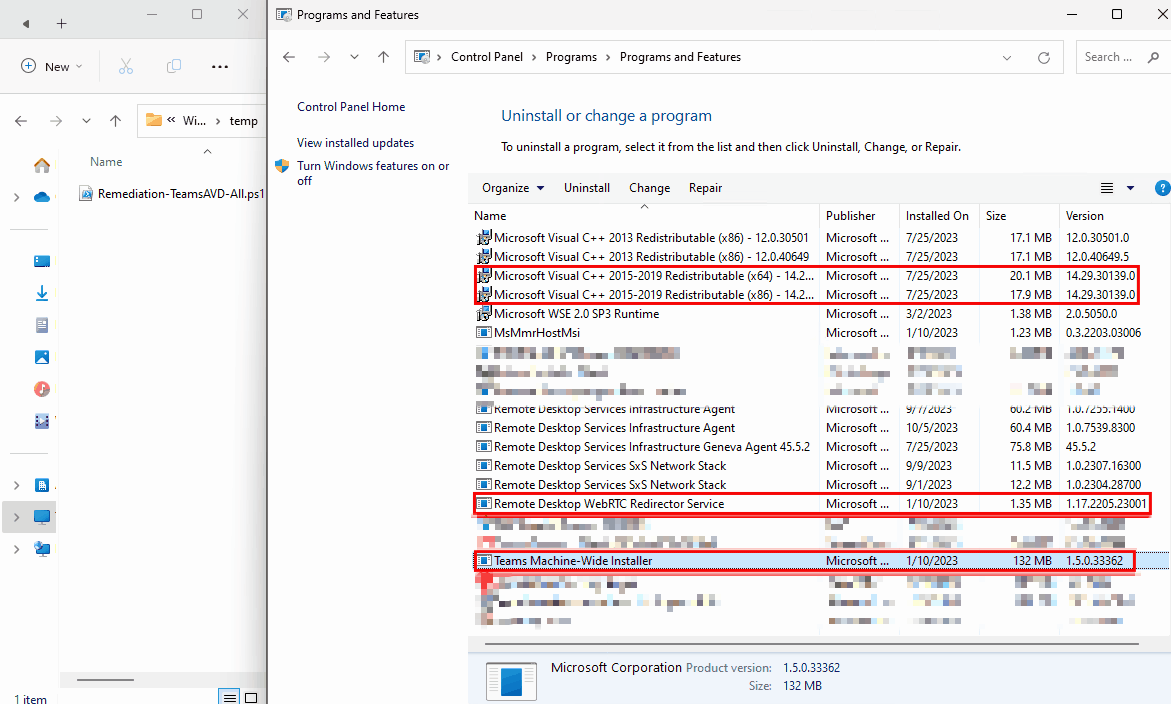
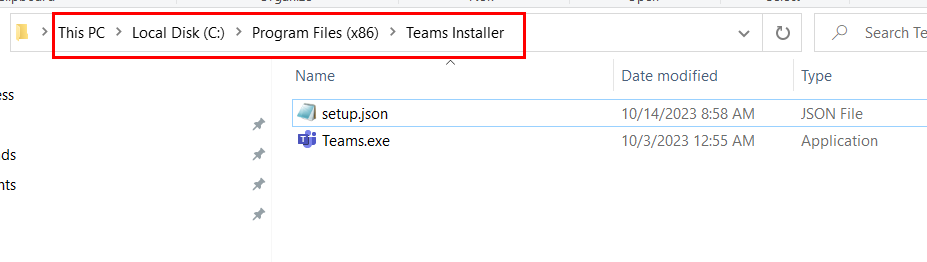
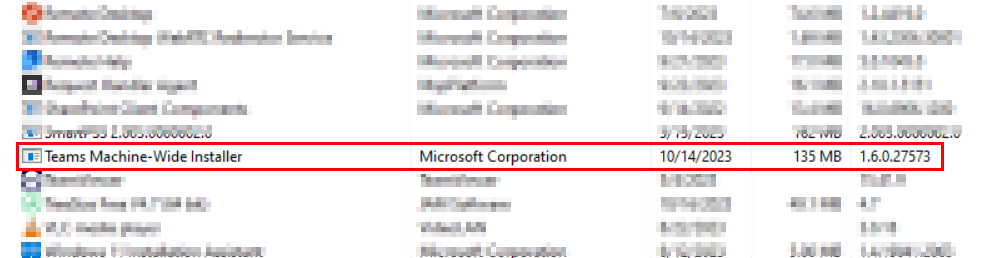
The big difference between downloading and installing Teams as an executable as a user, and installing Teams Machine-Wide installer from an MSI is where it’s installed and how it’s updated. When we install Teams in pooled VDI environments, it’s recommended by Microsoft to use the Machine-Wide installer, which installs a Teams.exe to the c:\program files (x86)\Teams Installer directory on the computer. It also creates an entry in the programs for the Teams Machine-Wide Installer:
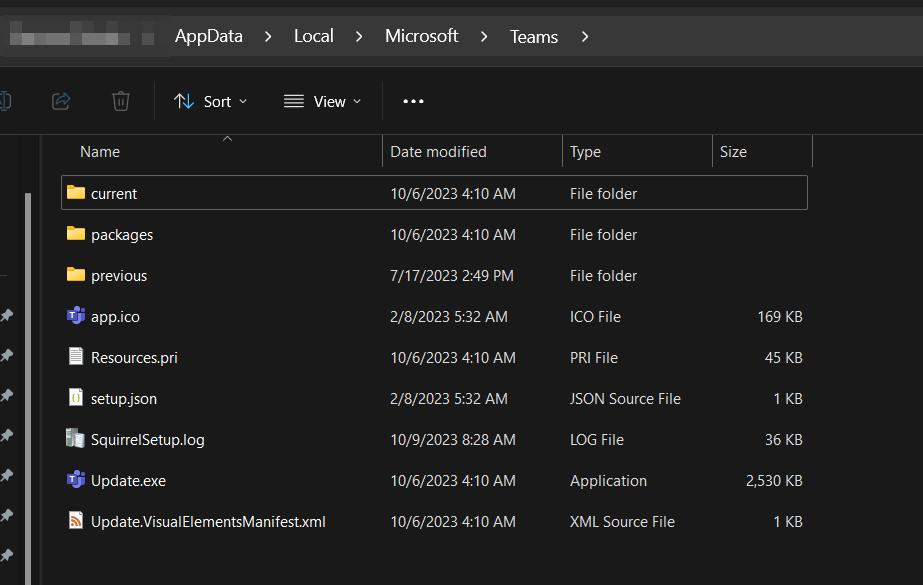
When users sign in for the first time, the machine-wide installer will perform a typical install of teams to that user’s profile in the %localappdata%\Microsoft\Teams directory.
This is why it’s important to use per-machine installs in a VDI environment. Teams is automatically installed to the native location in the user profile. When it is installed, it will match the same version as the Machine-Wide installer that is on the host. Teams will eventually start automatically start checking for updates once it’s installed for the user, but I’ve encountered issues in the past where Teams may fail to update, especially if the Machine-Wide installer is very outdated. So, good maintenance practices indicate that this should be kept up to date on our session hosts. As we saw earlier, its recommended to uninstall Teams and Install the latest version. If you’re using a common image to deploy your session hosts, you’ll want to do this periodically on your image, but if you have existing session hosts where you want to update this periodically without redeploying the image, we can use an Intune remediation to automate this. After all, if you’re using Intune already and your session hosts are MEJ or HMEJ, there is no harm in enrolling them in Intune for additional management.
This gets slightly difficult since session hosts are likely on a scaling plan, but remediations will run on schedule and if a host misses the scheduled time, it will run the next time it checks in. Or, you can simply build the remediation, not assign it, and run it on demand when needed. Before running the scripts, let’s look at what Teams needs to properly operate in a VDI environment so we understand what the scripts are doing.
- Microsoft recommends installing the latest version of the Microsoft Visual C++ Redistributable on your session hosts (and your clients if they’re Windows clients) https://support.microsoft.com/help/2977003/the-latest-supported-visual-c-downloads. This is required for Media Optimization to function properly.
- Media optimization needs to be enabled with a registry value. Without this, installing Teams with the “ALLUSER=1 ALLUSERS=1” parameters will fail because it won’t detect that it’s being installed in a VDI environment. We need the IsWVDEnvironment DWORD value of 1 to exist under the “HKLM:\SOFTWARE\Microsoft\Teams” registry key

- The Microsoft Remote Desktop WebRTC Redirector Service (https://aka.ms/msrdcwebrtcsvc/msi) needs to be installed on the session hosts. Note that this is not required for other VDI platforms, like VMware Horizon.
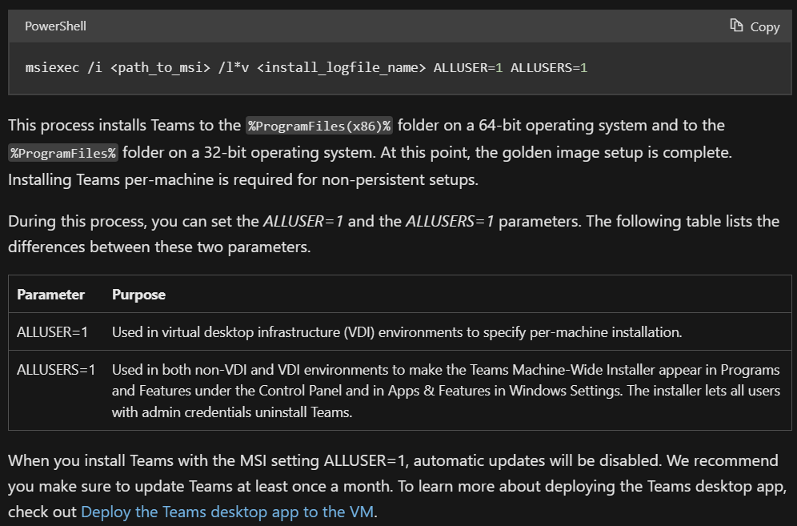
- Lastly, Teams needs to be installed with specific options for AVD. The recommended method for this is using “ALLUSER=1 ALLUSERS=1” as part of the Install (Use Microsoft Teams on Azure Virtual Desktop – Azure | Microsoft Learn)
I have this broken down on Github into four scripts if you want to use separate remediations for each component (Teams, WebRTC, C++ x86, C++ x64), or one master script that will perform everything in one detection/remediation. The detection script downloads the most up-to-date WebRTC, C++ Redistributable, and Teams MSI installer files. It then runs a version comparison against what is currently installed on the system. If the installed software is out of date, then the remediation script will run, which properly updates the components. In the case of Teams, it will gracefully remove the Teams MWI installed version, and then deploy the new version with the correct options for VDI. The C++ redistributable and WebRTC components do not require the previous version to be removed. So, those apps will automatically update when running the new installers. If your systems don’t have C++ Redistributable 2015-2022, then a reboot is also required to finish those installs. I have the reboot suppressed in the script, so you’ll need to restart the hosts after or edit your script to reboot at the end.
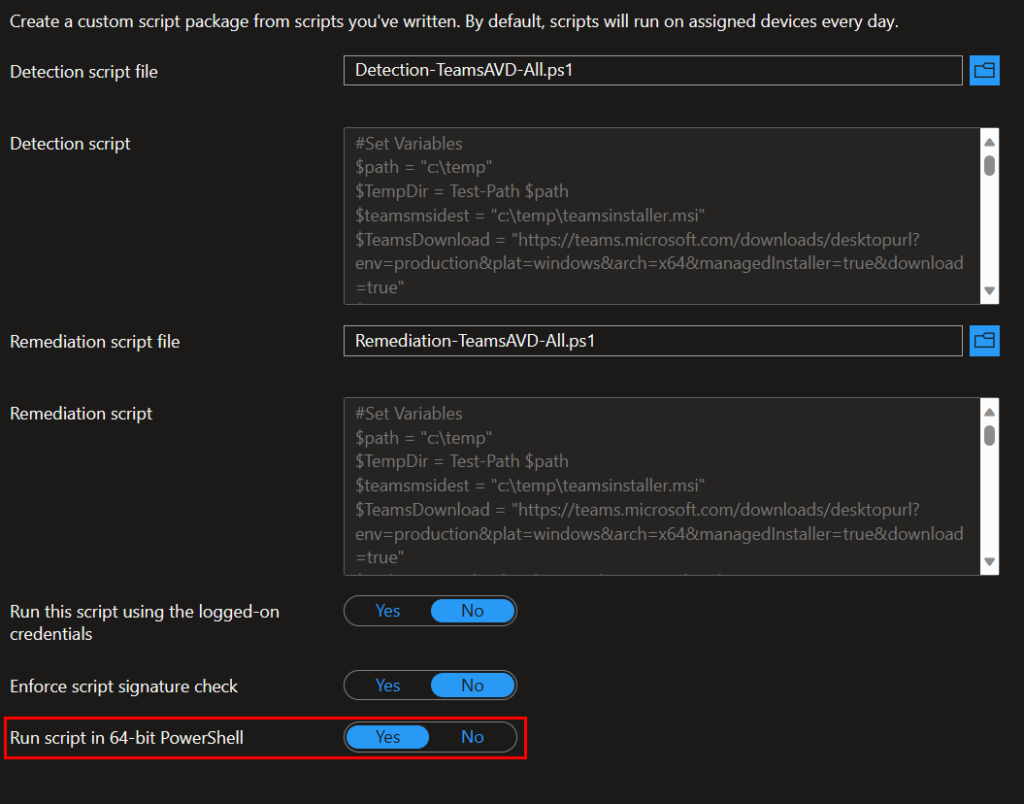
There is one thing I want to point out in the remediation. For the remediation that updates all components and the remediation that only updates the Teams MWI, I have a check to verify the necessary registry value for “isWVDEnvironment” is set, and set the correct value if it’s missing or wrong. Because of this, we need to make sure those scripts are run in 64-bit context (see below). I did this because without that registry value, Teams will fail to install with the VDI options.
When it comes to scheduling, this will vary based on the environment. We can automate the remediation to run every 30 days, or you can run this on-demand during maintenance as we mentioned. Keep any images updated, also. Ideally, you’d want these executed when users are not actively using Teams, which may be difficult. Since Teams is installed locally to their profiles and only the Teams MWI components are being removed/updated, there should be no or minimal impact on users. However, the WebRTC components can disrupt users who are on an active call. So, do whatever works for your environment and your environment’s scaling plan.
Here’s a GIF showing the remediation running on a Windows 365 image in the system context, like it will through Intune. We can see the installers being downloaded, and then the four applications all being updated in the program list. The script takes less than a minute to complete: