Last updated on February 16th, 2023 at 02:48 pm
You’d think there would be an easy way to deploy shortcuts to the public desktop with Intune, but that’s not the case. There are several ways to accomplish this, but the method I see most often is by deploying a script through Intune. If you really want to do this the right way (in my opinion), you want to use a Win32 app.
The script I use in my Win32 app is available here. You will need to edit several lines for your desired shortcut. You’ll also need to create an icon (.ico) file to use for the shortcut (if one is not specified, you’ll end up with the browser icon). There are several online converters for jpg/png files, or you can use the convertto-icon powershell module (PowerShell Gallery | ConvertTo-Icon.ps1 0.1). The quality of the image will be better using the online converters. After editing the script and finishing your deployment, you will end up with a shortcut on the public desktop that will open with a specified browser (optional), custom icon, and a detection rule so you can see the deployment status.
The Install script to create the shortcut:
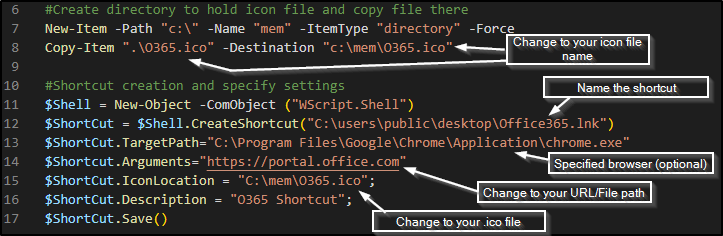
Let’s walk through some of this and point out some important lines:
- Line 7 (according to the line numbers on the left of the screenshots) creates the directory c:\mem on the target machine. We need this so the icon file has a destination.
- Line 8 copies the icon file from the running directory to c:\mem. Remember, the script is running as a Win32 app. More details on that below on how this gets packaged.
- Line 13 is important. Let’s say a business enforces Edge as their default browser, but they use some sites that require Internet Explorer or Chrome. We can specify which browser opens this shortcut. If you are making a shortcut to a UNC file path, you will want to remove the specified browser.
- If you don’t want to specify a browser, you can have it open with the default. Comment out the $Shortcut.Arguments line, and specify your shortcut URL for the value of $Shortcut.TargetPath. See Example below:

- Line 14 should be the URL or file path you want to use for the shortcut.
- Line 15 should only have the .ico file name changed to be your icon file name.
- Line 16 is optional and provides a description in the shortcut properties
The uninstall script:
This is a simple script that deletes the shortcut from the public user desktop. In the event you no longer want this shortcut, you need to specify an uninstall script within the Win32 App to remove it. Simply change the shortcut name to what you used.

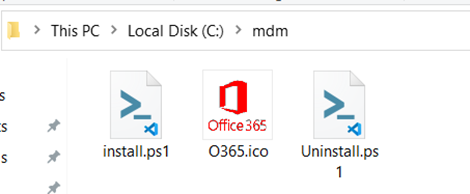
Now that you’ve edited both scripts with your values, we are ready to package this into a Win32 app. First, we need to place the install and uninstall scripts, and the icon file in the same directory.
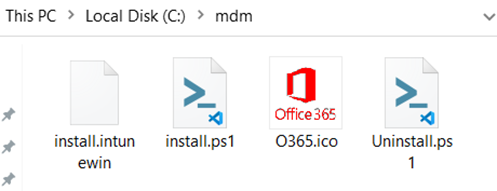
Launch the IntuneWinApp.exe program (https://github.com/Microsoft/Microsoft-Win32-Content-Prep-Tool) and specify install.ps1 as your installation file. I output my intunewin file to the same directory. The packaging process packages all files in the specified directory. This is why its important to place your uninstall and .ico files in the same directory, so they are part of the package. This goes back to line 8 of the install script. When this is executed with Intune, we are copying the .ico from the working directory to the local machine.
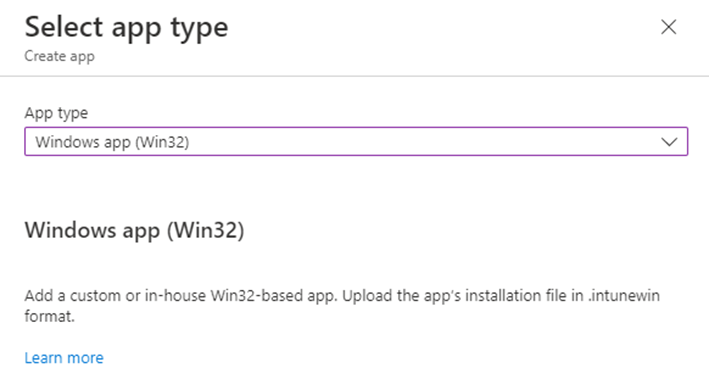
With the intunewin file created, we can create our application and deployment. Sign into Endpoint Manager and create a new Win32 app deployment.
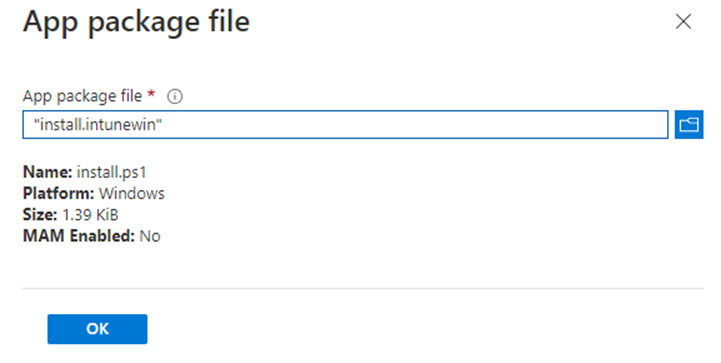
Browse to the install.intunewin file we created. Don’t mind the 1.4KiB size. That’s normal since its just the icon file, and the two scripts.
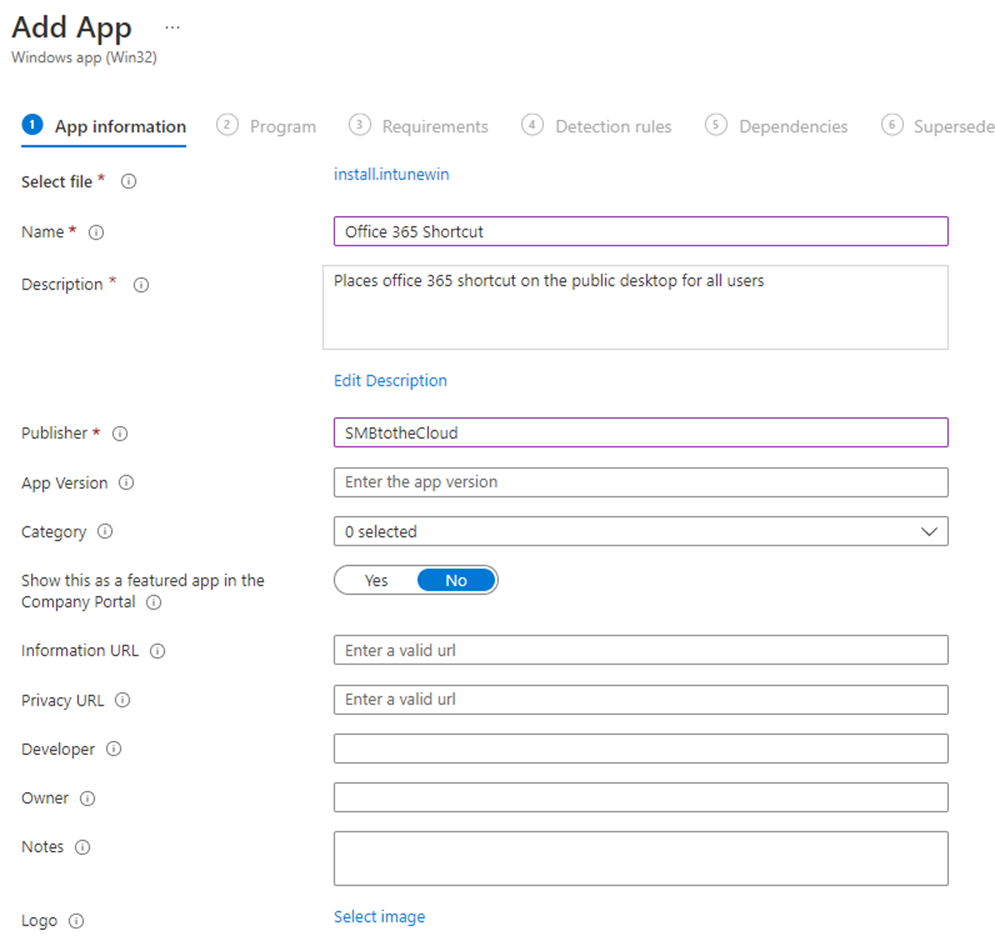
Name the app and complete the necessary fields
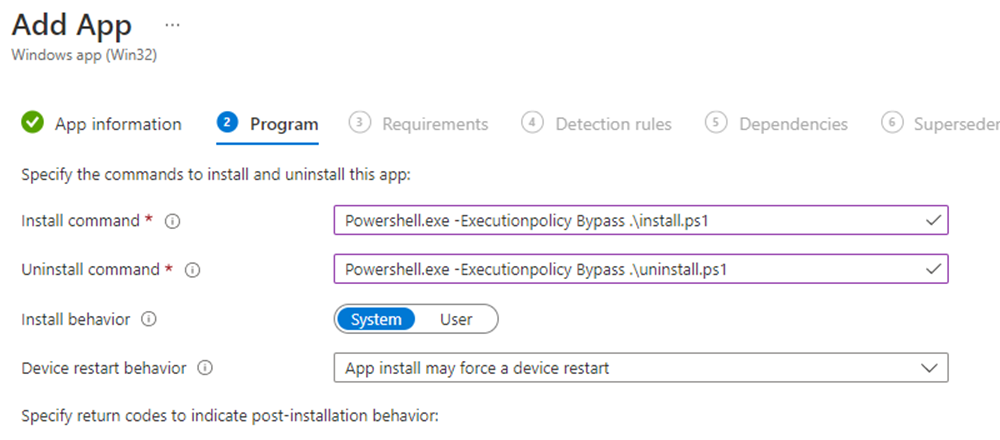
For the install command, we need PowerShell to launch and allow unsigned scripts to run. So, we use the install command Powershell.exe -Executionpolicy Bypass .\install.ps1. The uninstall command is the same, but targets uninstall.ps1. Make sure we install for System since we are targeting the public user desktop.
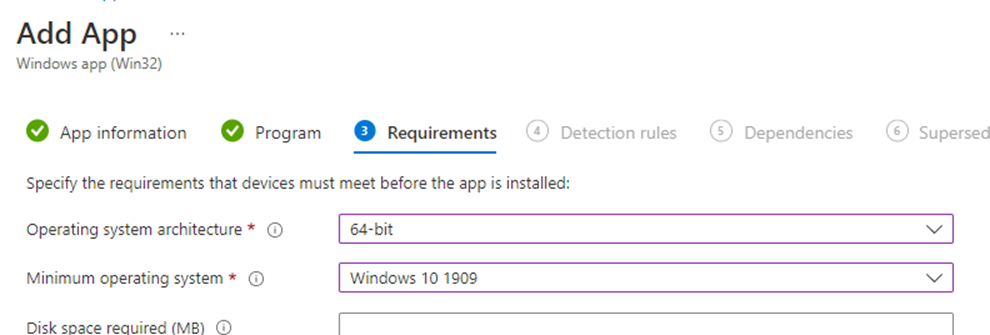
Add some requirements for the app
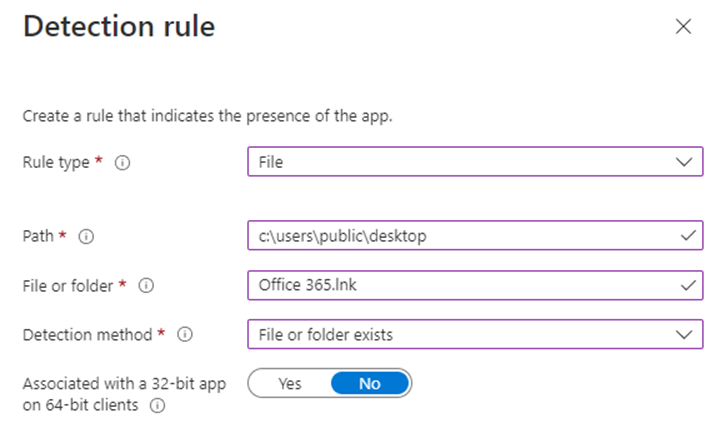
The detection rule is making sure the file exists. Edit the file or folder field to use the name of the shortcut file you used in the install script.
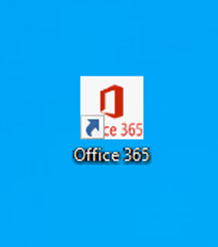
The rest of the steps can be left as default unless you want to specify any dependencies. Assign to your desired device group. A couple minutes after assigning, you can run a sync from the company portal on a target machine, or restart the IME service to force the device to check in for new apps. Shortly after, the shortcut should appear on the desktop: