With the New Teams app being GA, organizations will eventually move from “Teams Classic” to the “New Teams” app. There are several reasons to make the switch, the biggest reason likely being the performance benefits. As I’ve been testing the new teams, I realized that custom backgrounds that were manually added, or added via remediations, do not transfer over to the New Teams. I took a look at where backgrounds are stored in the new teams, and how we can deploy backgrounds with remediations. Using this method allows you to deploy custom backgrounds to your users without a Teams Premium license.
This post focuses on adding backgrounds for New Teams. If you are still using classic teams, see my previous post here. I will be using the same method using blob storage that I used in this post, so I will skip over the beginning portion. There is one extra pre-req for new teams, but the rest is mostly the same, other than changing some paths.
Without getting too into the weeds, the new Teams app differs from the classic app in that it’s an MSIX package. It’s more like a Microsoft Store application than a traditional MSI/EXE installer. Let’s take a quick look at the app details using get-appxpackage in PowerShell:
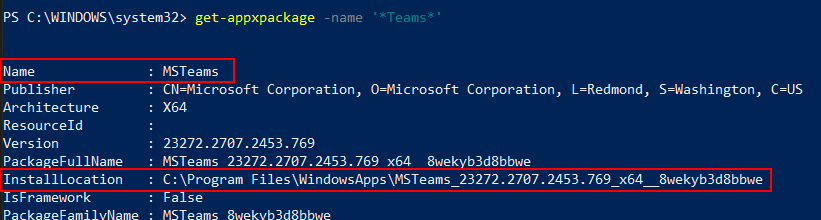
We can see the install path pointing to C:\Program Files\WindowsApps. However, similar to classic teams, new teams has some data that lives in the local user profile (where the backgrounds and other cached data are stored). This is data related to their Teams sign-in profile and is stored in %LOCALAPPDATA%l\Packages\MSTeams_8wekyb3d8bbwe
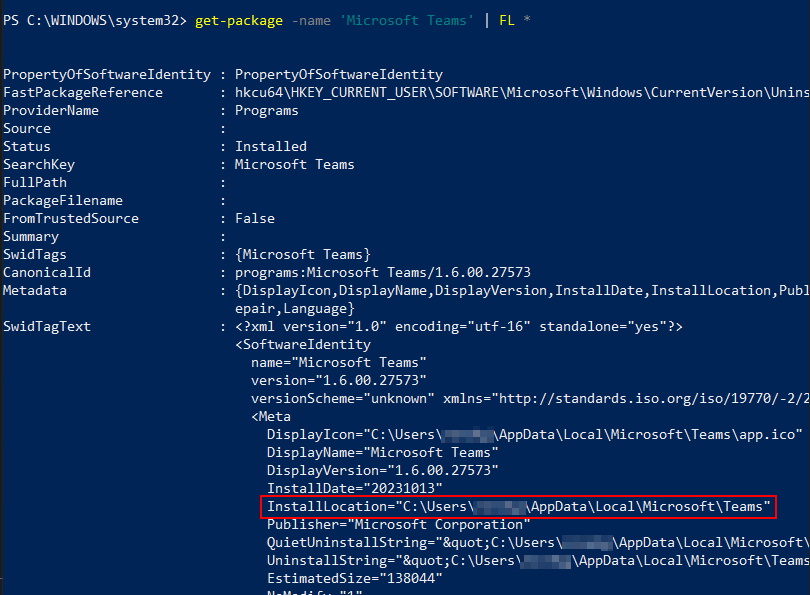
If we wanted to look at Teams Classic, we use get-package (since it’s not an MSIX) and can see that for each user, it’s installed to their profile. If you’re using the Machine-Wide installer, it will be located at C:\Program Files (x86)\Teams Installer, but each user on the device still has Teams installed to their local profile on first sign-in.
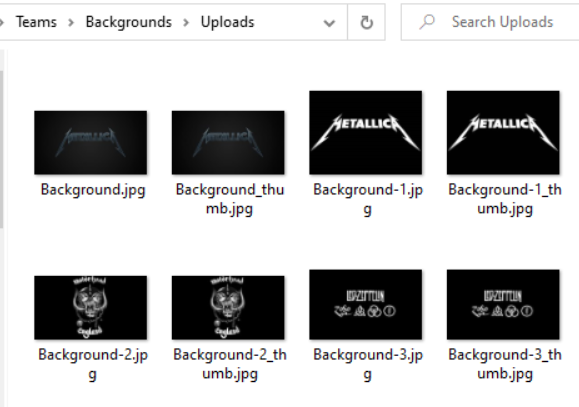
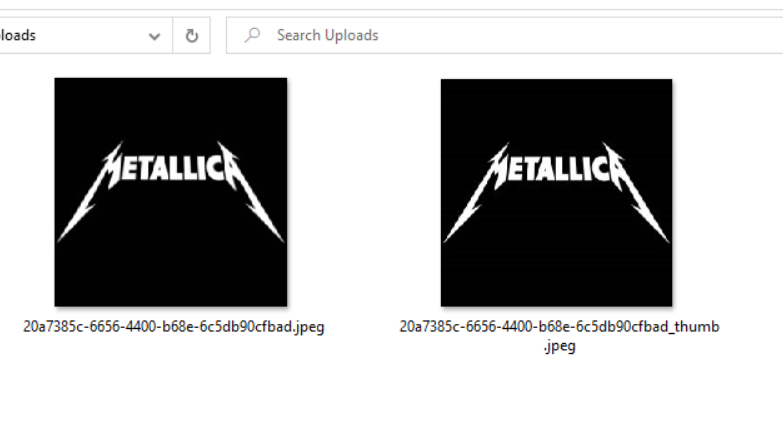
Now that we have some basics down on some of the differences between installation and installation paths, let’s see how we can start adding custom backgrounds to the new teams. As I mentioned, if you’re organization is using New Teams side-by-side with Teams Classic, your backgrounds do NOT transfer over to the new teams unless you have Teams Premium licensing and are deploying backgrounds using the Teams admin center. Classic Teams uses the directory %appdata%\Microsoft\Teams\Backgrounds\Uploads. To review, with Classic Teams, we simply add images to that directory and Teams will automatically generate a thumbnail of the image, like in the image below:
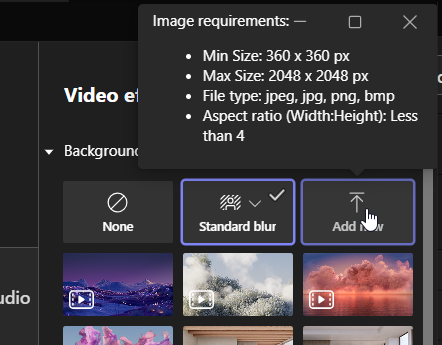
New Teams uses the directory %LOCALAPPDATA%\Packages\MSTeams_8wekyb3d8bbwe\LocalCache\Microsoft\MSTeams\Backgrounds\Uploads. I discovered this by manually adding a new image through the Teams App. You can do this from a meeting or the meeting lobby by selecting VIdeo Effects > backgrounds > Add New:
Here’s the curveball. My original test image was named “ozzy.jpeg”, but after adding the new image, it was renamed to 2dcf91dd-0b21-4266-bd5e-eb3dca976b9e.jpeg.
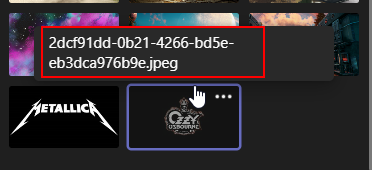
Just to make sure this was the case, I added another image to confirm. New Teams assigns a UUID to the image as the name, and also creates a smaller image for the thumbnail. If you simply drag and drop images into this directory without this naming convention, New Teams will not recognize them.
So, Teams is grabbing your image, and then assigning it a UUID.jpeg name, adding a UUID_thumb.jpeg file, and that gets added to the %LOCALAPPDATA\Packages\MSTeams_8wekyb3d8bbwe\LocalCache\Microsoft\MSTeams\Backgrounds\Uploads directory. We can see ms-teams.exe doing this in procmon during the process of adding a background manually:

I mentioned curveball earlier because this is the primary difference between adding backgrounds to classic and new teams. If your image is not named with a UUID.jpeg as the file name, and there is not a corresponding UUID_thumb.jpeg, then the background will not be available. I said jpeg because that was my example, but compatible formats are jpg, jpeg, png and bmp. The images need to follow this naming context for New Teams to recognize them.
That brings us to our remediation to deploy images to our users. As mentioned, I am going to dive directly into the remediation since the storage account portion is already covered in my other post for Classic Teams. My first draft of the remediation script worked, but I made it in a way where it was impossible to use a detection script. I was focusing so much on the remediation script, that when I finished, I had no way to accurately detect if the backgrounds were deployed since each image on each device had a unique UUID name for the backgrouds. I originally had the remediation download the image files, generating a new UUID for each image, and then copying the images using the generated UUID and a UUID_Thumb files to the backgrounds directory. This worked great, but the detection was the issue. I thought about using a dummy file or even a text list in the backgrounds directory, but that still would not be a great solution since the actual image files would not be the source of detection. I scrapped this idea and instead, pulled the portion doing the renaming out.
So, the most logical step is to do the UUID generation and renaming before uploading the images to the storage account. If we do it this way, we will have our backgrounds fit the necessary unique naming convention, but they’ll be named the same on each workstation, and our detection rule can accurately detect if both the UUID.jpeg and UUID_Thumb.jpeg images exist. It does this by pulling the names of all files in the storage account and then comparing them to what exists on the local machine. If any files are missing, the remediation will run. This allows you to dynamically add additional backgrounds to the storage account without adjusting the scripts.
Before uploading your images to your blob storage, you need to have the images renamed properly. If you already have a bunch of background images you use, the below script will make two copies of each of your backgrounds – one will be uuid.jpeg and the other will be uuid_thumb.jpeg (or whichever extension your images are). This script and the remediation scripts are on Github. Simply put all your backgrounds in a directory, and set that directory as the $backgroundsdir variable, then run the script. The script only identifies compatible image files (jpeg, jpg, png, and bmp). A new directory will be generated named RenamedBackgrounds with the copied and renamed images.
#Directory where your images are stored (Change $backgroundsdir to your location)
$backgroundsdir = "C:\temp\TeamsBackgrounds"
$renamedbackgrounds = New-Item -Path "$backgroundsdir" -Name RenamedBackgrounds -ItemType Directory -Force

#Rename JPEG files
$jpegimages = get-childitem $backgroundsdir -filter "*.jpeg"
foreach ($jpegimage in $jpegimages)
{
$uuid = new-guid
$name = "$uuid.jpeg"
$thumbname = "${uuid}_thumb.jpeg"
$newnamedestination = Join-Path -Path $renamedbackgrounds -ChildPath $name
$newthumbdestination = Join-Path -Path $renamedbackgrounds -ChildPath $thumbname
Copy-Item -Path $jpegimage.FullName -Destination $newnamedestination
Copy-Item -Path $jpegimage.FullName -Destination $newthumbdestination
}

#Rename JPG Files
$jpgimages = get-childitem $backgroundsdir -filter "*.jpg"
foreach ($jpgimage in $jpgimages)
{
$uuid = new-guid
$name = "$uuid.jpg"
$thumbname = "${uuid}_thumb.jpg"
$newnamedestination = Join-Path -Path $renamedbackgrounds -ChildPath $name
$newthumbdestination = Join-Path -Path $renamedbackgrounds -ChildPath $thumbname
Copy-Item -Path $jpgimage.FullName -Destination $newnamedestination
Copy-Item -Path $jpgimage.FullName -Destination $newthumbdestination
}

#Rename PNG Files
$pngimages = get-childitem $backgroundsdir -filter "*.png"
foreach ($pngimage in $pngimages)
{
$uuid = new-guid
$name = "$uuid.png"
$thumbname = "${uuid}_thumb.png"
$newnamedestination = Join-Path -Path $renamedbackgrounds -ChildPath $name
$newthumbdestination = Join-Path -Path $renamedbackgrounds -ChildPath $thumbname
Copy-Item -Path $pngimage.FullName -Destination $newnamedestination
Copy-Item -Path $pngimage.FullName -Destination $newthumbdestination
}

#Rename BMP Files
$bmpimages = get-childitem $backgroundsdir -filter "*.bmp"
foreach ($bmpimage in $bmpimages)
{
$uuid = new-guid
$name = "$uuid.bmp"
$thumbname = "${uuid}_thumb.bmp"
$newnamedestination = Join-Path -Path $renamedbackgrounds -ChildPath $name
$newthumbdestination = Join-Path -Path $renamedbackgrounds -ChildPath $thumbname
Copy-Item -Path $bmpimage.FullName -Destination $newnamedestination
Copy-Item -Path $bmpimage.FullName -Destination $newthumbdestination
}
And a gif of the script in action so you can see how it works:
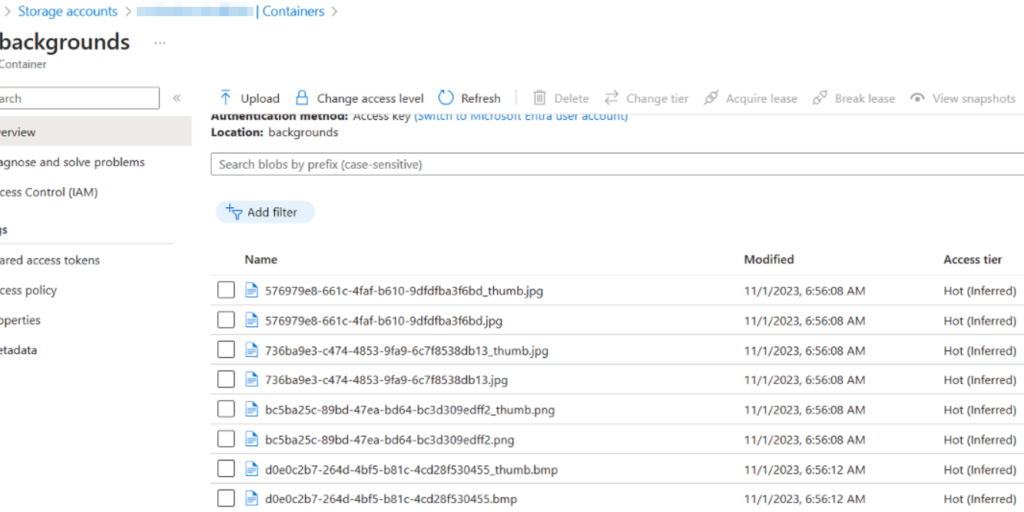
Next, upload those renamed files to your blob storage:
Create the remediation using the detection/remediation scripts. Make sure you edit them to use your storage account. Also, make sure when creating the remediation that the script runs as the logged-in user. Here are the scripts (also on github):
Detection:
#Checks for Az.Storage module and installs if it doesn't exist
Write-Host "Checking for Az.Storage Module..." -ForegroundColor Green
$azstoragemodule = Get-Module -name Az.Storage
if ($azstoragemodule -eq $null) {
Install-PackageProvider -Scope CurrentUser -Name NuGet -MinimumVersion 2.8.5.201 -Force
install-module az.storage -scope currentuser -Force
}

#Connects to storage account and pulls background image file names
$BlobURL = "https://<YOURSTORAGEACCOUNT>.blob.core.windows.net/"
$container = 'backgrounds'
$storageaccount = New-AzStorageContext -Anonymous -BlobEndpoint $BlobURL
$blobs = Get-AzStorageBlob -Container $container -Context $storageaccount
$Images = $Blobs.name
$BackgroundDir = "$env:LOCALAPPDATA\Packages\MSTeams_8wekyb3d8bbwe\LocalCache\Microsoft\MSTeams\Backgrounds\Uploads"
$Backgrounds = Get-ChildItem $BackgroundDir | Select -ExpandProperty Name -ErrorAction SilentlyContinue

#compare file names to see if they exist in the teams backgrounds destination
$FileComparison =
foreach ($image in $images)
{
$image -in $backgrounds
}

Write-Host "Checking to see if blob container images already exist..." -ForegroundColor Green
If ($FileComparison -contains $False) {
Write-Output "Background Images are Missing"
exit 1
}
else {
Write-Output "All background images exist"
exit 0
}
Remediation:
#Check for Teams Backgrounds Directory and create if it doesn't exist
Write-Host "Checking for Teams background directory..." -ForegroundColor Green
$BackgroundDir = "$env:LOCALAPPDATA\Packages\MSTeams_8wekyb3d8bbwe\LocalCache\Microsoft\MSTeams\Backgrounds\Uploads"
$DirExists = Test-Path $BackgroundDir
If ($DirExists -ne $True) {
New-Item -Path "$env:LOCALAPPDATA\Packages\MSTeams_8wekyb3d8bbwe\LocalCache\Microsoft\MSTeams\Backgrounds" -Name Uploads -ItemType Directory
}

#Checks for Az.Storage module and installs if it doesn't exist
Write-Host "Checking for Az.Storage Module..." -ForegroundColor Green
$azstoragemodule = Get-Module -name Az.Storage
if ($azstoragemodule -eq $null) {
install-module az.storage -scope currentuser -Force
}

#Variables for blob connection and download
$BlobURL = "https://<YOURSTORAGEACCOUNT>.blob.core.windows.net/"
$container = 'backgrounds'
$storageaccount = New-AzStorageContext -Anonymous -BlobEndpoint $BlobURL
$blobs = Get-AzStorageBlob -Container $container -Context $storageaccount
foreach ($blob in $blobs)
{
Get-AzStorageBlobContent -Container $container -Blob $blob.Name -Destination $BackgroundDir -Context $storageaccount -Force
}
Here are the scripts in action:

Then, let the detection and remediation scripts deploy your backgrounds for New Teams 🙂 *Note if you’re using the same storage account to deploy both classic and new teams backgrounds, you’ll want to use different containers.