Last updated on February 13th, 2025 at 06:20 pm
There’s no shortage of posts regarding updating the background and lock screen images for your endpoints. The question that usually comes up is how to do this on Windows 10/11 Pro. This is because the Intune device restriction policy makes adding background/lock screen images easy, but it’s only compatible with Windows Enterprise/Edu SKUs. If that somehow brought you to this post, go to this link where we walk through how to accomplish this for Windows Pro. This post is slightly different and was inspired by an organization with a unique ask. They had a graphic designer create 52 custom background images related to their business that they wanted to use as the lock screen and background images. The unique part was they wanted these rotated weekly, so a new image was displayed each week.
Luckily, they had Windows Enterprise licensing. So, we can use the device restriction policy in Intune, which makes creating and updating the policy simple. However, assigning someone a manual task to update the policy every week is not a great use of time and is also subject to error or missing the update if they are out of the office. Therefore, we wanted a way to automate this. This post walks through the entire process of how you can automatically rotate your background and lock screen images at a fixed period.
The Intune Policy
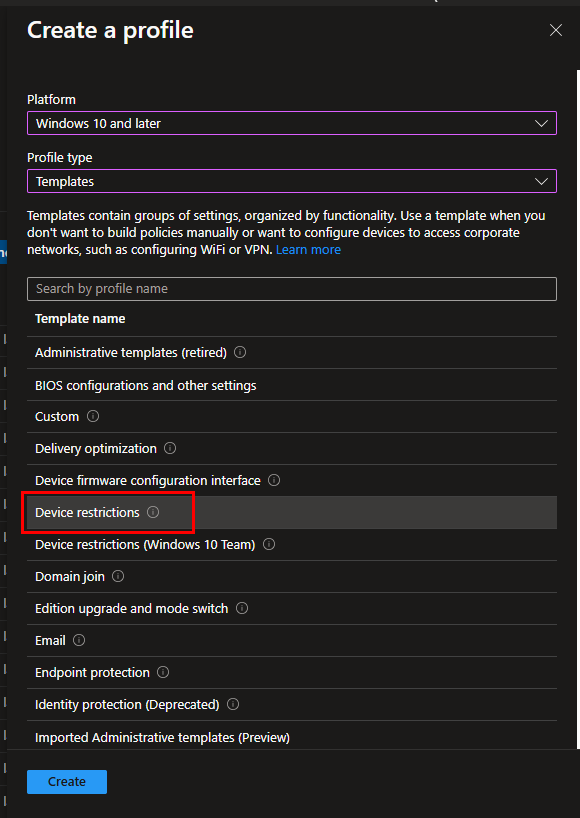
First, we need to create our Intune Policy. Navigate to Device Configuration Policies in Intune. Create a new Profile, and select the Device Restrictions Template:
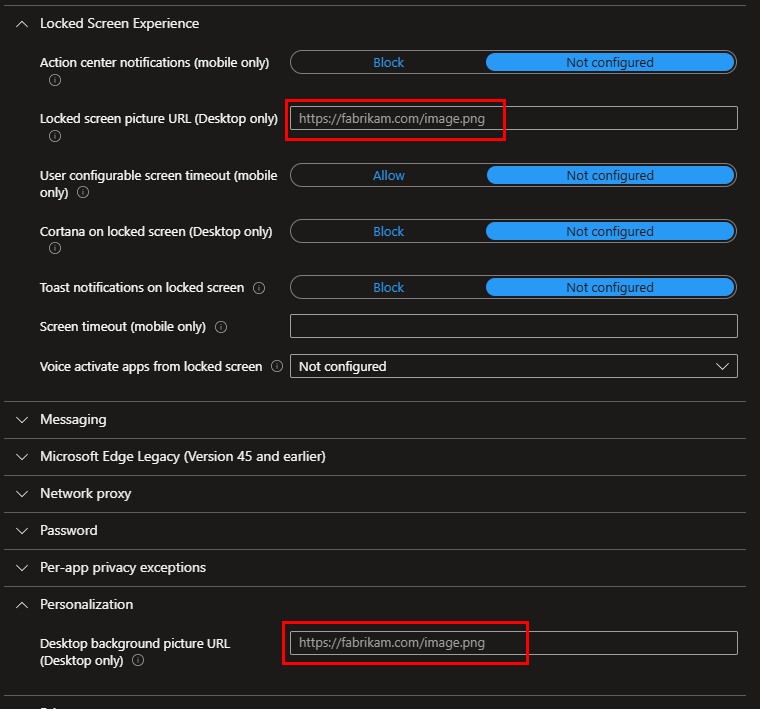
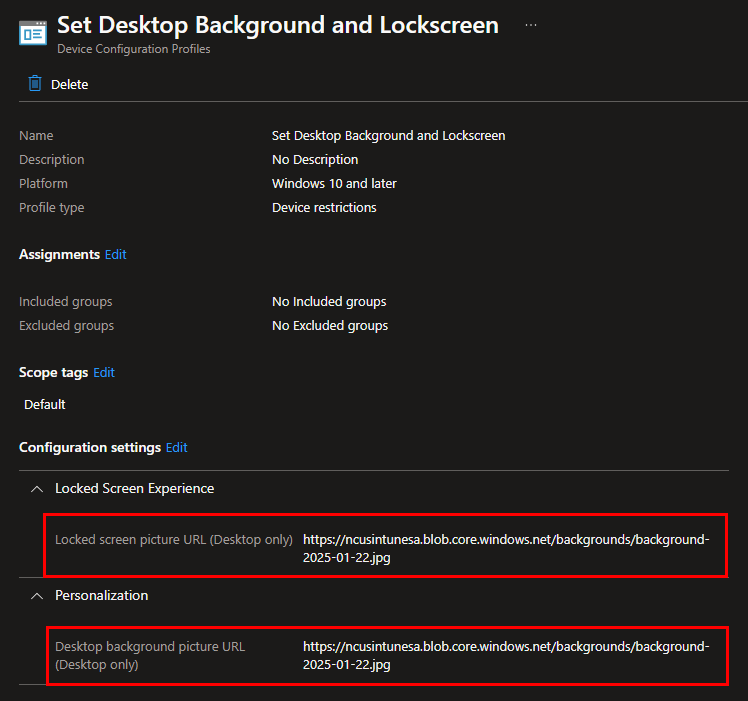
If you already have the URL for your initial image, you can add it to the lock screen and background fields. If not, leave it blank for now and continue with the policy creation.
Add your assignments and create the policy. After creating the policy, select it and grab the ID from the URL. Copy it and paste it somewhere for now. We will reference this in the automation script.

The Azure Storage Account and Image Files
Next, we must create an Azure storage account to hold our background images. Navigate to https://portal.azure.com. Search for storage accounts and create a new one. For something this basic, use the standard SKU and Blob storage as the primary service. Finish creating the storage account—you shouldn’t need to edit anything in the other tabs unless you have specific requirements to do so.

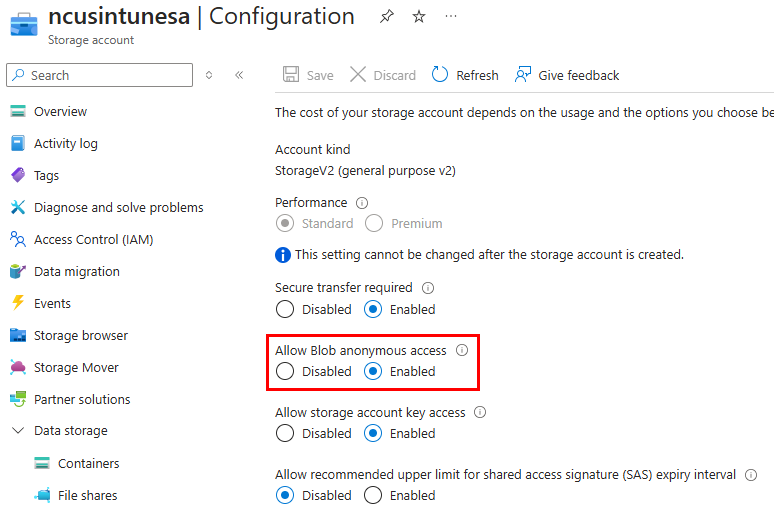
After your SA is created, we need to enable anonymous read access so our endpoints can retrieve images from the container. Under the storage account settings > configuration, select Enabled for Allow Blob anonymous access:
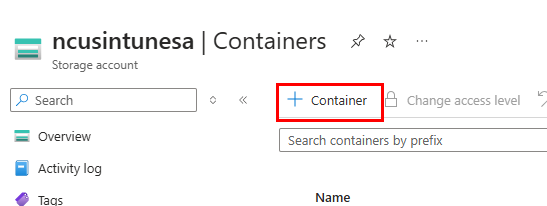
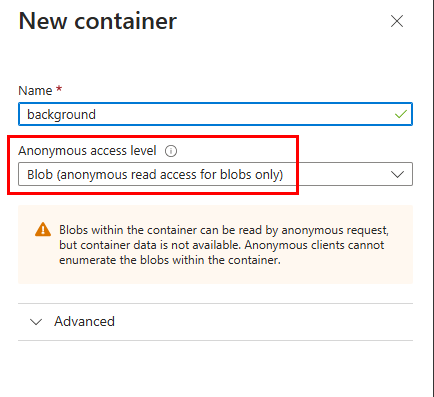
Next, we need to create a container. Under data storage, select Containers and click the + sign. Provide a name, and for the anonymous access level, select anonymous read access for blobs only.
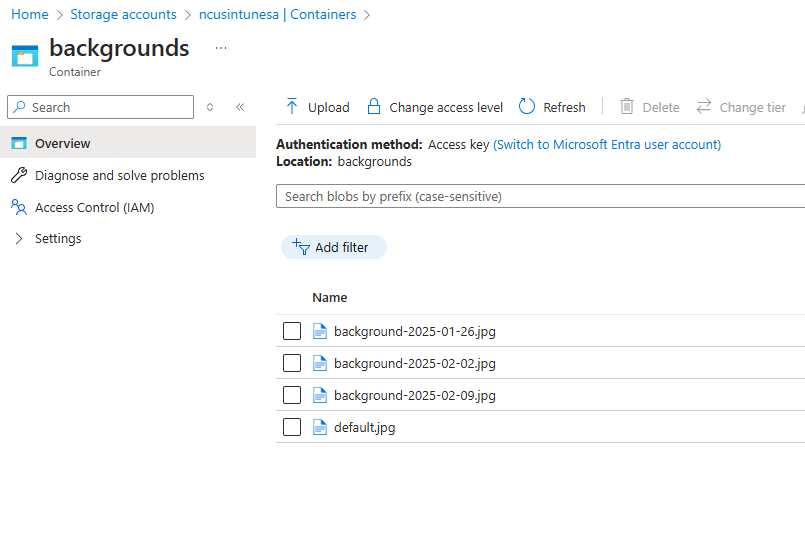
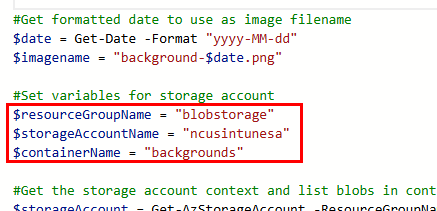
Now we are ready to upload our files. This is important because before uploading them, we must ensure they are correctly named. You don’t need to follow my naming convention if you don’t want to, but you’ll need something to identify the files based on the date. So, I used the naming convention “background-YYYY-MM-DD. Where the date on the file was the date we wanted it implemented. In this case, every Sunday. Our runbook script will run each Sunday and look for a file that starts with “background-” and ends with the date of that Sunday. I also have a default.jpg image uploaded. If the script can’t find a match on the file for that week, it will use the default background image. Here’s how my files look:
The Azure Automation Account
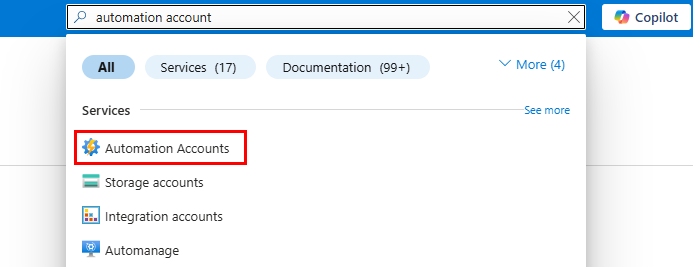
Now that we have created our Intune policy and images named and uploaded to our storage account, we need to make the engine that will work for us. For that, we will use an Azure Automation Runbook. From Azure, search for and select Automation Accounts:
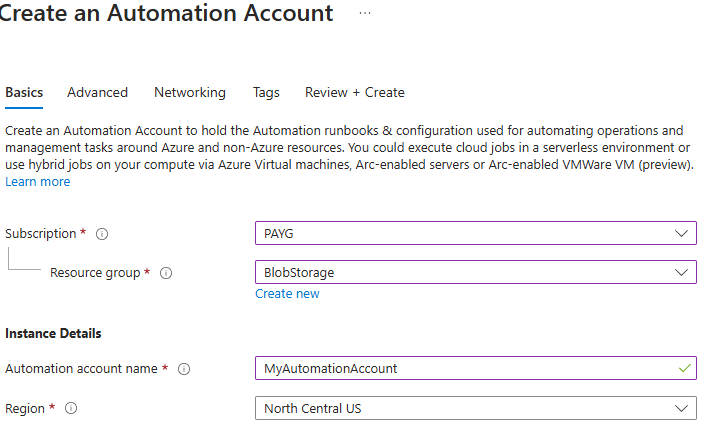
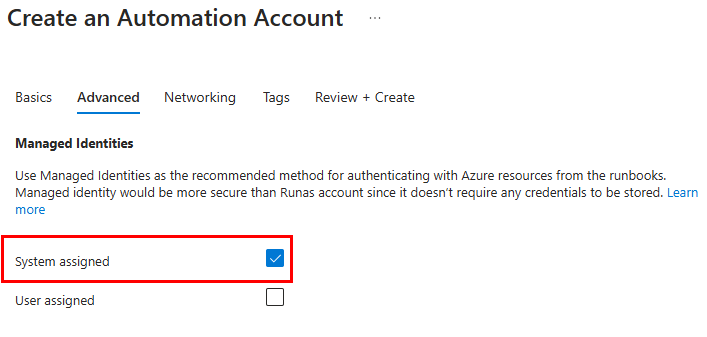
Create a new Automation Account. Complete the required fields and make sure system-assigned managed identity is selected under the Advanced tab:
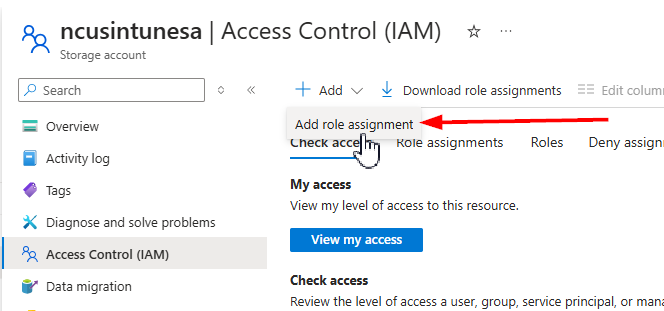
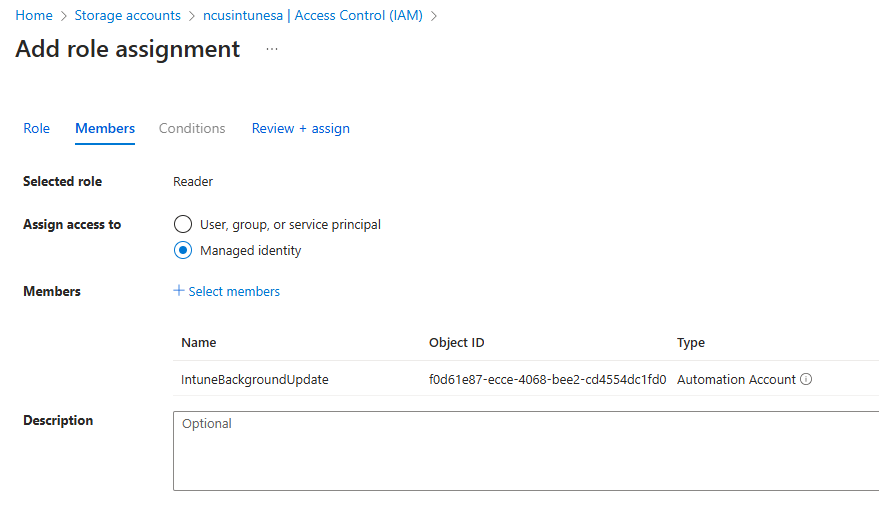
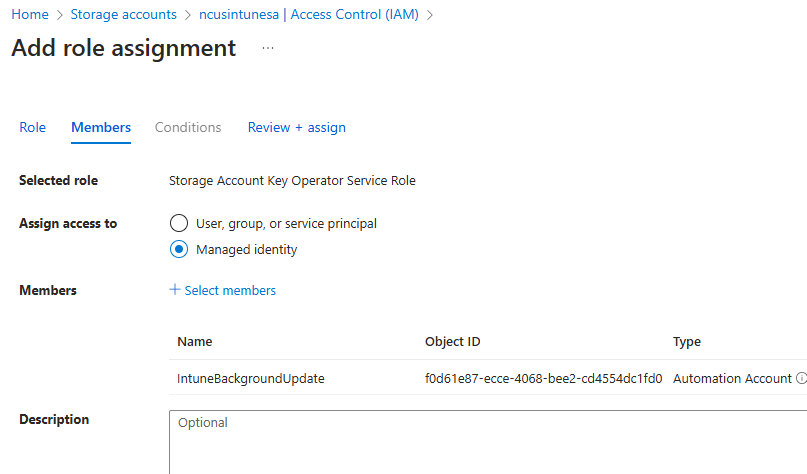
Next, we must grant our Automation Account identity rights to access our storage account. This is so it can list and read the contents of the container and compare those files to the date in our script. Navigate back to your storage account and select Access Control, then Add a new role assignment. We will grant the automation account identity Reader and Storage Account Key Operator Service roles:
- Add automation account to have reader role permissions to storage account
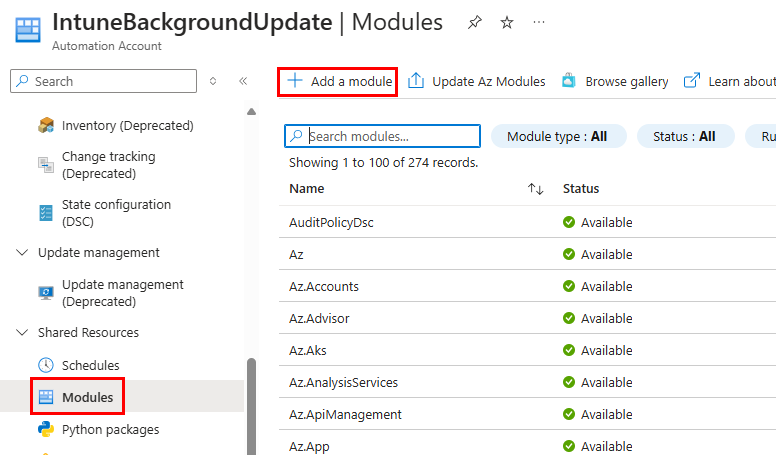
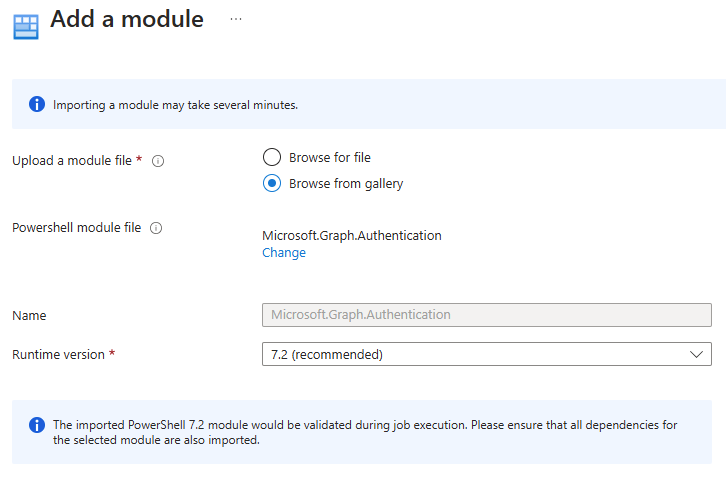
After adding the role assignments, navigate back to the Automation Account. Under Shared Resources, select Modules and then click Add a module:
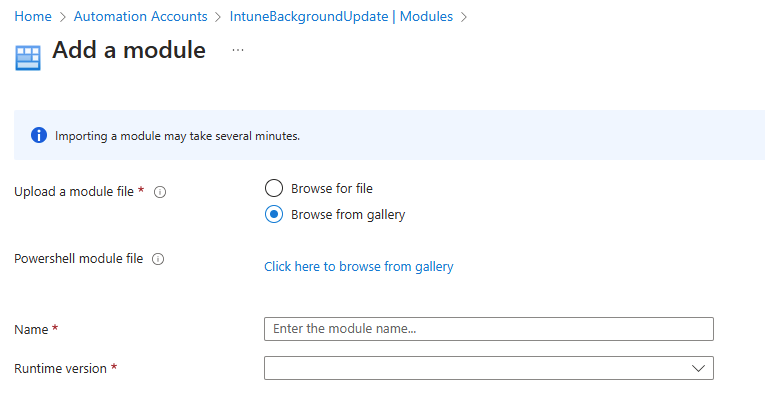
Seelct browse from gallery:
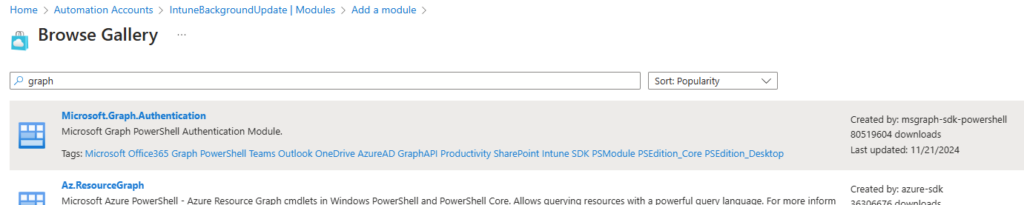
Search for and select Microsoft.Graph.Authentication:
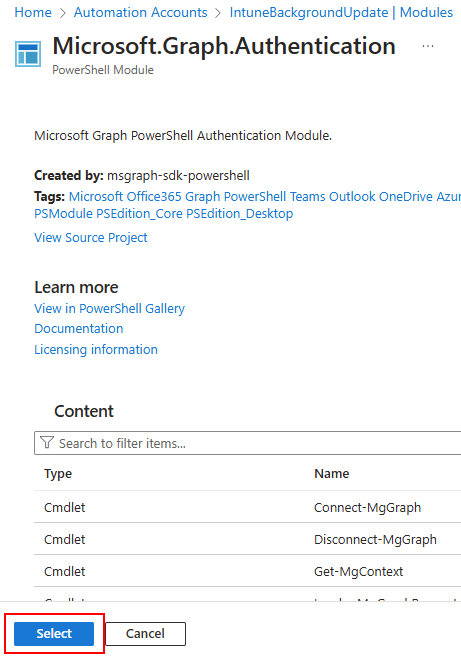
Click the select button, and when asked which runtime version, select 7.2:
That wraps up the creation of the Automation Account, assigning the correct permissions in Azure, and adding the required module for our automation account. Next, we need to assign our Automation Account identity permissions to Graph API, and upload our Runbook script.
Assigning Graph API Permissions and Adding our Runbook
This step is essential because when an automation account connects to the Graph API, we cannot add scopes to our script and grant consent during authentication. The permission assignments need to be added to the identity before the authentication. For this, we will use PowerShell. Before we look at the script, we need to retrieve our automation account’s ID. The easiest way to find this is under the automation account, Account Settings > Identity:
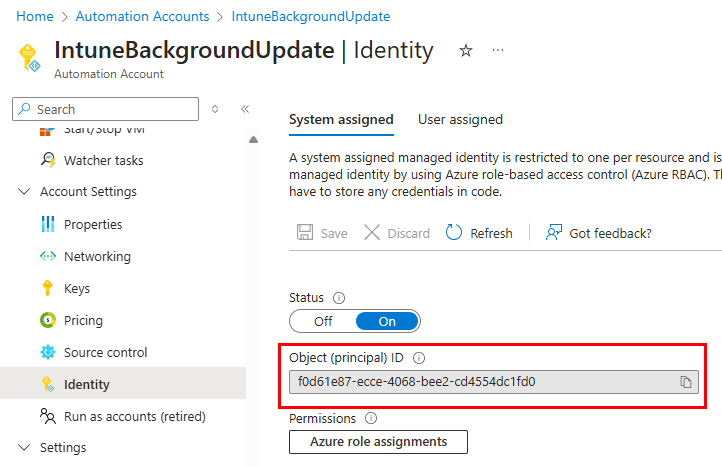
Copy your automation account’s ID and use it in the script below for the $serviceprincipalId variable. The rest of the script can be left alone and will do the rest for you. Essentially, this script looks for the permission IDs for each of the objects set in the permissions array, retrieves the permission ID, and assigns it to the automation account’s identity. This short script assumes you already have the Microsoft.Graph.Authentication module installed. The rest of it is requires the Microsoft.Graph.Applications module. Setting these permissions allows the automation account to make the necessary changes to the Intune policy when it runs at its scheduled interval.
Install-Module Microsoft.Graph.Applications -scope currentuser
Connect-MgGraph -Scopes "AppRoleAssignment.ReadWrite.All", "Application.ReadWrite.All"
$serviceprincipalId = f0d61e87-ecce-4068-bee2-cd4554dc1fd0
$permissions= @("Directory.Read.All", "DeviceManagementConfiguration.ReadWrite.All", "DeviceManagementConfiguration.Read.All")
ForEach ($permission in $permissions) {
$GraphResource = Get-MgServicePrincipal -Filter "AppId eq '00000003-0000-0000-c000-000000000000'"
$approle = $GraphResource.AppRoles | Where-Object {$_.value -eq $permission} | Select-Object Value,ID
New-MgServicePrincipalAppRoleAssignment -ServicePrincipalId $ServicePrincipalId -PrincipalId $ServicePrincipalId -AppRoleId $approle.Id -ResourceId $GraphResource.Id
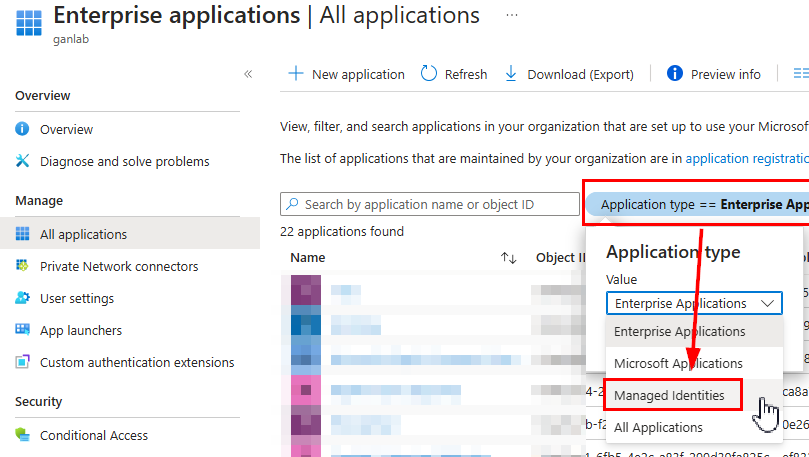
} To verify that the permissions were correctly set, you can navigate to enterprise applications in Entra, select Managed Identities as the application type:
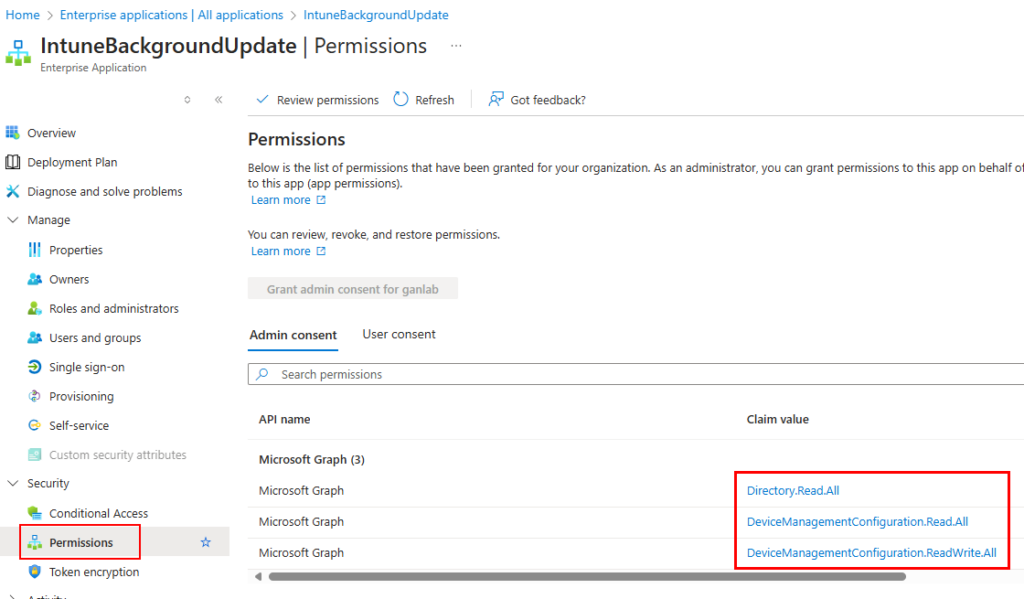
Select your Automation Account identity and select security > permissions. You’ll see below that we have the Graph Permissions
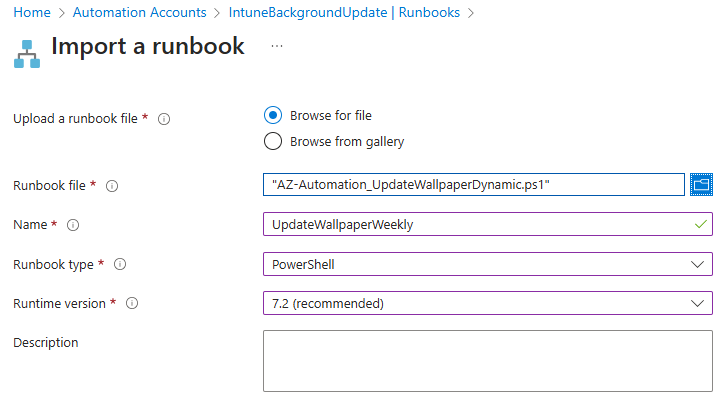
Now we can add and test our runbook script. Download the runbook script from Github. Then, go back to your automation account and select Runbooks, and Import a Runbook:
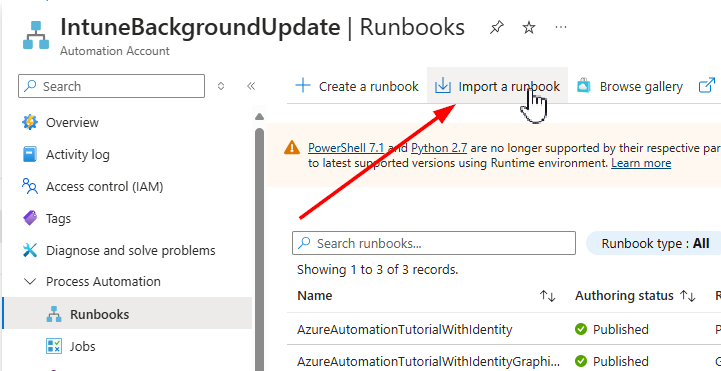
Select to browse for a file and select the runbook script we just downloaded. Provide a name and select runtime version 7.2. Click Import when finished.
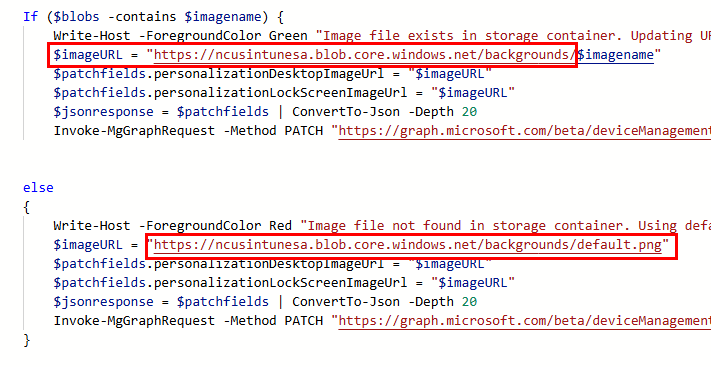
Now, we need to make a few edits to the runbook. We already briefly discussed this, but the runbook is relatively simple. It will connect to both Azure and MS Graph as the Automation Account identity. It gets the current date in the format of “yyyy-MM-dd” and then generates a variable for the image name using “background-$date”. It lists and reads the names of the images in the storage account container to see if it can find a match. Depending on the results, it uses a PATCH API call to update the Intune policy with the new image URL, or the default fallback image if there was no match. I should also mention that this script currently sets the background and lock screen to the same image. If you want separate images, you’ll need to edit the script and the image names you’re uploading. You’ll need the following items so we can edit the runbook script for your environment:
- Your Intune Policy ID
- Storage account name
- container name
- Resource Group of the storage account
- URL of the blob storage account container where your images were uploaded
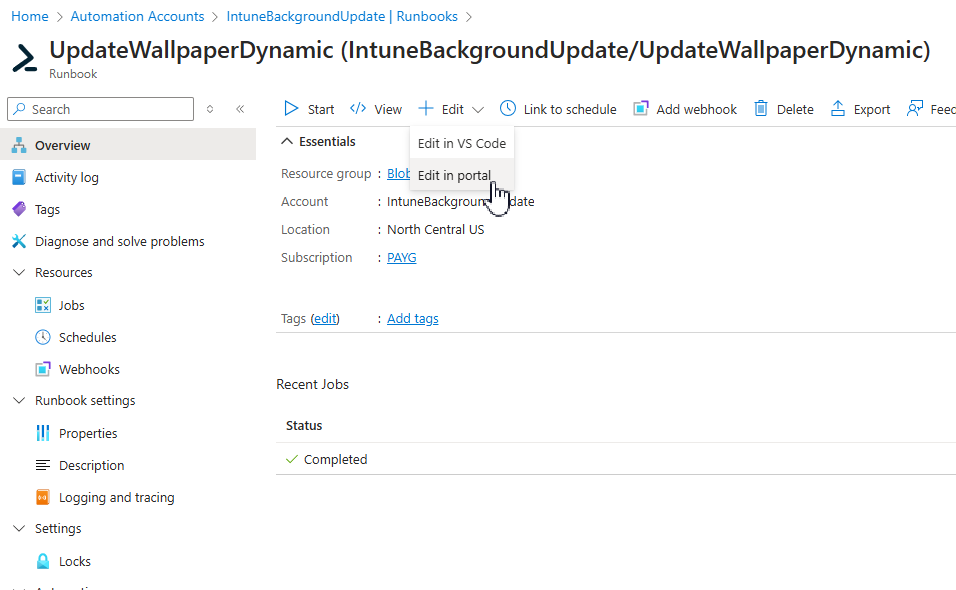
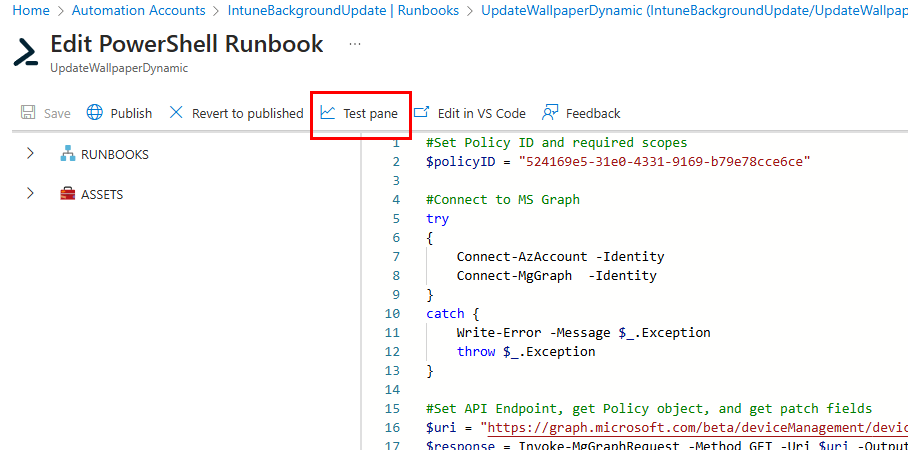
Navigate to the runbook in Azure and click Edit at the top of the screen. For quick edits, we can select edit in Portal:
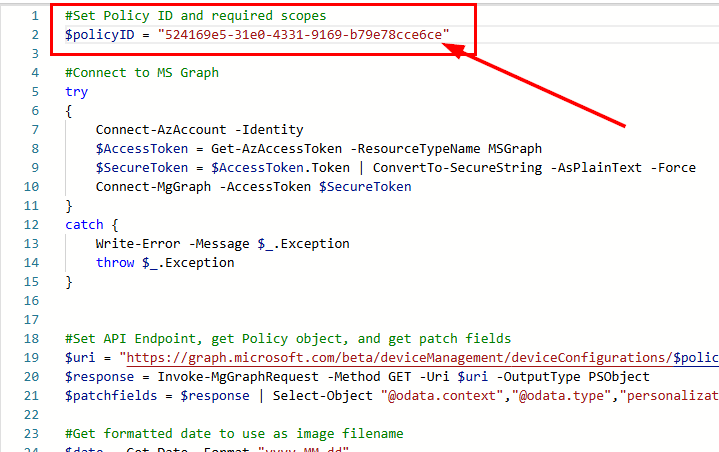
Add your Intune policy ID as the $policyID variable at the top of the script:
Then add your container name, storage account name, and the resource group of your storage account under the respective variables:
Lastly, add the URL for your storage account container under the If and else statements. You’ll see the else statement uses the default.jpg image as the fallback method if there is no match for an image. Click the save button at the top when you’re finished.
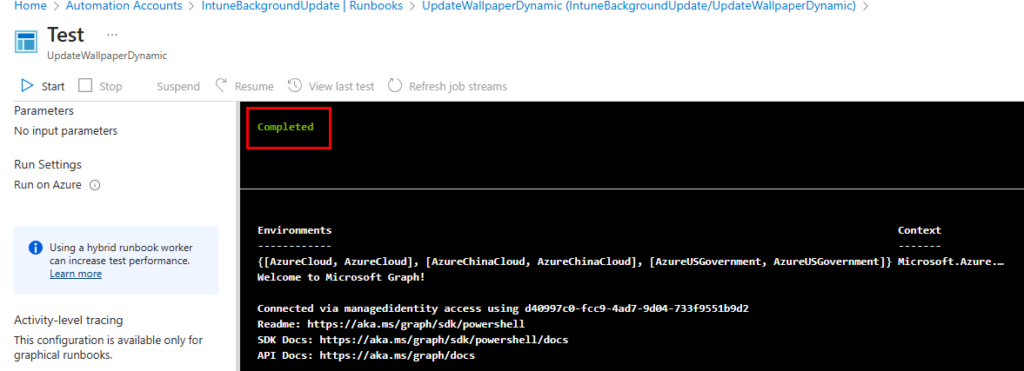
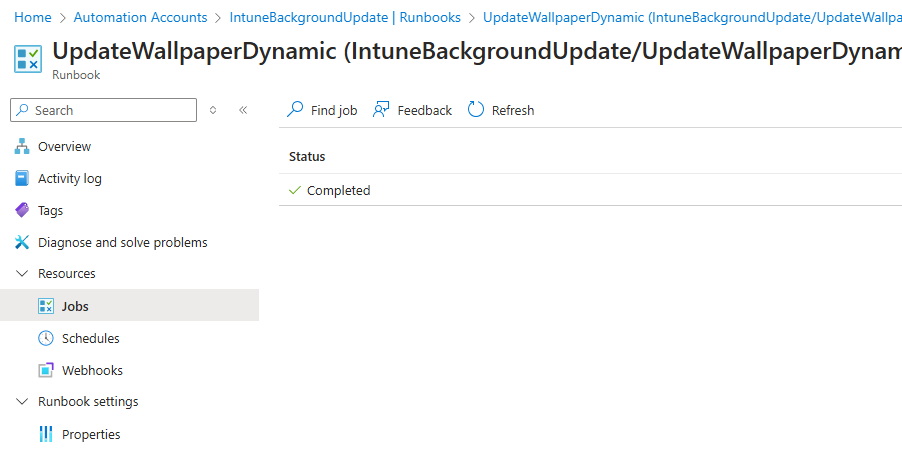
After you’ve made your edits, you can navigate to the test pane to test the runbook:
Successful should show completed.
Your Intune policy should reflect your image based on the date (if one exists). Otherwise, it will default to the default image.
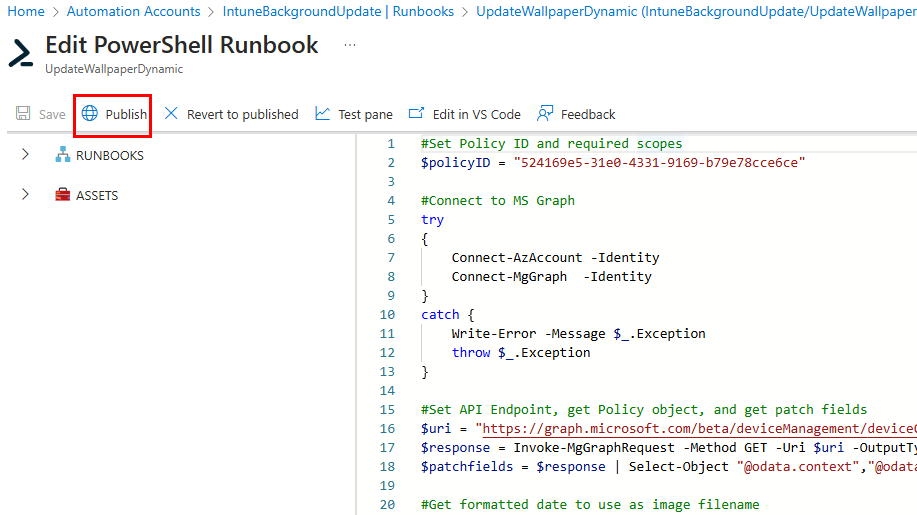
Lastly, we need to publish the runbook and create a schedule. Back in the edit runbook page, there is a button to Publish the runbook. Click the button so the runbook is published with your saved changes:
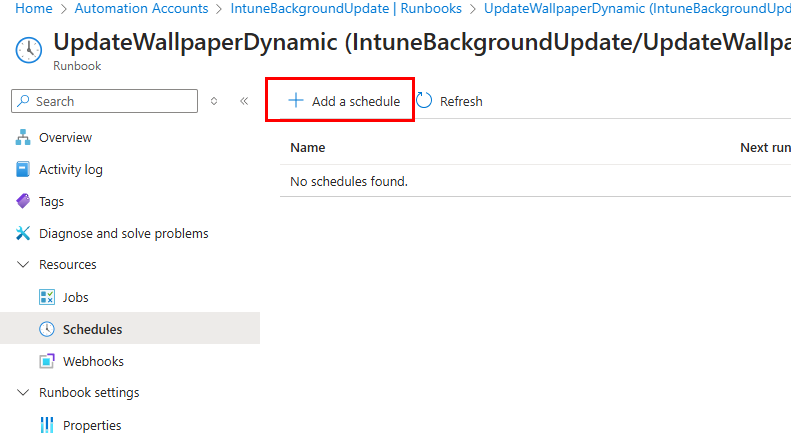
For our schedule, this should run at the same interval you want your images rotated with how they’re named. For example, if you want the images rotated every Sunday so they’re new on the first workday of the week, you’ll want the automation runbook to run on Sunday and your image files to be named as “Background-2025-01-26” then “background-2025-02-02”, and so on to match the date of each Sunday (this is how our example images are named). From the Runbook, click Resources > Schedules, and add a new schedule:
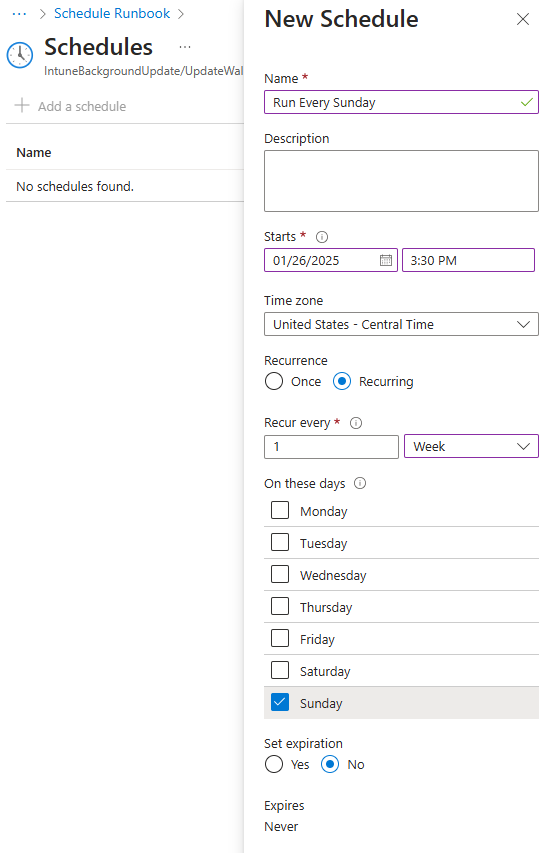
Set your recurring schedule:
As the jobs run, you can track if they were successful under the Jobs tab for the automation runbook:
Now, you can sit back and let the automation rotate the images for you 👍