Last updated on June 16th, 2022 at 02:22 am
If you do app deployments for numerous tenants, it can be time consuming creating Win32 app packages. Especially for common apps that many businesses use. I had the idea of trying to automate the task of packaging and uploading common apps (Adobe reader, Chrome, Firefox, VLC, etc.). I came across the IntuneWin32App PowerShell module (Github – IntuneWin32App). Huge thanks to Nickolaj Anderson and the other contributors. This module did exactly what I was looking for – takes an MSI or EXE, and through PowerShell, packages the file into a intunewin file, configures and app settings (install commands, detection rules, etc.), then uploads the file package and properties to the target tenant. It even gives you the option of using a logo for the app so it looks nice in Intune.
After reading through the documentation on Github, I installed the module and began testing. The module worked very well, but I still had the task of manually downloading the application installer, moving it to a directory, extracting it if it was a .zip (thanks Chrome), and then manually changing the script to use the specified location, detection rules, and other application specific settings. So, I evolved my script to automate as much of this as possible, and this has saved me a ton of time for common Win32 app deployments. The script creates a folder named apps in the working directory, downloads your MSI/EXE installer from the internet, downloads a specified logo file from the internet, specifies the app details, packages the Win32 App, and uploads it to the target tenant. If you have a bunch of app scripts created, there is a bulk script that will run all of them, so you can package and upload multiple apps with one script. I will review the process for MSI installers, EXE installers, dealing with .zip files, running in bulk, and show an example of a script in action. The download, packaging, and upload of 7zip only takes 50 seconds!
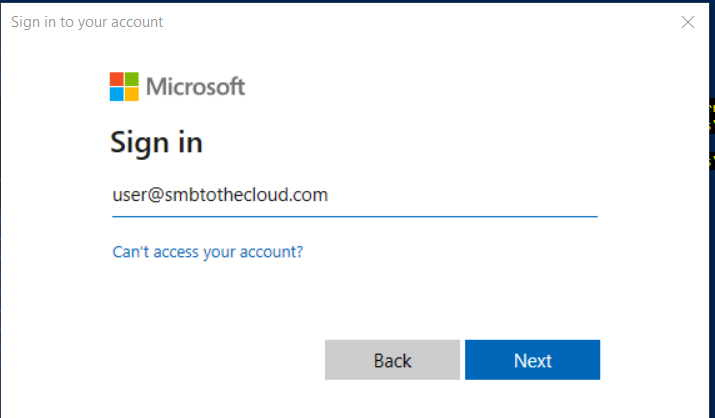
PowerShell pre-requisites: Install the following modules – MSGraph, IntuneWin32App, AzureAD, and PSIntuneAuth. You also need to use global admin or intune admin credentials when prompted for authentication.
Scripting MSI installers
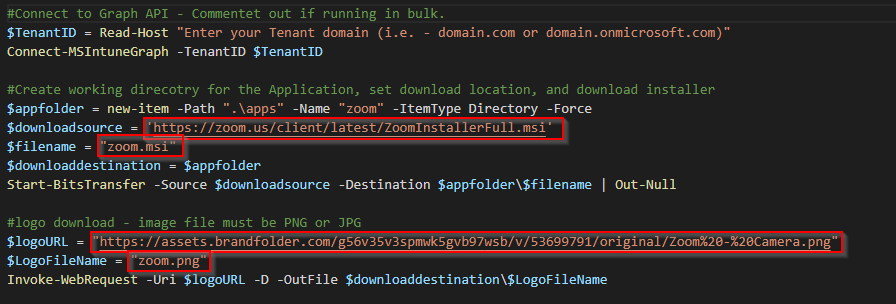
Using MSI installers requires less work than EXE files. Lets use the script for Zoom as an example (zoom script here). Find the URL for your MSI installer and a logo file you want to use. The logo file can be any image URL as long as its a JPG or PNG. For anyone who doesn’t know how to get the download URL for a file, right click the download link and select copy link address. Once you have your URLs, we need to put them into the script. Lets look at the parts of the script you need to edit. The four red boxes below are the areas you will edit – Your download URL for the installer and logo, and naming your installer and logo file. You’ll also notice the $appfolder variable creates a subdirectory named apps, with another subdirectory named zoom. This is to keep the install files and logos separated if running several of these at once, so our intunewin files aren’t bloated with unneeded files.
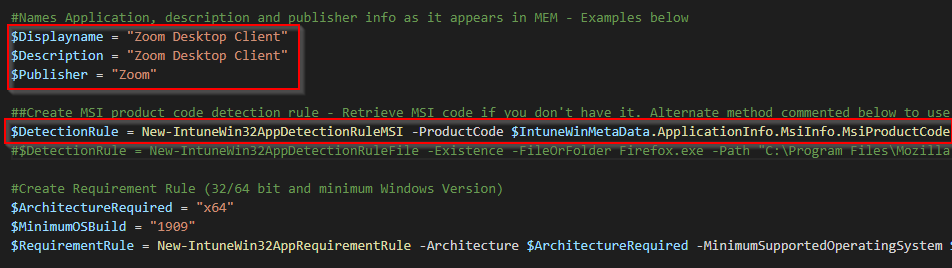
Next, add a name, description, and publisher for the app. For MSI installers, you can use New-IntuneWin32AppDetectionRuleMSI to pull the product code from the MSI as the detection rule. Commented out below the highlighted line is an example of a file detection rule as an alternate detection method.
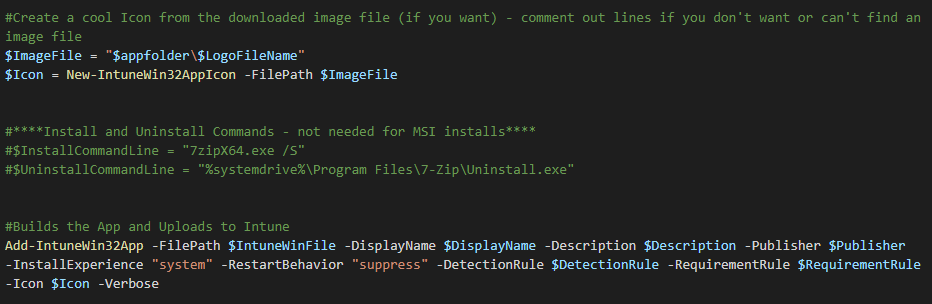
There is nothing else to edit, but here is the remainder of the script where the install and uninstall commands are commented out. MSI installers do not need these specified; the Win32 app adds them automatically. The last line with Add-IntuneWin32App packages everything into a intunewin file and then uploads to your tenant.
EXE installers
EXE installers require slightly more work. In addition to the fields you modify for an MSI, you need to manually specify a detection rule and install/uninstall commands. I won’t review everything that’s the same as the MSI, so lets look at what is different:
First, we have the detection rule. If you know the product code or you can pull it from a machine with the software installed, you can still use an MSI product code. If a file/folder exists detection method is sufficient, here is an example from the Notepad++ script:

Next, we need our install/uninstall commands. Know which command line switches are necessary for your install/uninstall. If you have the MSI product code, you can use this for the uninstall command. An example is below using EXE command line switches for the install, and the MSI product code for the uninstall:

That’s all you need to edit for an EXE file. The rest is the same as the MSI, and when executed, it will package everything and upload to your target tenant.
Installers that download as ZIP files
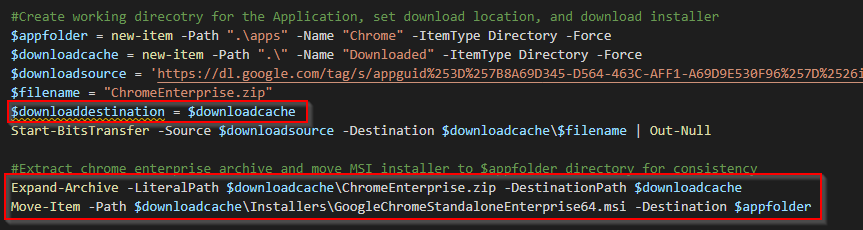
If you are trying to retrieve an installer that is compressed as a zip file, use the Chrome script as an example (chrome script). There are a few extra lines that extract the zip, and then move your installer (in this case, an MSI), out of the extracted folder. We only move the files we need for the application install so our intunewin file is not bloated with other unnecessary files.
Running multiple scripts at once
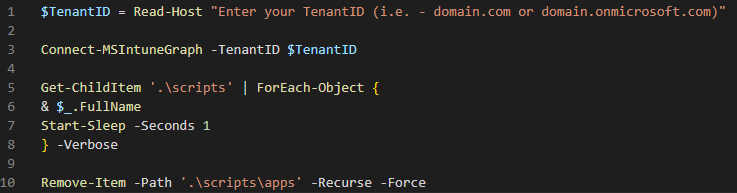
Now that you have all your common application scripts built out, you have two options to upload them to your target tenants. You can run them all individually, or you can run all of them with a single script that executes all script in a directory (script here). The advantage of using this method is you only have to authenticate to your target tenant once. If you run the scripts individually, you’ll have to authenticate to your tenant for each script. One important step is to comment out the tenant authentication lines in the app scripts, otherwise they’ll still prompt you for authentication when the main script runs:
Comment out these lines in the app packaging scripts:

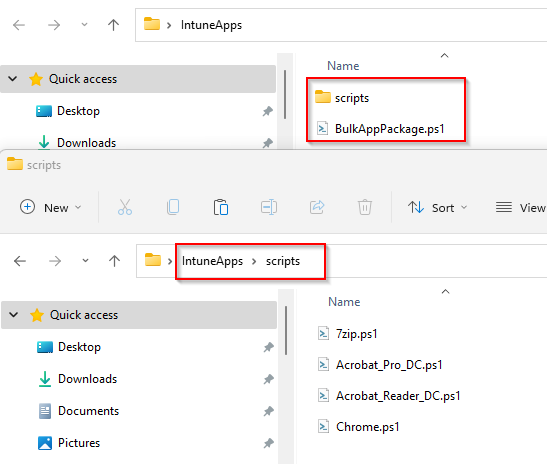
Here is the parent script that will execute all scripts in the specified directory. Folder structure is important here. In this example, the parent script needs to be in a folder that contains a scripts folder with all the app packaging scripts. I’ll try making this easier when I get some time so the script prompts for the directory where the app scripts are located, but this is how it is now. Example below:
Example:
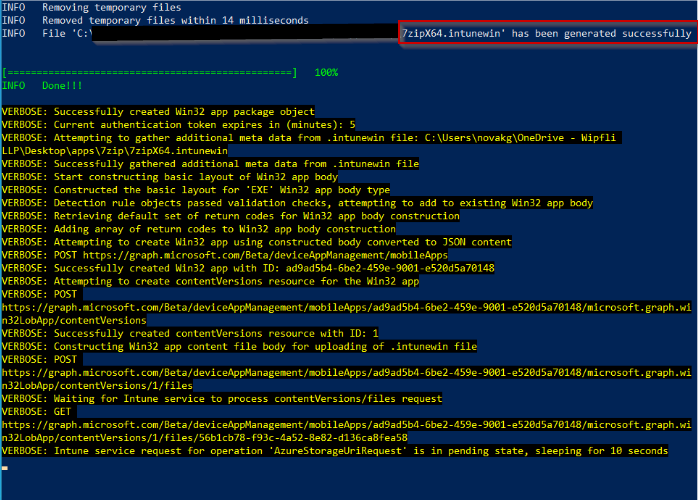
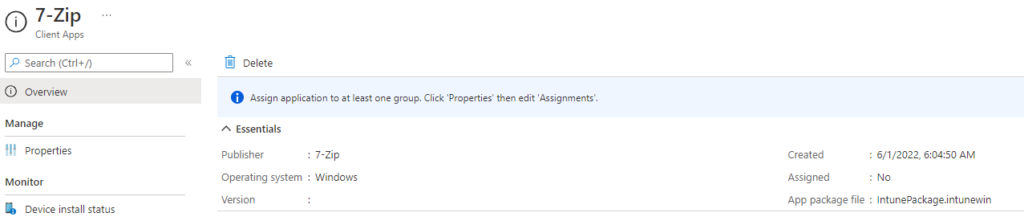
Screenshots of script execution. It only took 50 seconds for 7zip to be downloaded, packaged, and uploaded when making this. Note that this uploads the app package, but does not specify any group assignments. You still have to assign the application.

Additional details:
- The URL’s specified may change over time. We can’t control this, but you may have to check if the download URL is still valid if there are issues downloading the files.
- Some vendors have a URL that always downloads the latest version, like Zoom. Others release a new URL for every version, like Notepad++. You will have to update those manually.
- As previously mentioned, you still need to specify your group assignments after the app is uploaded
- All my scripts can be found here – https://github.com/gnon17/MS-Cloud-Scripts/tree/main/intune/Win32App-Powershell