A couple months ago I posted how you can upload autopilot hardware hash files directly to blob storage from your target machines – https://smbtothecloud.com/upload-autopilot-hardware-hashes-to-azure-blob-storage/. I wanted to try automating as much of the remaining process as possible and found myself down a rabbit hole. This solution is probably overkill to gather hardware hash files, but it highlights some of the tools we have available in Azure for free or little cost. I still think the path of least resistance for registering existing non-Intune managed devices with autopilot is to use an app registration. If you can’t use an app registration and have thousands of production machines to register, this post may help you.
I haven’t used Azure Functions or Logic Apps much and started investigating how I could use these tools to merge the uploaded CSV files. I kept stumbling on blogs and articles for using data factory to merge and manipulate data. I found this YouTube video which was a perfect tutorial on this. So, data factory can easily accomplish the first component of merging the csv hash files into one. I needed a vehicle to get that merged file to me (or the IT team). I originally wanted to use a Teams incoming webhook. However, webhooks don’t support attachments. So, I used the Teams email to channel feature. The added benefit to sending to Teams is the hash files are stored in SharePoint, not a shared or individual mailbox.
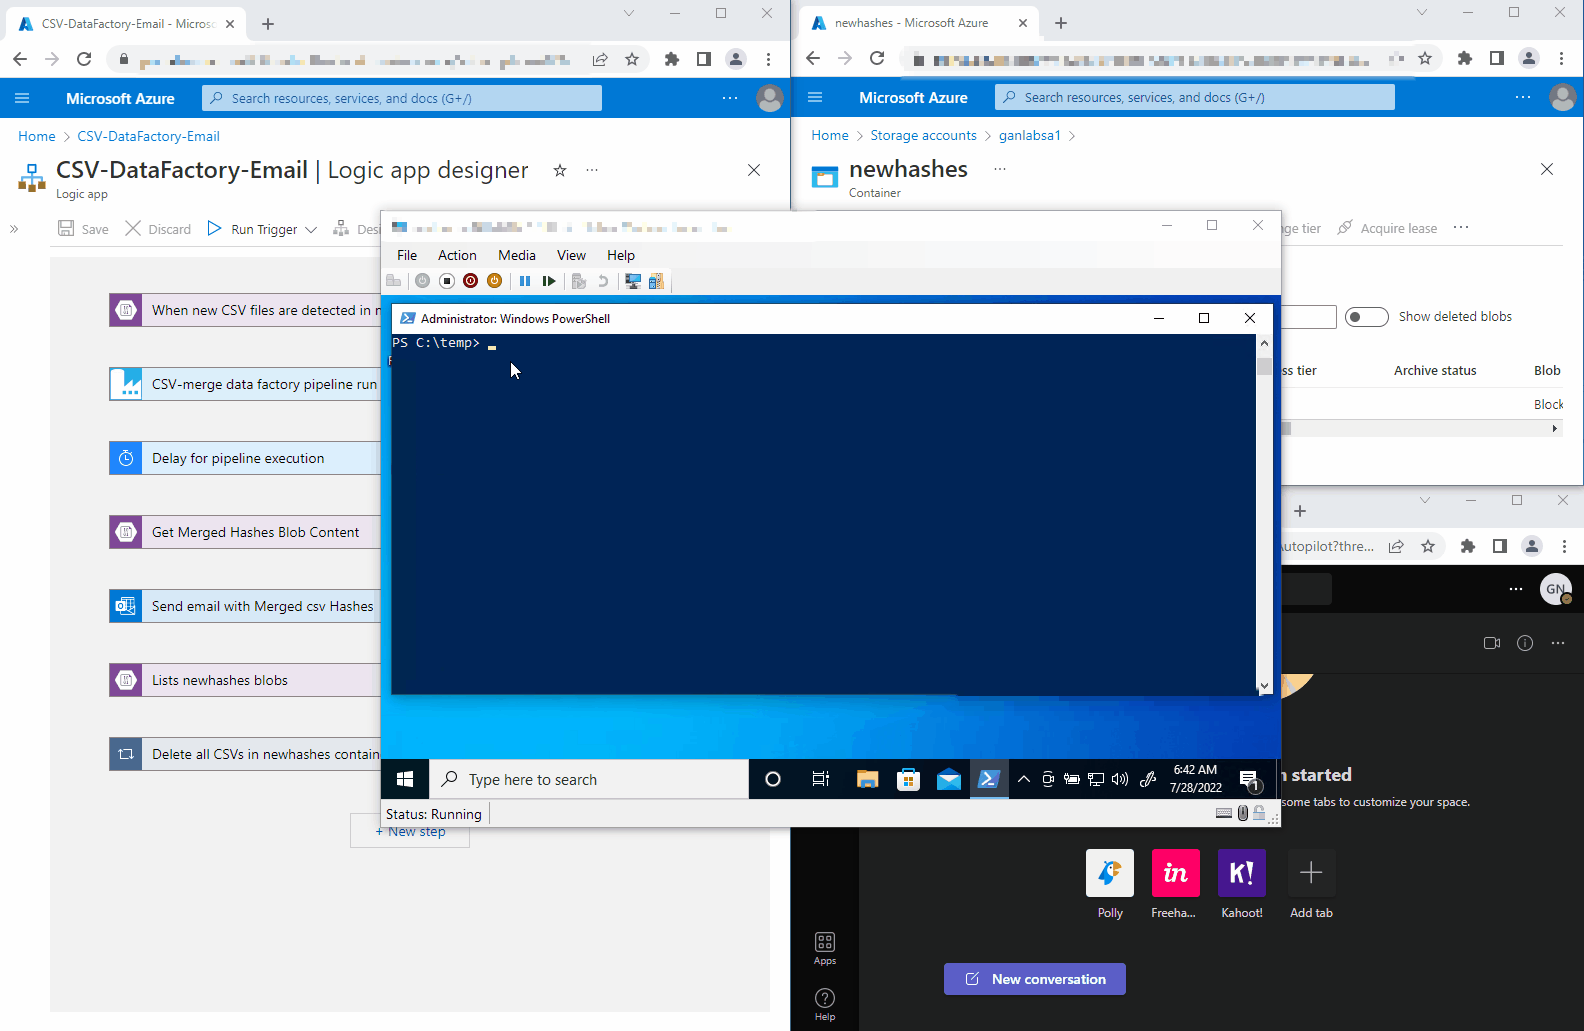
I won’t review everything in my original post on how to use a script to upload hardware hash files to blob storage. I’ll assume you already read through it, and pick up where that left off. It’s all the same with the exception of creating two storage containers instead of one, and I’ll cover that below. When finished, you will have a blob storage account that receives hardware hash files from your machines, a data factory pipeline that merges all the hash files, and a Logic App that sends the merged file to your specified Teams channel. The files are deleted from the storage account at the conclusion of the Logic App. Here is everything in action from start to finish:
Create your storage account containers
The creation of the storage account is covered in the previous post. However, for this, we will make two containers – one for the incoming hash files, and another for the data factory pipeline destination for the merged CSV (I didn’t realize I had a typo in my mergedhashes container until way later). Create your two containers like shown below:

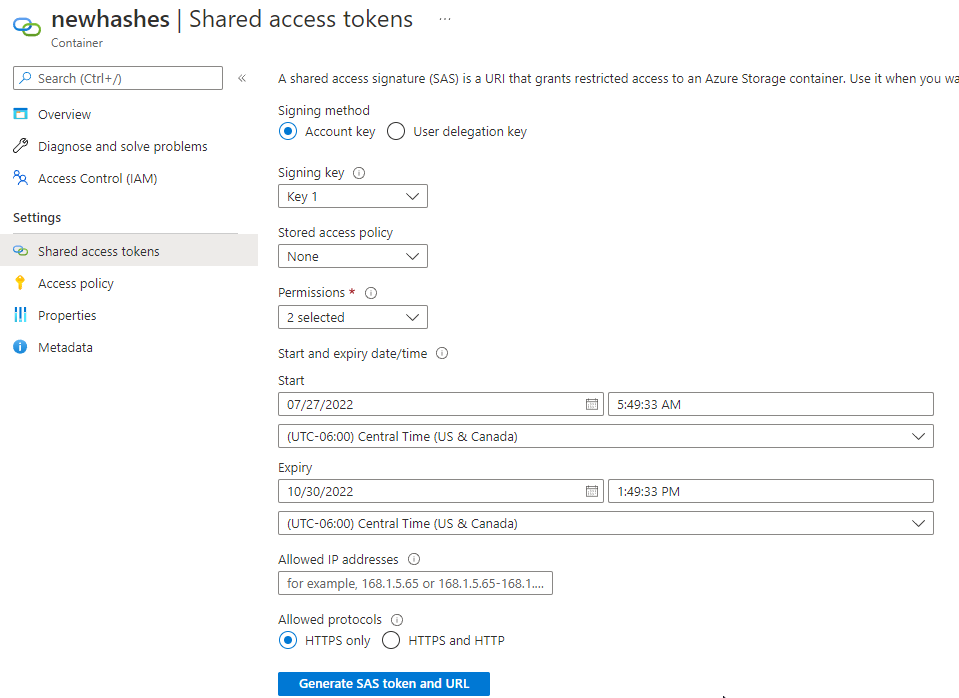
Next, generate a Blob SAS token with create and write permissions. You’ll need this for the script you run on client machines to upload the hash.csv files. You can reference the previous post for more details on this.
Once you have your containers created, you can start running the script on client machines and the hash.csv files will start showing up in your container (don’t forget to add your SAS blob URL) – https://github.com/gnon17/MS-Cloud-Scripts/blob/main/autopilot/HardwareHashtoBlob.ps1
Create a new Data Factory
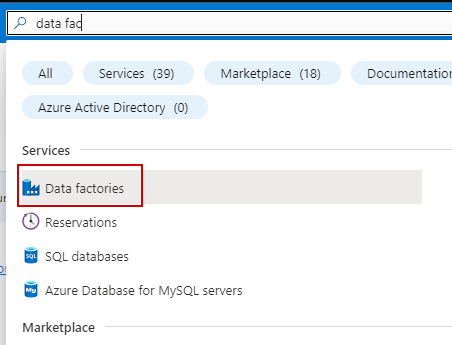
Data factory is a beast in itself and can do significantly more than merge CSV files, but we will use it for this simple task. Search for Data factories in Azure and create a new one:
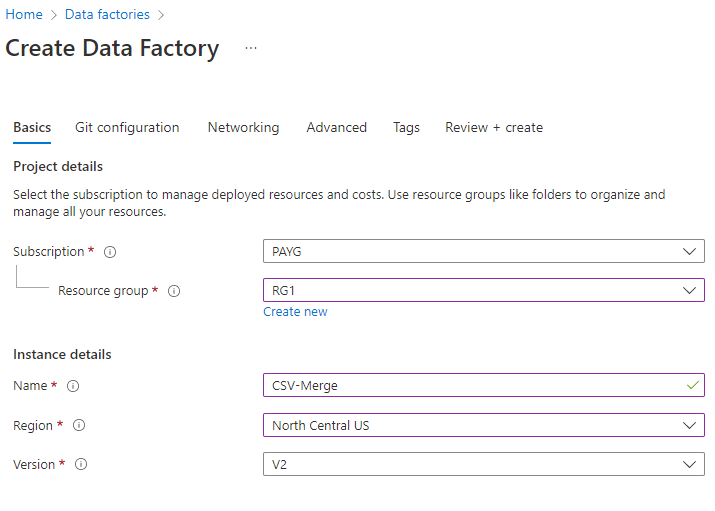
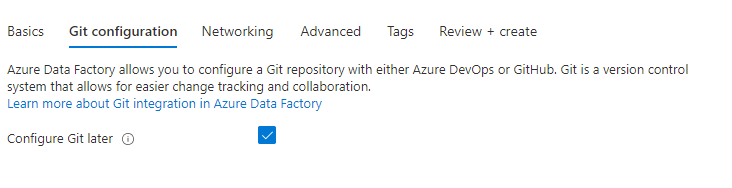
Configure GIT later, and select public endpoint in the networking tab.

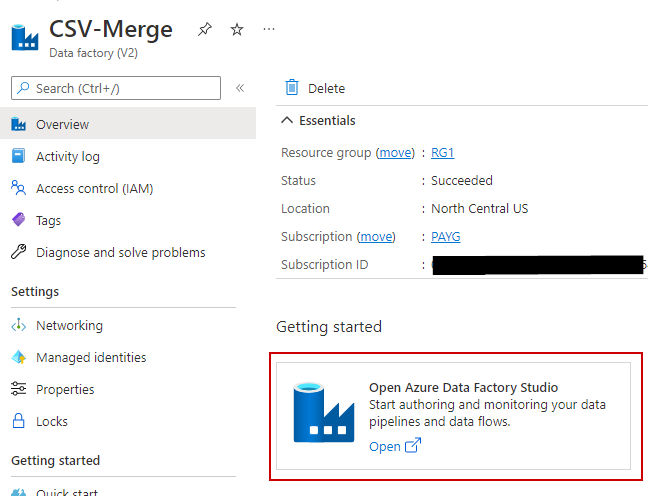
Once your data factory is created, select it and then navigate to the data factory studio.
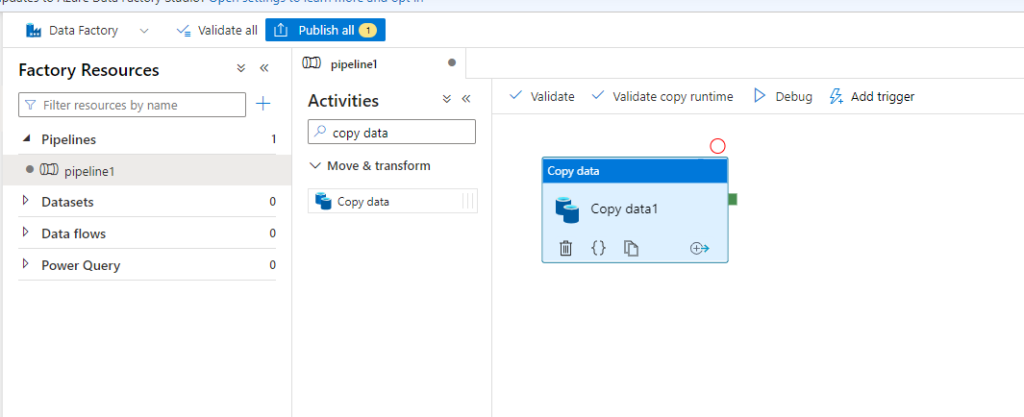
Under the Author tab, create a new pipeline with the copy data activity:
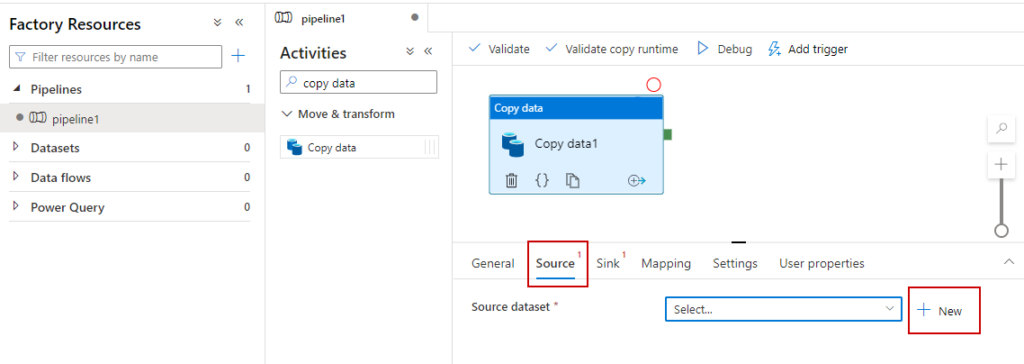
Select the copy data activity and then select the source tab. Click the new button for the source dataset:
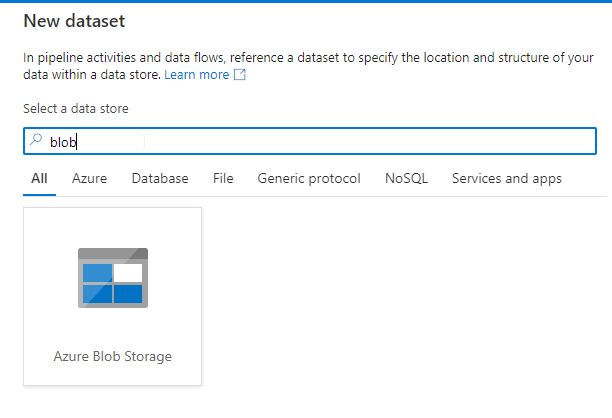
Search for and select Azure Blob Storage:
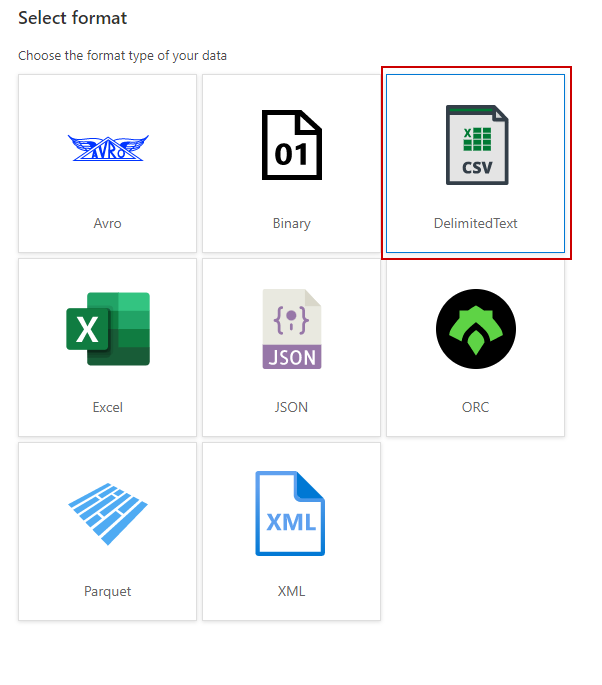
Select Deliminated Text from the options:
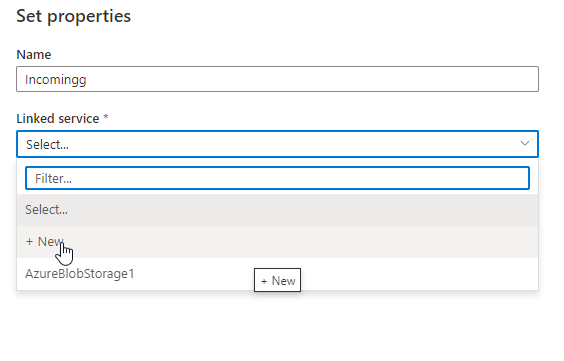
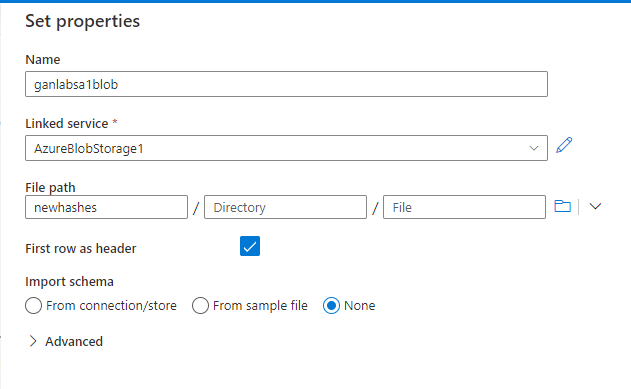
In the set properties page, provide a name. I used incoming since this is the dataset that will read the individually uploaded csv files. Select a new linked service:
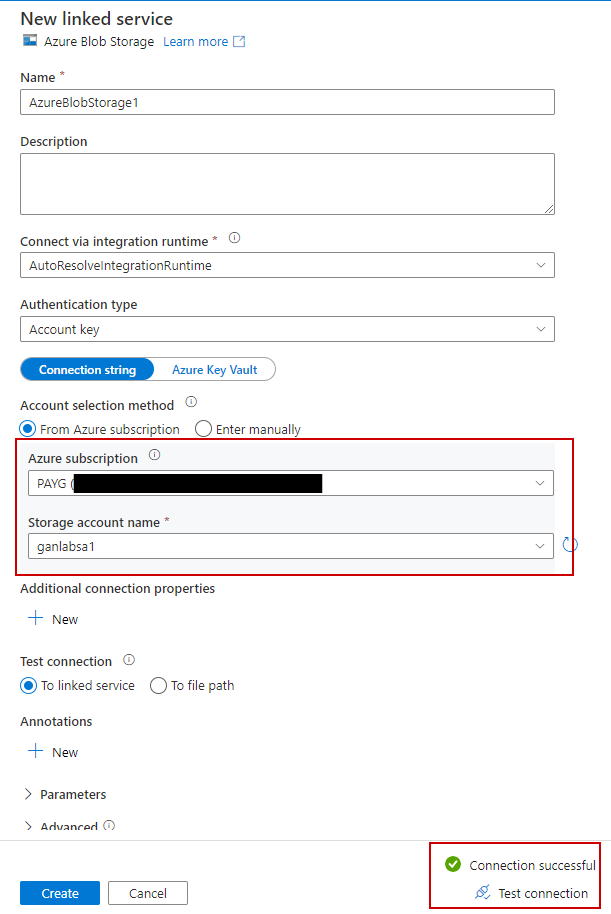
Select your Azure Subscription and the storage account where the files are stored. Click the test connection after you make your selections to verify the connection is successful. Click Create when finished:
In the properties page, browse to the container where your hashes are uploaded. In my example, the container is “newhashes”. We want to select the container, not an individual file:

Change the import schema to None and click OK:
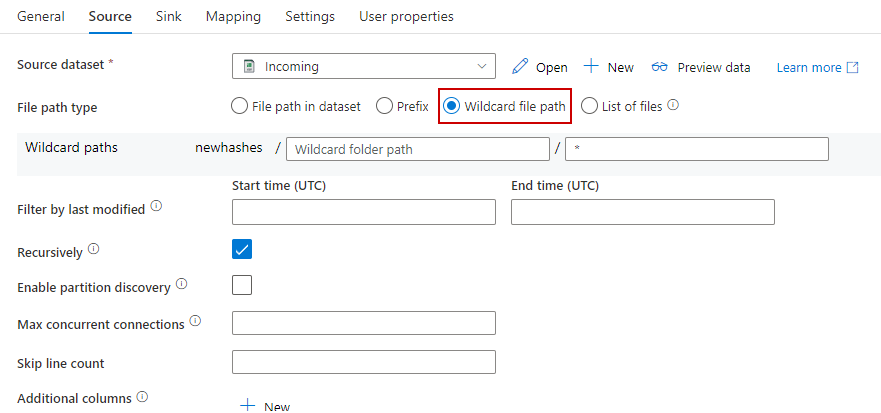
Next, for the file path type, select Wildcard file path and verify the check box for Recursively is selected:
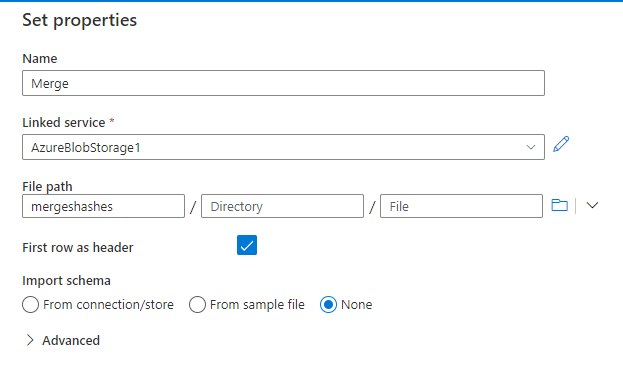
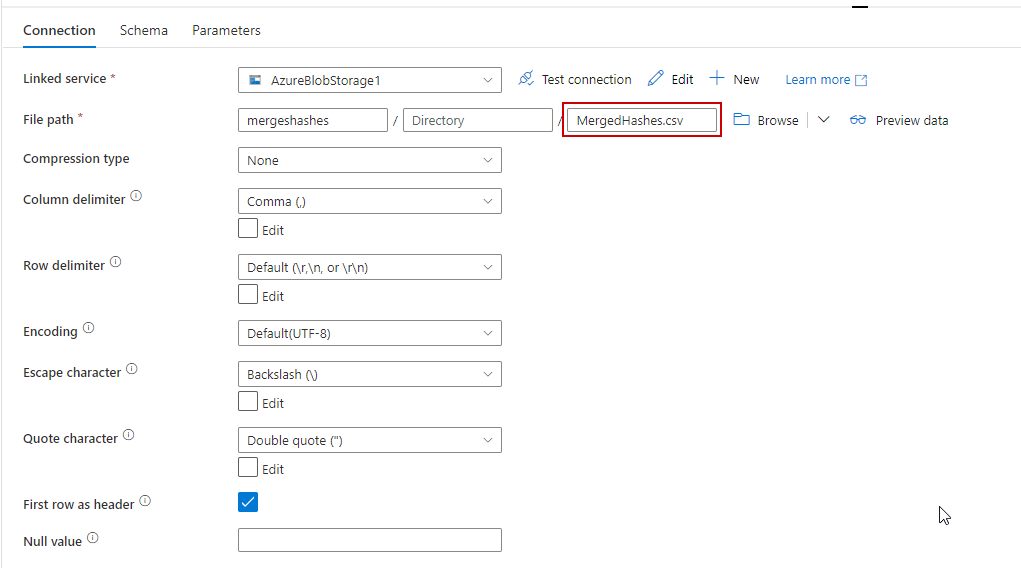
Click the Sink tab and create a new Sink dataset. Select Azure Blob storage and deliminated text again. Provide a name, and select the AzureBlobStorage1 linked service we created earlier. Change the file path to use the container where you want to store the merged CSV. In this example, its mergedhashes. Check the box for first row as header, and change import schema to none:
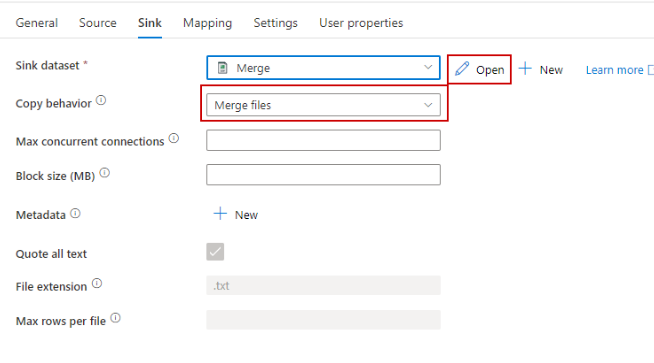
Change the copy behavior to Merge Files, and open the Merge sink dataset:
Name the merged file in the file path section:
Navigate back to the pipeline. It’s time to test the actions. Make sure you put some test files in your source container before testing this out. I have two hardware hash files in my demo. Click the debug button to run the pipeline activity:
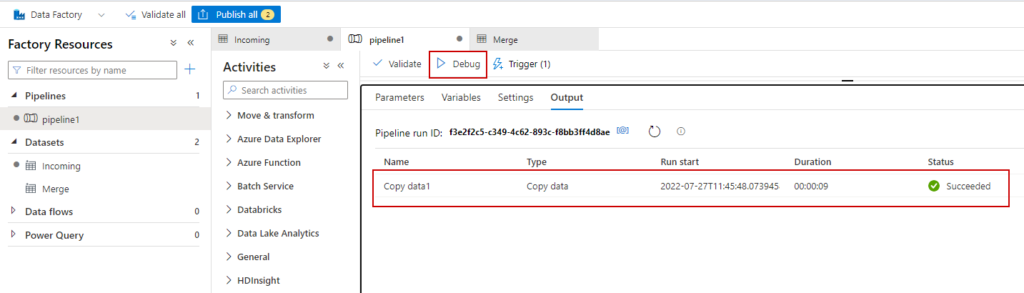
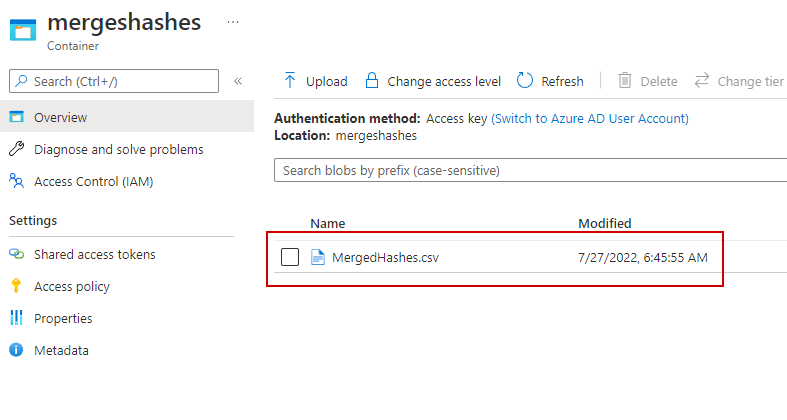
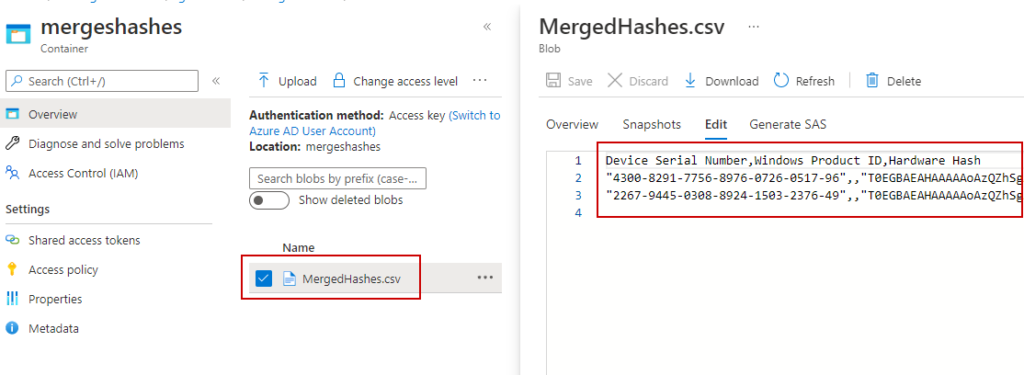
Let’s see if we have a proper merged CSV in our output container. You can see in this example, the mergedhashes.csv file. When the pipeline runs, it will overwrite that file if it already exists. If we click the ellipses and edit the file, we can see its formatted properly with the headers:
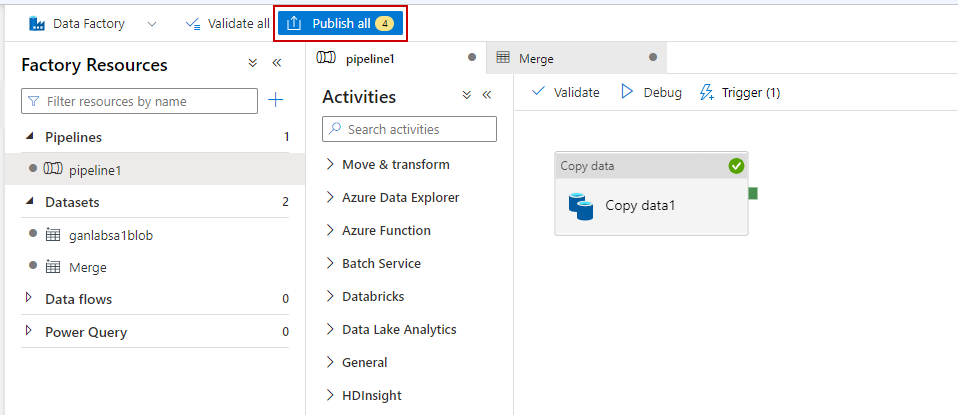
We won’t add a trigger because we will call the pipeline from our Logic App. If you want to run this on a schedule, you can set a trigger. Lastly, publish all data factory resources to make this live.
This completes our data factory setup. Now we can move on to the Logic App.
Create the logic app:
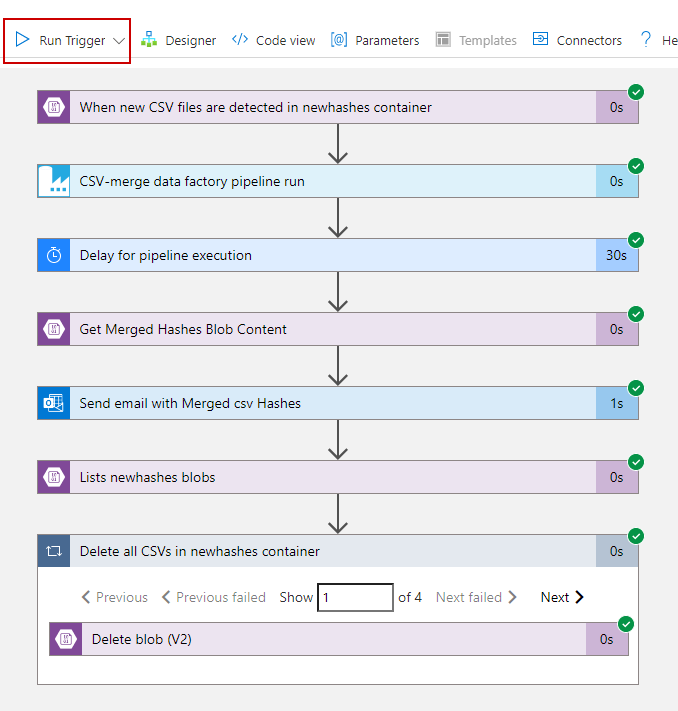
The flow of this logic app works like this: Check for new/modified files in the newhashes container, If new/modified files are found -> Run the Data Factory Pipeline we created earlier -> Wait 30 seconds for the pipeline to run -> Email the Merged CSV file to Teams -> Delete all files in the newhashes container.
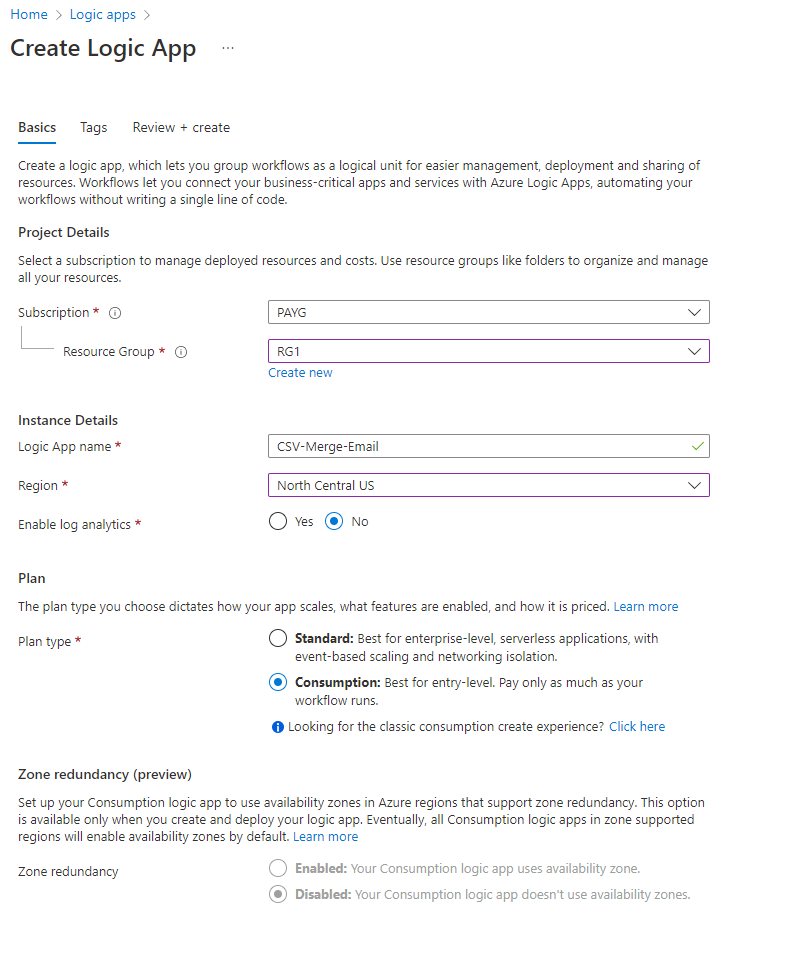
Search for logic apps in Azure and create a new Logic App. Give it a name, resource group and region. I’m choosing consumption for my plan type. You get 4,000 actions for free, and then get charged fractions of cents after that. Its unlikely you will incur any charges if this only runs once or a few times her day. Click review + create when finished to create the Logic App:
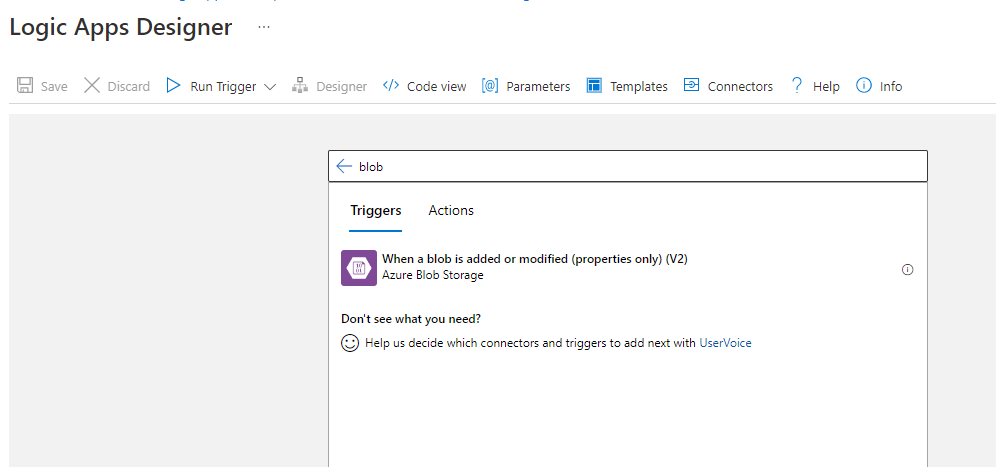
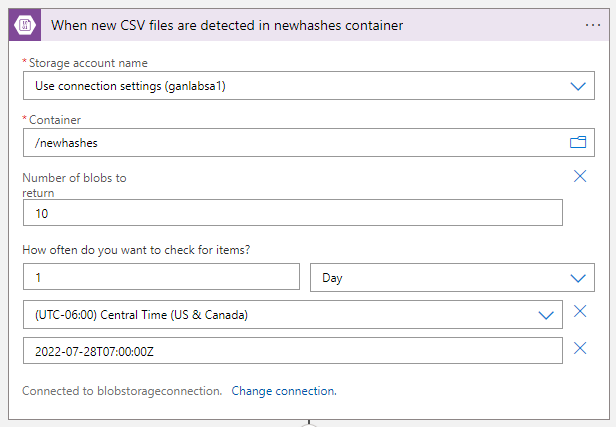
When the Logic App creation completes, select the Logic App and click logic apps designer from the left menu. This is where we can start building our triggers and actions. We will assign a trigger to run the app if it detects new or modified files in our newhashes storage container. Search for blob and select the trigger “when a blob is added or modified”
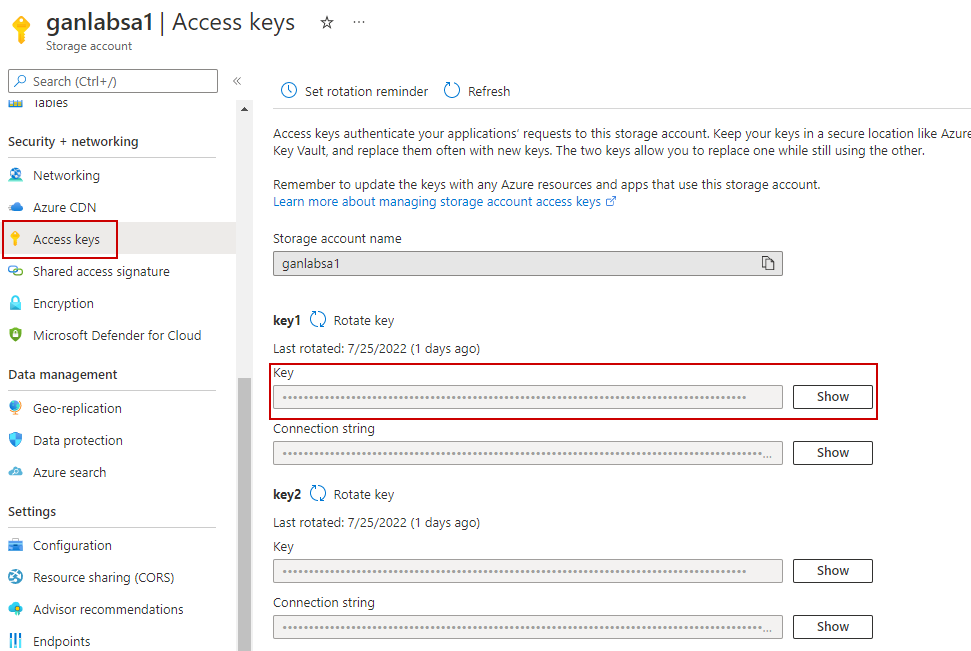
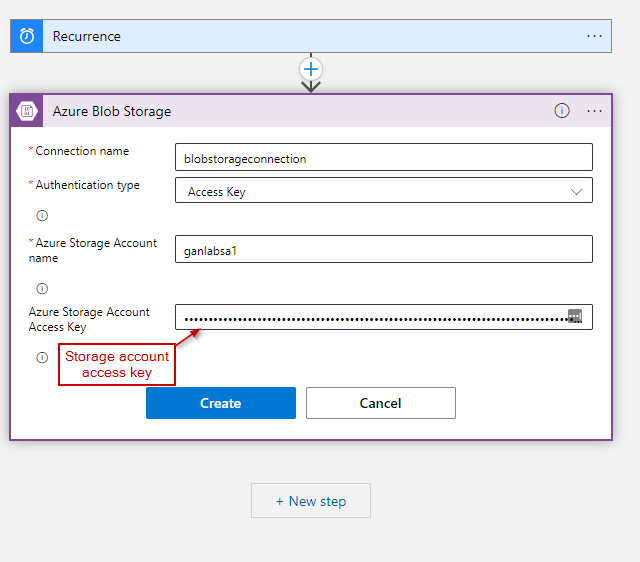
You will need to add a storage account connection. Provide a connection name and specify the name of the storage account. Utilize Access Key as the authentication type. You will have to copy the access key from the storage account:
Once you create the storage account connection. Select it from the drop down, select the newhashes container, and set the schedule for when to check for new files. I am selecting once per day at 7:00 AM:
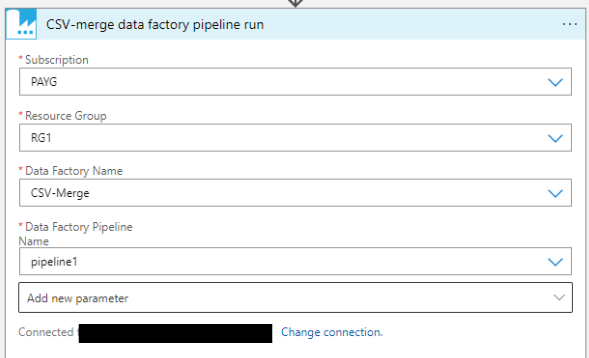
Next, we need to run our data factory pipeline if new files are detected. For this we want to select Create a pipeline run and complete the fields to run the pipeline we created earlier:

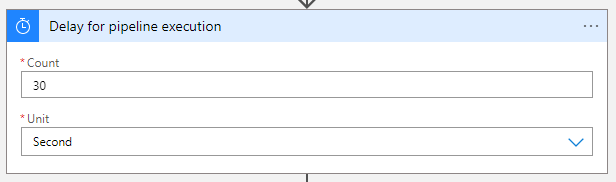
Next, we add a Schedule Delay action to wait 30 seconds. This allows time for the pipeline to complete. Without the delay, the next task kicks off before the pipeline completes, and the logic app will fail:
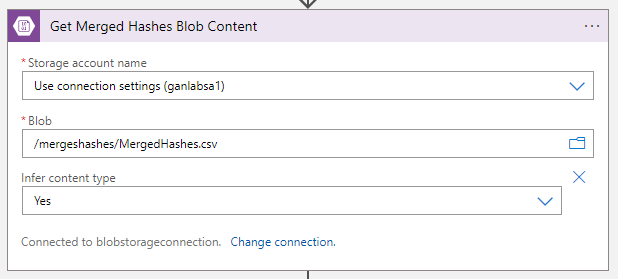
Add a “Get Blob Content” action next. You can reuse the same storage connection we created earlier. For this, we want to select the mergedhashes container and mergedhashes.csv file which gets created by the previous pipeline task:
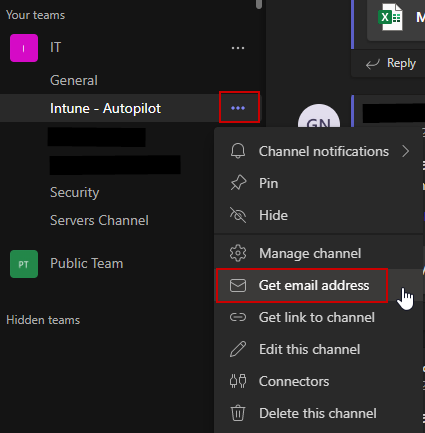
The next action is to send the email. First, we need to grab the email address for our Teams channel. Navigate to your Teams channel and click the ellipses. Select Get Email Address to get the unique email address for that channel:
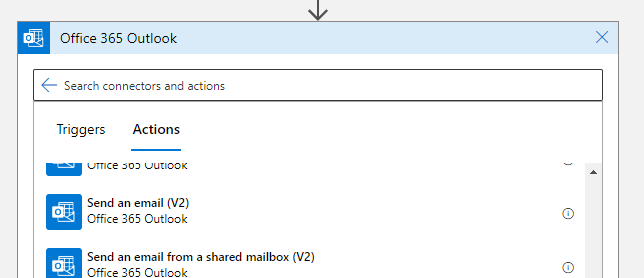
Then add an Office 365 Outlook Send an Email task:
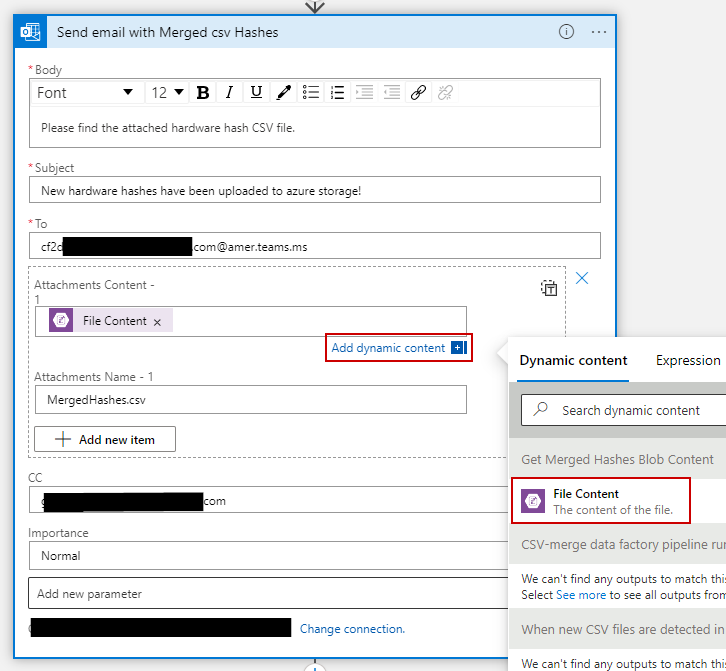
Complete the email information. For the attachments content, select dynamic content, and file content from our get blob content action earlier. Supply an attachment name and add additional details if you’d like:
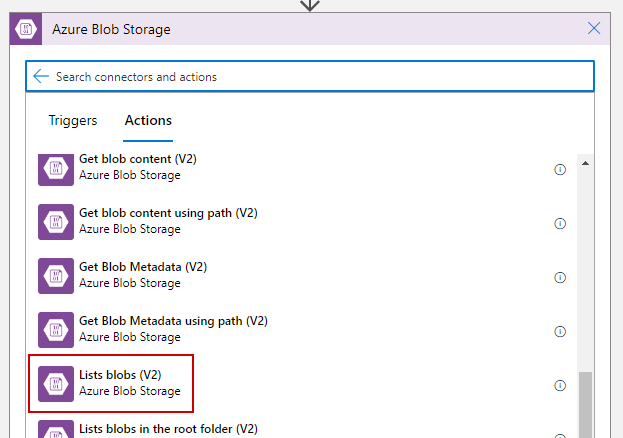
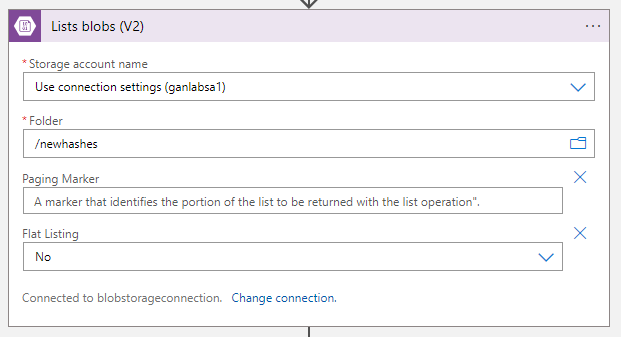
The last step is to delete all contents of the newhashes container so we don’t end up with duplicate hardware hashes the next day this runs. Create a List Blobs action. Specify the newhashes container:
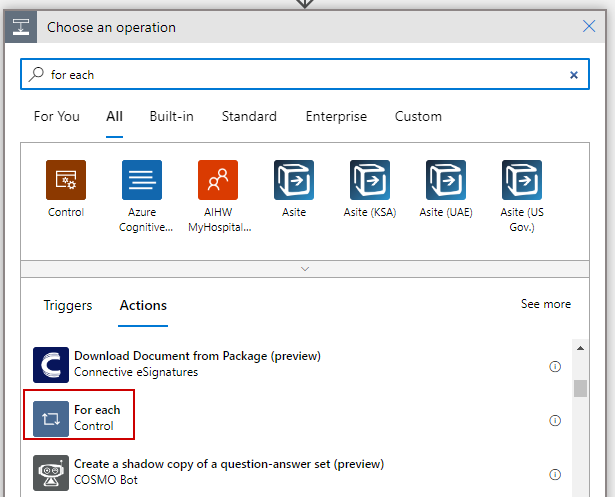
Lastly, we add a for each action:
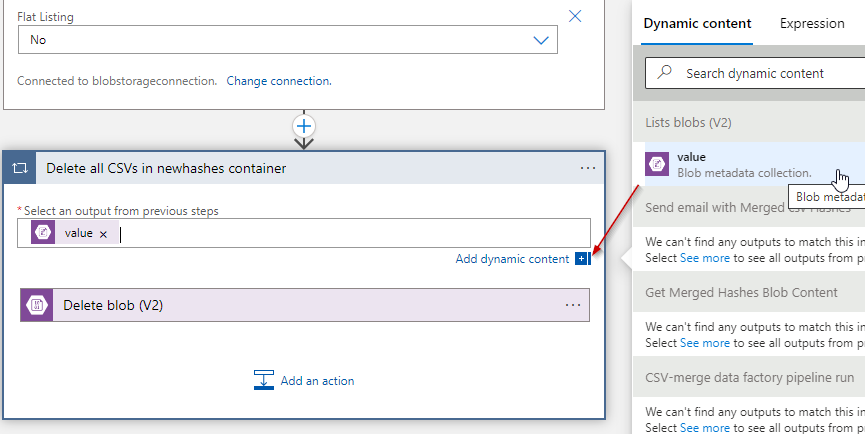
Select the “value” from the previous list blobs action, and then supply an action of “delete blob”:
Save your logic app, and we are ready to test. When we run the trigger, the logic app will continue to check the container for new content until you upload something. So, click run trigger, then upload a couple CSVs to your newhashes container, and give it a minute or two to run through. If all goes well, it will look like this:
If we check our teams channel:
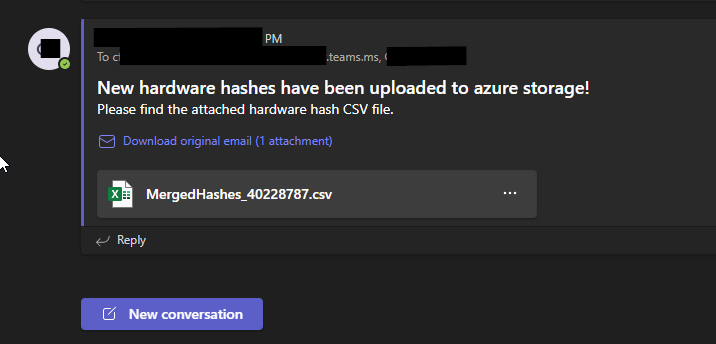
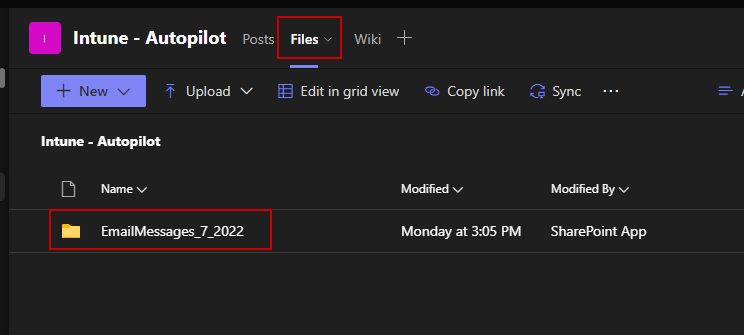
The attachments are also stored in the files section of the Teams channel:
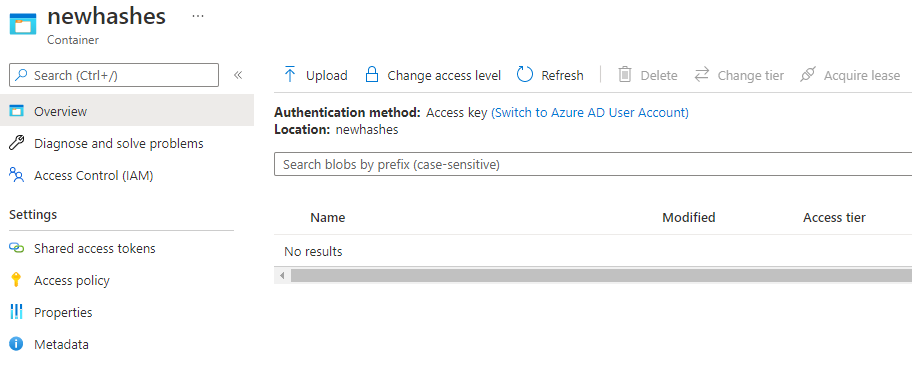
If we check our newhashes container, the csv files are deleted:
Next time new hashes get uploaded, the task will kick off at 7:00 AM the next morning!