Naming Hybrid Joined devices during autopilot has always been very limited. You can’t use variables like %SERIAL% to add the serial number to the device name. You’re basically stuck using a prefix and a randomly generated string of characters. That’s not the best naming convention and it usually adds an additional step for IT admins to rename the device after autopilot completes. This has been brought up by some of my clients in the past, and I started working on a solution a while ago, but due to my dislike for hybrid device join, I never had the motivation to finish until someone asked this question in the LinkedIn group. My interest was revitalized and despite my dislike for Hybrid Azure AD Join, I wanted to finish what I had started. However, there are a few hurdles that need to be cleared to accomplish this in an automated way during autopilot:
- We need to make some changes in AD to allow the device to be renamed. I originally got this all working using a dedicated service account that is locked down. It wasn’t until I was almost done with this project that I found another much simpler way. We will cover both methods because I learned some cool things about protecting passwords in PowerShell with my first method.
- The device needs to be rebooted after being renamed or it will fail to log users on. Yes, it absolutely needs to be rebooted so there is a new certificate trust to the domain with the new computer name. I tried for several days to find a workaround to no avail. I discovered a way to reboot after the ESP is completed anyway, so all is OK.
- This should go without saying, but the device needs line-of-sight to a domain controller. I’ve only tested this in my lab on the same LAN as my DC. If you’re using an always-on VPN with device cert, we can probably adjust the script to check for DC connectivity before executing. This may be something I revisit in the future.
I’ll break this into a few sections where we go over the whole solution, and all the files and scripts in this post are on my github here:
- Changes we need to make in AD
- The rename script and how it works
- The task to reboot the PC after ESP
- The Win32 apps and user experience
Make the necessary changes in AD
The first thing we need to do is grant an account permission to rename computers. As I mentioned, there are a couple of ways to do this. I’ll cover the method I used first, but at the end of this section, I show another way that is much easier. First, let’s quickly look at the portion of the script that renames our workstation. We can see that this requires domain credentials. Therefore, we need a domain account and we should give it just enough permissions to accomplish what we need:
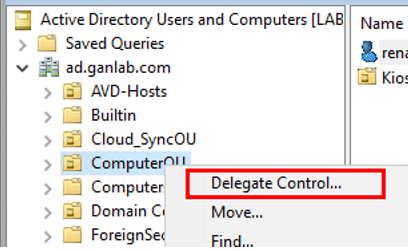
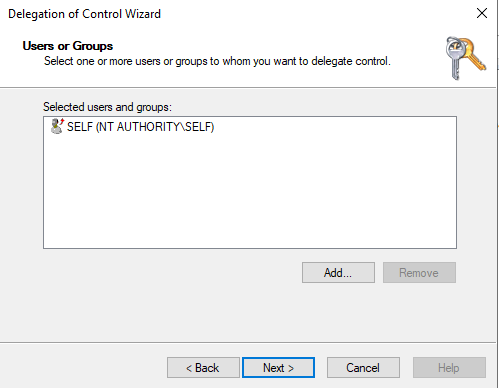
Rename-Computer -NewName "HYB-$shortserial" -DomainCredential $credsTo start, I created a domain account named renamer. If you end up going this route in production, take extra security measures to lock this account down as much as you can. Provide a complex password, prevent interactive logins, etc. Next, we need to provide this account with some additional permissions to allow the renaming of devices. Right-click on the OU where your hybrid devices will be joined to the domain, and select delegate control:
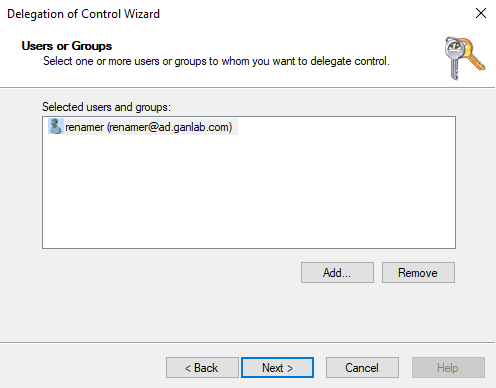
Add the service account you want to use to rename the devices:
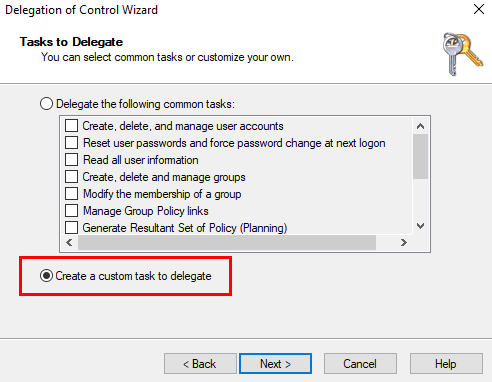
Select Create a custom task to delegate:
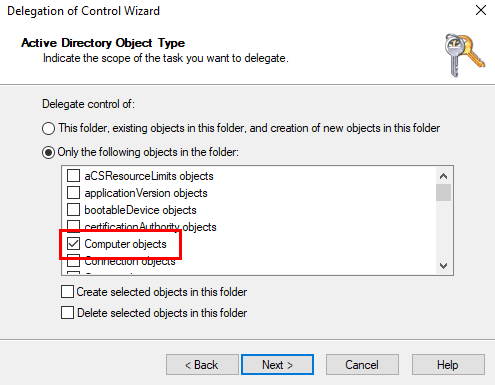
Select only the following objects in the folder, and then select computer objects
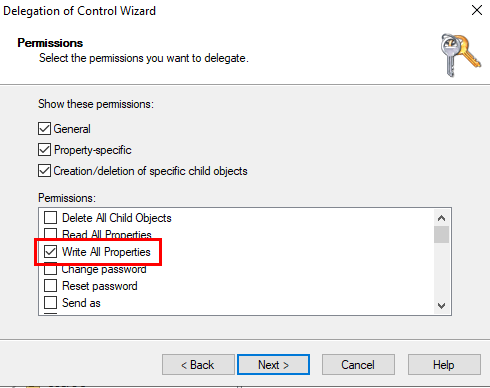
Select write all properties from the permissions list and finish the wizard:
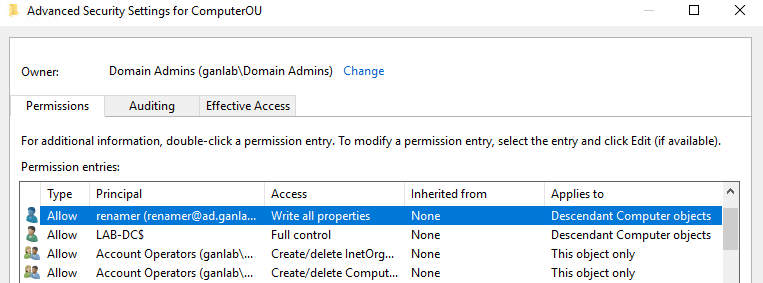
Your account should look like this after adding the permissions:
Securing credentials in PowerShell
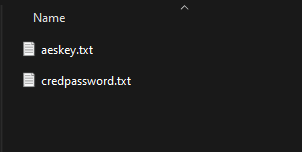
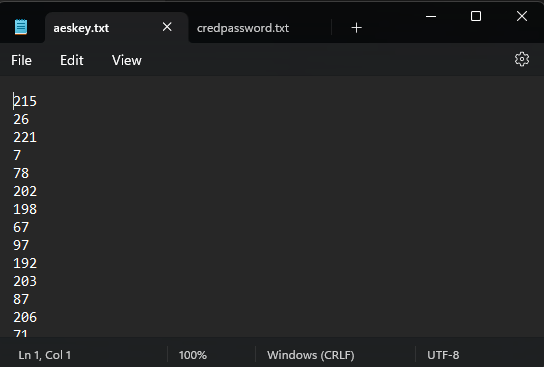
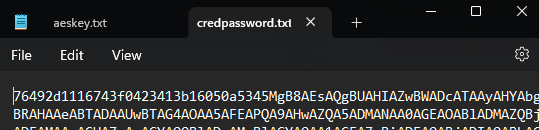
That completes the AD setup. Next, we need a way to allow this account to authenticate securely through the script. For this, I give a bunch of credit to this blog by David Lee (Using Saved Credentials in Powershell Scripts (telstra.com.au). We all know storing plain text passwords in our scripts is a very bad practice. We can always convert the password to a secure string, but it’s only usable by the computer and account that converted it to a secure string. When I found David Lee’s solution, this was something I could utilize. Basically, David’s solution creates an AES encryption key that is used to decrypt the secure string password. With this solution, you need the secure string password file and the decryption key to properly decrypt the password. Still not a perfect solution, but much more secure than storing the password in plain text. David made this much easier on us by providing a template we can use. The below script is what we can use to generate our AES key and encrypted password file. It will prompt for our creds and we will supply the AD account creds we created earlier. It then stores that password as a secure string and encrypts it with a randomly generated AES Key, which gets stored as a separate .txt file.
$credObject = Get-Credential
$passwordSecureString = $credObject.password
$AESKeyFilePath = “c:\temp\aeskey.txt”
$credentialFilePath = “c:\temp\credpassword.txt”
$AESKey = New-Object Byte[] 32
[Security.Cryptography.RNGCryptoServiceProvider]::Create().GetBytes($AESKey)
Set-Content $AESKeyFilePath $AESKey # Any existing AES Key file will be overwritten
$password = $passwordSecureString | ConvertFrom-SecureString -Key $AESKey
Add-Content $credentialFilePath $password
You’ll end up with two files. The password.txt file is useless without the AES Key. So, protecting the AES key is important. You’ll want to make sure this is secured as much as possible in production.
Now that we have our encrypted password and AES key we can move on to the rest of the script. But what about how I mentioned earlier that we don’t have to go through all this? Well, we don’t. Since I originally went through all this, I wrote it in the blog anyway, and my script uses the method above. After finishing most of this post, I found there is a much easier way to accomplish this. Instead of creating a service account and saving an encrypted password with AES key, you can give delegate access to SELF in AD. Follow the same steps we went through above for delegate permissions, but this time use NT AUTHORITY\SELF. The remainder of this blog still uses the method above with the service account since this was a late discovery. You can use whichever method you’d like, but it seems easier to delegate access to SELF and not worry about storing encryption keys and passwords.
The Rename Script
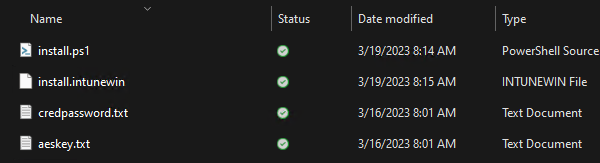
Our script to rename the computer is fairly simple. I have two examples below, and you can get creative and use just about any variables you’d like. The two examples are commonly used naming schemes. First, we have one that will simply rename to a prefix followed by the serial number. I use “HYB-“. It will also check the length of the serial number. If it’s greater than 10 characters, it trims any additional characters down so it only uses the first 10 digits of the serial number. Also, I don’t recommend packaging your secure password file and AES key in the Win32 app (like I have below), but since this was proof of concept in a non-production environment, I did it for simplicity. I also included a transcript in my script while I was testing, but you can remove that portion if you’d like. All these scripts are available on github.
New-Item -Path "c:\" -Name "temp" -ItemType "directory" -Force
Start-Transcript -Path "C:\temp\rename.txt"
$fullserial = Get-WmiObject win32_bios | select-object -expandproperty "Serialnumber"
$shortserial = $fullserial.SubString(0,9)
$AESKeyFilePath = "aeskey.txt"
$SecurePwdFilePath = "credpassword.txt"
$user = "ganlab\renamer"
$AESKey = Get-Content -Path $AESKeyFilePath
$pwdTxt = Get-Content -Path $SecurePwdFilePath
$securePass = $pwdTxt | ConvertTo-SecureString -Key $AESKey
$creds = New-Object -TypeName System.Management.Automation.PSCredential -ArgumentList $user, $securePass
If ($fullserial.Length -gt 9) {
    Write-Output "Full Serial Number is longer than 10 characters. Using the first 9 characters of the serial in the PC name"
    Rename-Computer -NewName "HYB-$shortserial" -DomainCredential $creds -verbose
}
Else {
    Write-Output "Serial Number is shorter than 10 Characters. Using entire serial number in PC name"
    Rename-Computer -NewName "HYB-$fullserial" -DomainCredential $creds -verbose
}
Many organizations prefer to specify desktops or laptops in the computer name with a DT or LT. The below script is slightly more complex and detects if there is a battery present in the system. If so, it will name the device with the LT- prefix. If no battery is present, it names the system as DT-. Yes, I know if there is a UPS connected to a desktop with a USB, this may end up falsely detecting a desktop. I don’t have any of those to deal with, but if you do, you may need to use something else to detect a desktop or laptop. The rest of the name will be the serial number or a trimmed serial number to contain the first 10 characters:
New-Item -Path "c:\" -Name "temp" -ItemType "directory" -Force
Start-Transcript -Path "C:\temp\rename.txt"
$fullserial = Get-WmiObject win32_bios | select-object -expandproperty "Serialnumber"
$shortserial = $fullserial.SubString(0,9)
$AESKeyFilePath = "aeskey.txt"
$SecurePwdFilePath = "credpassword.txt"
$user = "ganlab\renamer"
$AESKey = Get-Content -Path $AESKeyFilePath
$pwdTxt = Get-Content -Path $SecurePwdFilePath
$securePass = $pwdTxt | ConvertTo-SecureString -Key $AESKey
$creds = New-Object -TypeName System.Management.Automation.PSCredential -ArgumentList $user, $securePass
$battery = Get-WmiObject Win32_Battery
If (($fullserial.Length -gt 9) -and ($battery -eq $null)) {
    Write-Output "Full Serial Number is longer than 10 characters and device is a desktop. Using DT- prefix and first 9 characters of the serial in the PC name"
    Rename-Computer -NewName "DT-$shortserial" -DomainCredential $creds -verbose
}
If (($fullserial.Length -gt 9) -and ($battery -ne $null)) {
    Write-Output "Full Serial Number is longer than 10 characters and device is a laptop. Using LT- prefix and first 9 characters of the serial in the PC name"
    Rename-Computer -NewName "LT-$shortserial" -DomainCredential $creds -verbose
}
If (($fullserial.Length -lt 9) -and ($battery -eq $null)) {
    Write-Output "Full Serial Number is less than than 10 characters and device is a desktop. Using DT- prefix and full serial number"
    Rename-Computer -NewName "DT-$fullserial" -DomainCredential $creds -verbose
}
If (($fullserial.Length -lt 9) -and ($battery -ne $null)) {
    Write-Output "Full Serial Number is less than than 10 characters and device is a laptop. Using LT- prefix and full serial number"
    Rename-Computer -NewName "LT-$fullserial" -DomainCredential $creds -verbose
}
So these are two good templates you can use for renaming your devices. You can pull the manufacturer and model from WMI and use those if you’d like. Whichever script you use to rename your devices will end up being deployed as a required Win32 app during the ESP.
The Reboot task to Complete the Device Rename
As I mentioned earlier, the device must be rebooted after its renamed or users won’t be able to sign in and they’ll receive the below error:

This has to do with the device trust certificate that a device obtains when the workstation starts up. Since the initial domain join happens before a reboot during autopilopt, the certificate contains the original name of the device. Hence the trust relationship error. I tried everything I could think of to get around this, but in the end, it was just easier to find a method to reboot the device after the Enrollment Status Page completed. Finding a way to reboot the device after the ESP was a challenge on its own, and I created a separate blog post for that here – Automate a Reboot or Custom Script When the Autopilot ESP is Complete – SMBtotheCloud. That post focuses on AADJ devices, not hybrid devices. However, it will work almost exactly the same. The difference ends up being the trigger that initiates the reboot script. Since I skip the account phase of the ESP for almost every HAADJ Autopilot deployment, we can simply set the trigger to use event 4647, which is when the defaultuser0 account logs off, signaling the end of the Device Setup phase and the conclusion of the ESP if you’re skipping the account setup phase.
I’m not going to rewrite everything in that other post. Visit Automate a Reboot or Custom Script When the Autopilot ESP is Complete – SMBtotheCloud and read through it to find out how it works. The only difference is our Post-ESP.ps1 script. Instead of using a while loop to detect when a process starts and stops, we simply execute a reboot since our trigger is already indicating when the ESP is finished (assuming you’re skipping the account setup phase). All the necessary files for the task are available on github. Here is the script.
$tempdir = "C:\temp"

$taskdir = "C:\windows\system32\Tasks"

New-Item $tempdir -ItemType Directory -Force

New-Item $taskdir -ItemType File -Name ESP-TaskComplete -Force

Start-Transcript -Path "C:\temp\post-esp-task.txt" -Verbose

disable-scheduledtask -taskname PostESP-Script -ErrorAction SilentlyContinue -Verbose

Unregister-ScheduledTask -TaskName PostESP-Script

start-sleep -Seconds 2

Restart-Computer -Force -Verbose
Package that all up and deploy the scheduled task as a Win32 app. See my previous post along with this one for more details on deploying schedules tasks as Win32 apps – Deploy Scheduled Tasks as Win32 Apps – SMBtotheCloud.
The Win32 Apps:
We will deploy two Win32 apps here. One containing the script that renames the computer and another that deploys the scheduled task. You can probably combine these into a single Win32 app if you want to, but since these two components needed to be independently tested, I have them separated and have the rename task dependent on the scheduled task being installed.
The Win32 app to rename the PC basically just needs the script to rename the device. In my case and for testing, I have the encrypted password and encryption key bundled together. Don’t do this if you’re using this solution in production.
Wrap them as an .intunewin file and create a new Win32 app. The install is straightforward:
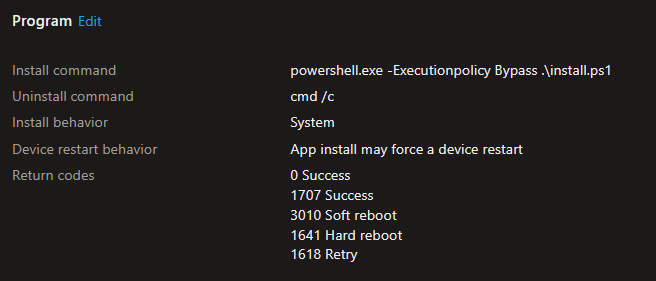
In this example, I am using the script that renames the device with the prefix HYB- and then the serial number. We use a custom detection script that looks for the computer name in the registry. You’ll need to modify this accordingly for your naming convention:
$pcname = Get-ItemPropertyValue -Path HKLM:\System\CurrentControlSet\Control\ComputerName\ComputerName\ -Name ComputerName

$fullserial = Get-WmiObject win32_bios | select-object -expandproperty Serialnumber

$shortserial = $fullserial.SubString(0,9)

If (($pcname -eq "HYB-$ShortSerial") -or ($pcname -eq "HYB-$fullserial")) {

Write-Host "PC has been properly renamed"

exit 0

}

Else

{

Write-Host "There was an issue renaming the PC. The PC name is $PCname. Exiting"

Exit 1

}
For the Win32 app that deploys the scheduled task, it follows the same method described in the two forementioned posts (this and this), but using the new script above. All these scripts and files are separated out on github. Assign the two apps to device groups and make them required during the ESP.
User Experience:
Here’s how everything looks during autopilot. You can see the device is originally joined to the domain with the naming scheme specified with the Intune profile of HYB- and then a random string of characters. When the ESP kicks in, our rename app happens during the device setup phase. We see the device name change in Active Directory, and after we sign in, we can confirm the device was renamed properly using the first 10 digits of the serial number: