If you’re familiar with Apple Business Manager, Android Zero Touch is the equivalent for corporate Android devices. There are some differences in how ABM and AZT are set up and the overall functions they provide, but the goal for devices is the same – to seamlessly enroll new or wiped devices in your MDM. When a device is registered to your Android Zero Touch tenant, it connects to Google during the out-of-box experience to determine if it’s part of a corporate AZT, and it will automatically pull the assigned enrollment profile. My experience was not exactly how the documentation is written, so I made this post. The official documentation with more details is here – Zero-touch enrollment for IT admins – Android Enterprise Help (google.com). This post Focuses on the backend setup for AZT and how to connect your Intune Enrollment Profiles. When set up properly, there is no difference in the Android enrollment process except that you don’t need to manually enroll devices anymore. It all happens automatically. This allows you to ship devices directly to users with simple instructions to turn it on and sign in when prompted.
The first thing we need to do is create a Google account to use for the Android Zero Touch portal. This Google account should be associated with a corporate email. You can do this without creating a Gmail account by using this link – https://accounts.google.com/signupwithoutgmail. This will be the initial admin account associated with the AZT tenant.
Unlike ABM, you can’t create your own tenant and you can’t manually add devices. You must have a business contract with a supported carrier. In the US, all the major carriers are supported. If you’re unsure if your carrier is supported, check at this link – Android Enterprise Solutions Directory – Resellers (androidenterprisepartners.withgoogle.com). Each carrier has a process to procure an AZT instance. Talk to your rep or complete the required forms and send them in to your mobile provider.
- Verizon – mobile_device_enrollment_instructions_and_candidate_information_form_google.pdf (verizon.com)
- AT&T – Android™ zero-touch | AT&T Business Console (att.com)
- T-Mobile – Contact your rep. They don’t have any direct information on AZT online, but they are a device reseller.
If you have existing devices that were purchased through your carrier, they can be retroactively added to the AZT tenant. Make sure you complete the form properly with the IMEI numbers for the existing devices. Otherwise, only newly procured devices will be tied to the AZT instance. 1-3 days after submitting the required forms, you should receive an email from your carrier stating that your account is enabled for Android Zero Touch. It will also contain your AZT account number, Google ID to use for login (this is specified on the form), and a link to sign in (https://partner.android.com/zerotouch). Your carrier will only be able to retroactively add previously purchased devices if they were purchased through the carrier. At the time of writing, there is no way to manually import other devices into AZT.
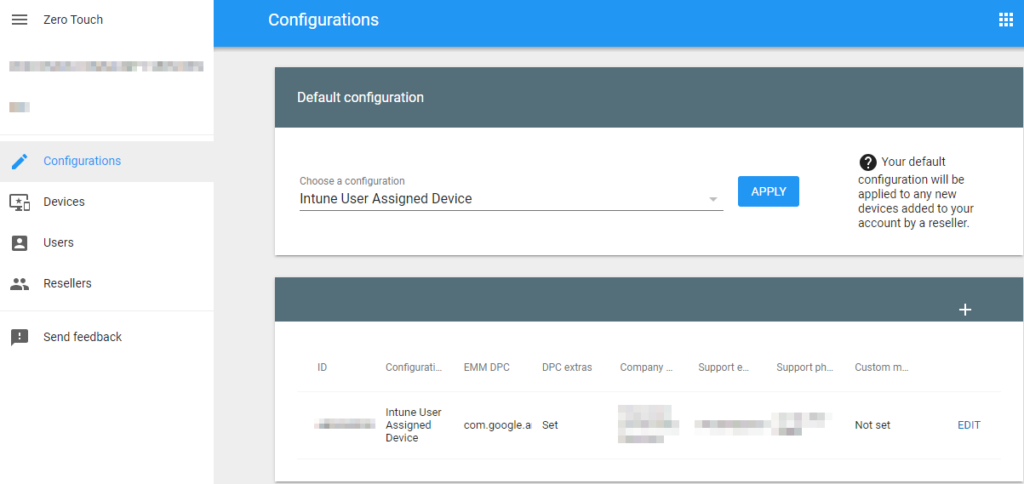
The AZT dashboard is pretty plain. After all, AZT doesn’t do much other than assign MDM profiles to devices at the OOBE. We’ll take a quick look at each section. The configurations tab is the default tab when you sign in, and contains your MDM profile assignments. By default, there won’t be any configurations listed:
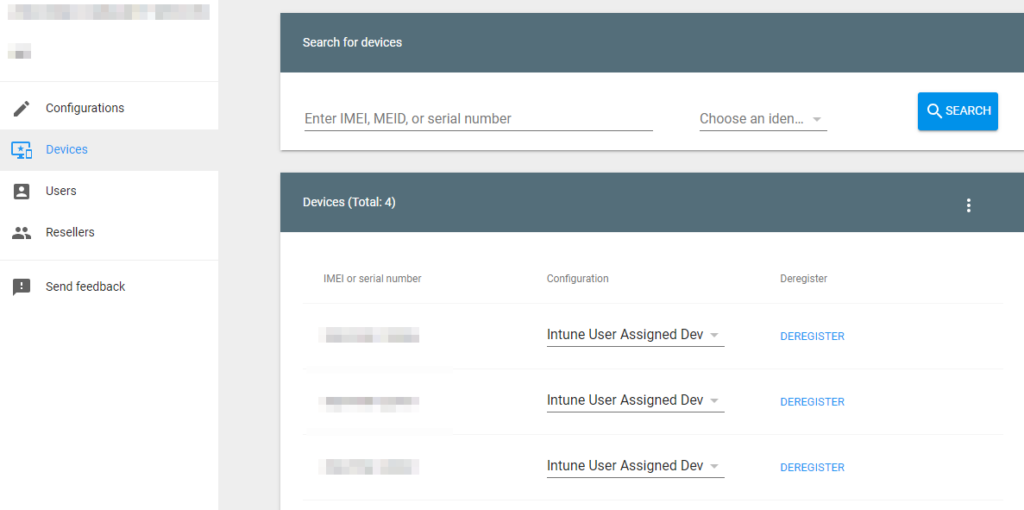
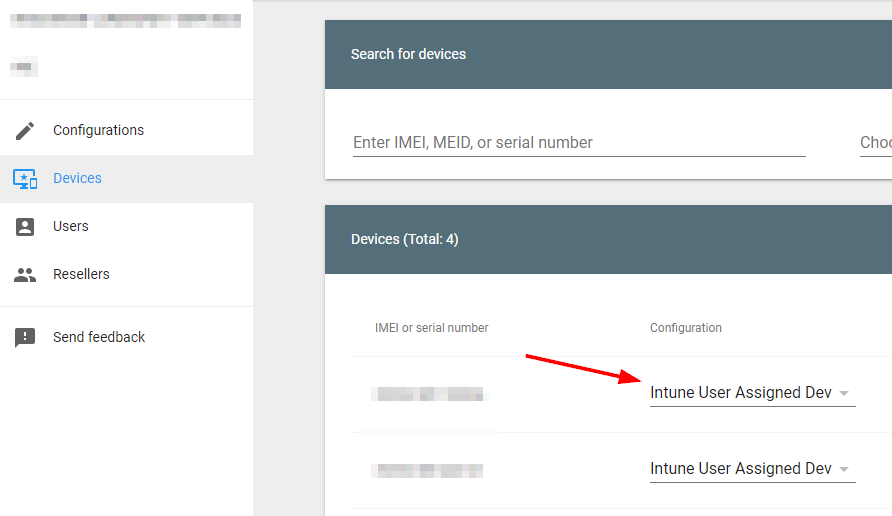
The Devices tab will show you all your AZT assigned devices. Similar to Apple Business Manager, you’ll assign a default profile that all devices are automatically assigned, but you can also manually change the configuration profiles for the devices:
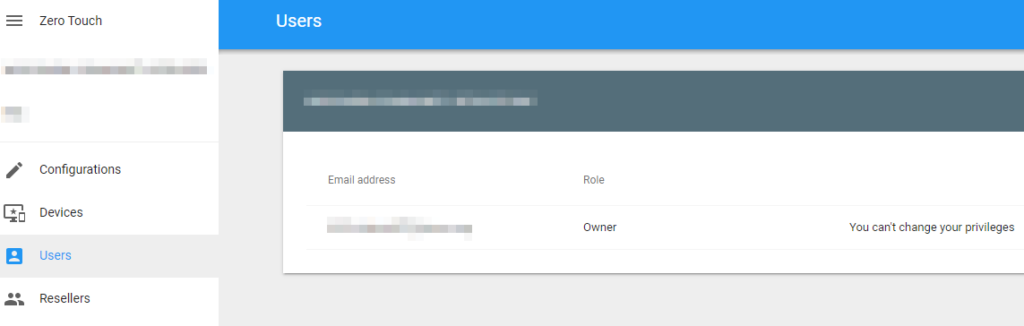
The Users tab will show the original Google admin account, which is assigned the owner role by default. You can add additional Google accounts and assign the role of Admin or Owner here.
Lastly, the Resellers tab will show you your customer ID and active resellers:

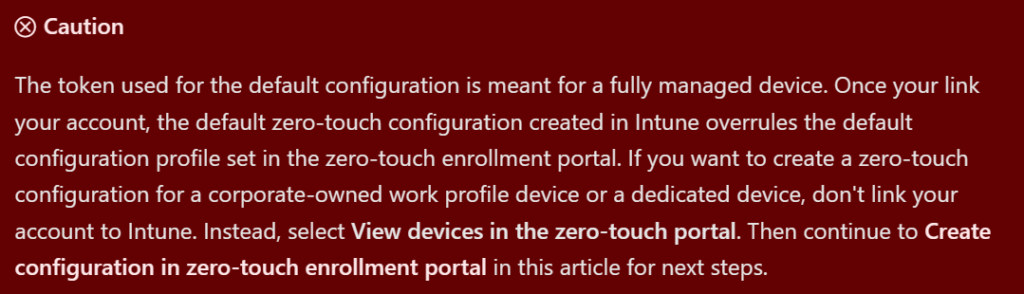
Now that we have access to our AZT tenant and devices are enrolled, we need to connect Intune as the MDM provider. This is where the documentation seemed to be off. The Microsoft documentation here (Enroll Android Enterprise dedicated, fully managed, or corporate-owned work profile devices in Intune – Microsoft Intune | Microsoft Learn) States in step 3 to link the ZT account to Intune under Devices > Enroll Devices > Android Enrollment > Bulk Enrollment Methods > Zero-touch Enrollment. However, this did not automatically link my fully managed user profile to AZT. After a couple of hours, I ditched this and set up the profile manually. According to the MS Learn documents, if you’re default profile is not a fully managed device, you’ll need to create the profile manually anyway. Also, if you have more than one profile you’ll need to use this method to add additional enrollment profiles:
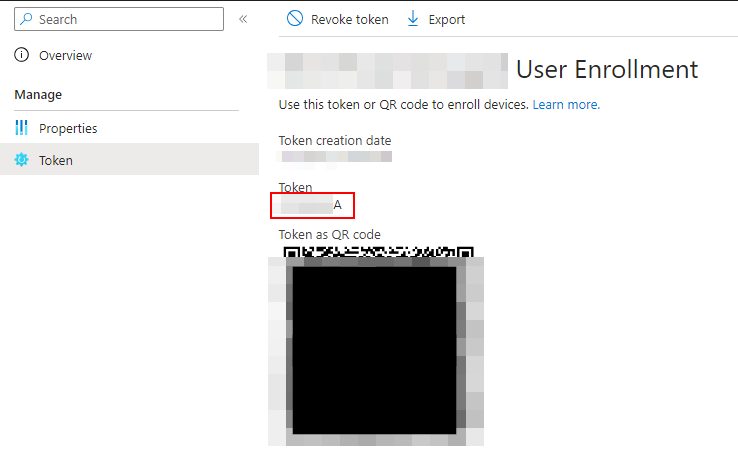
We’ll follow these steps to link our Intune enrollment profile to AZT. First, you need to have an enrollment profile created in Intune. I’m using a corporate-owned fully managed user device profile. Create a new profile or locate an existing profile you want to use and copy the enrollment token:
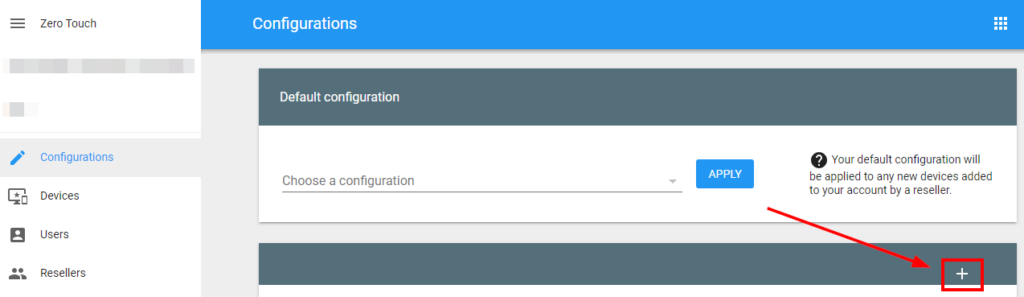
Navigate back to Android Zero Touch, and create a new Configuration:
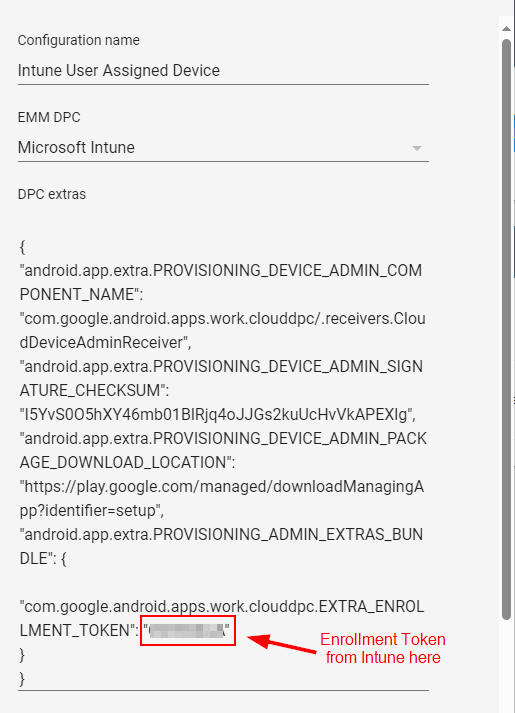
Provide a Configuration Name and Select Microsoft Intune as the EMM DPC list. For the DPC Extras, copy the JSON from step 5 here. Make sure you paste the enrollment token we copied in the previous step where it says “YourEnrollmentToken” in the JSON:
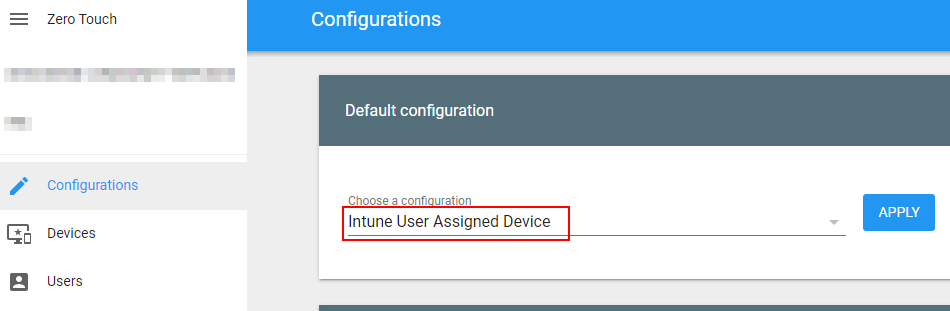
You’ll also need to complete the required fields in the configuration for Company Name, Support email address, and Support Phone Number. Click Add after all the required fields are completed. If you have multiple enrollment profiles you are adding, add the other profiles using the same process. Lastly, assign a default configuration profile from the drop-down. This is what any newly added device will be assigned:
You can verify device profile assignments in the devices tab or manually change the configuration profile for a device:
When those devices are unboxed and powered on, or the next time they’re factory reset, they’ll auto-enroll with Intune based on the configuration profile assigned from Android Zero Touch 👍