Yes, some organizations still rely on client VPNs for access to on prem resources. Hopefully, if you find yourself in this situation, you’re moving towards Entra joining your devices, and have a plan to eventually remove your on-prem AD reliant resources. Until then, you need to deploy a client VPN to your workstations. This post will focus on the SonicWall global VPN client. Although pushing the actual VPN client app is simple, it took me a while to figure out how to deploy the client config settings to include the pre-shared key. After this post, you’ll know how to not only deploy the VPN client, but also push your client config so users only need to launch the VPN client and provide their credentials.
Exporting the VPN client config settings
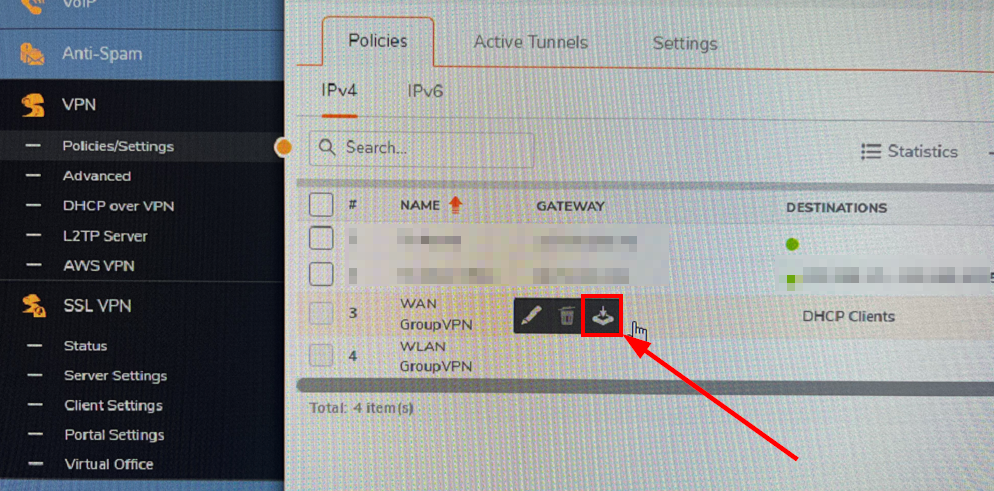
The first thing we need to do is download our client VPN configuration file. It’s important that we download it directly from the Firewall, or the pre-shared key (if you use one) can’t be transferred between machines. In other words, you can create the config on the VPN client on a client device, and then copy it to another device. The connection name and IP will move over, but the PSK will not. So, sign into your SonicWall firewall and navigate to Device > VPN > Policies/Settings. Find the WAN GroupVPN, click it, and then click the link to download the config (sorry for the bad pic, didn’t have the option to get a snip).
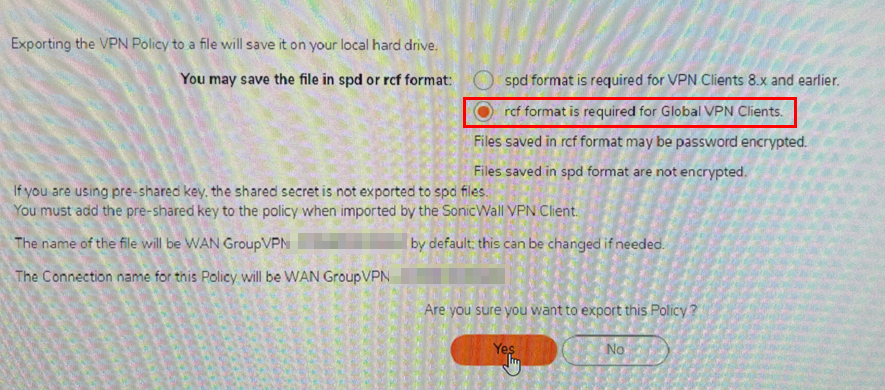
Select rcf format. We will not add a password to the file because we will be silently importing it. We’ll cleanup the config file with a remediation later. The PSK is NOT displayed in clear text in this config.
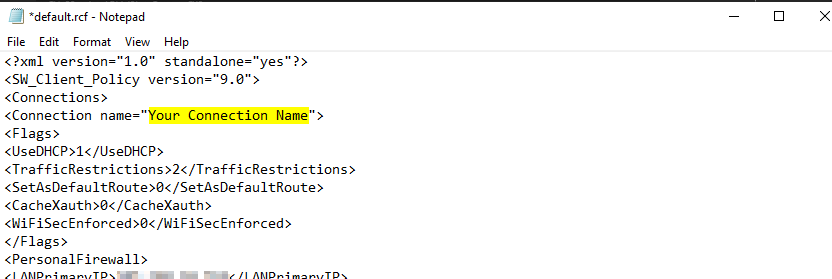
Next, we need to make a couple of edits to the downloaded config file. Open the file and rename the connection name (this is how it will appear to the users in the client). After entering a connection name, rename or save the file as “default.rcf”.
Create the Intune installation package
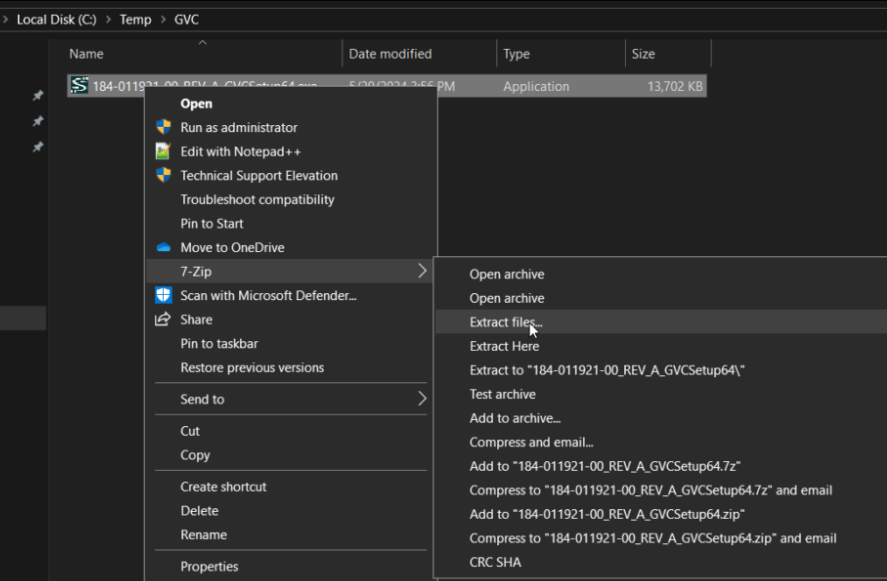
Now we need to make our installation package. Download the GVC from here – SonicWall VPN Clients | NetExtender & Mobile Connect. It will come as an EXE. Using 7zip or a comparable tool, extract the exe package.
After extracting the EXE, you’ll see a GVCInstall64.msi file. This is the file we will build our package from. First, though, I’ll explain how we will do this and import the config using one app. The client config files for the user’s VPN connection are actually stored in the user profile under the “%appdata%\sonicwall\global vpn client” directory. However, these configs contain an encrypted PSK unique to the machine. So, these configs cannot be transferred to other machines without needing to re-enter the PSK. These configuration files get generated the first time the VPN client is launched. Therefore, we use the exported configuration from the firewall (default.rcf from earlier), which uses an encrypted PSK that can be decrypted by the GVC. If default.rcf is placed in the “c:\program files\SonicWall\Global VPN Client” directory, then the first time the user launches the VPN client, it will build the user config files in “%appdata%\sonicwall\global vpn client” based on the default.rcf settings.
So, our flow is basically to silently install the GVC, copy default.rcf to “c:\program files\SonicWall\Global VPN Client”, and then cleanup the default.rcf file with a remediation.
Our install script looks like this and is available on github:
$msi = "GVCInstall64.msi"
$logPath = "C:\ProgramData\Microsoft\IntuneManagementExtension\Logs\GVCInstallLog.log"
$arguments = "/i `"$msi`" /QN /l*v `"$logpath`""

# Install GVC
Start-Process "msiexec.exe" -ArgumentList $arguments -Wait -NoNewWindow
start-sleep 10

#copy config
copy-item .\default.rcf -Destination "c:\program files\SonicWall\Global VPN Client\" -Force

#set modify permissions on default.rcf file
icacls "C:\Program Files\SonicWall\Global VPN Client\default.rcf" /grant BUILTIN\Users:M
Place the GVCInstall64.msi, default.rcf, and install.ps1 files in the same directory. Package these as a Win32 app using the IntuneWinAppUtil tool:
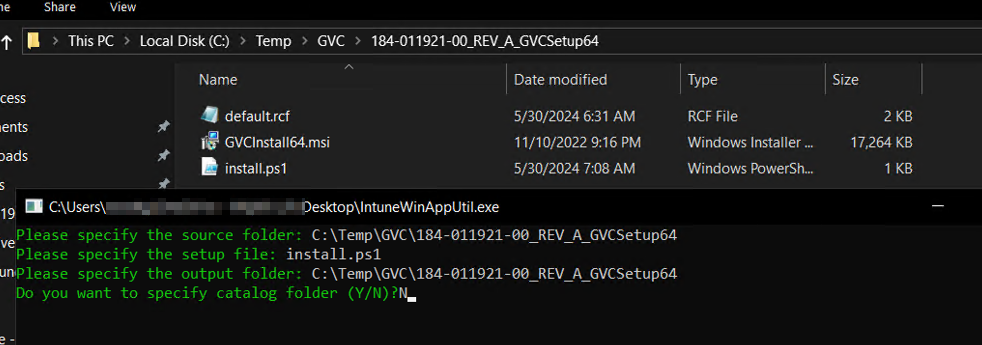
Sign into intune and create a new Win32 app using our .intunewin file we just created:

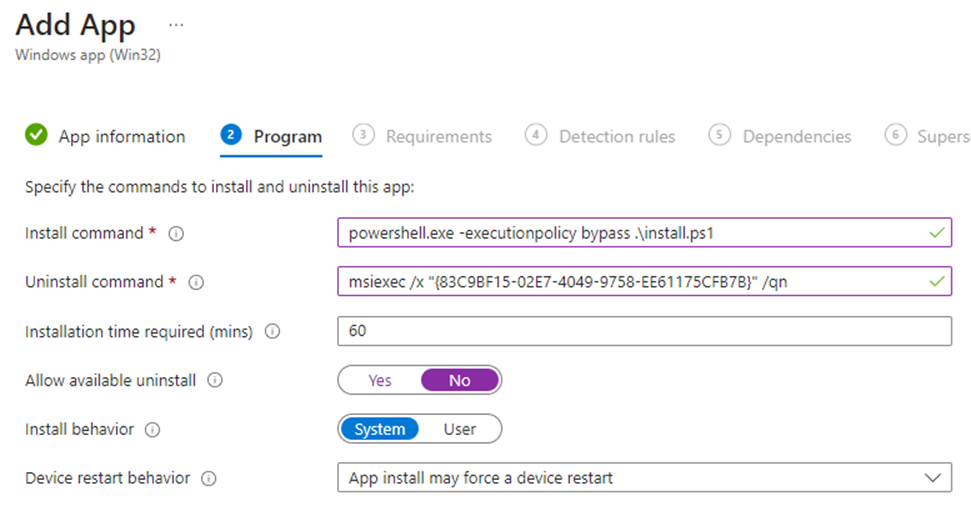
Install and Uninstall commands are below. We also want this to install as system:
- powershell.exe -executionpolicy bypass .\install.ps1
- msiexec /x “{83C9BF15-02E7-4049-9758-EE61175CFB7B}” /qn
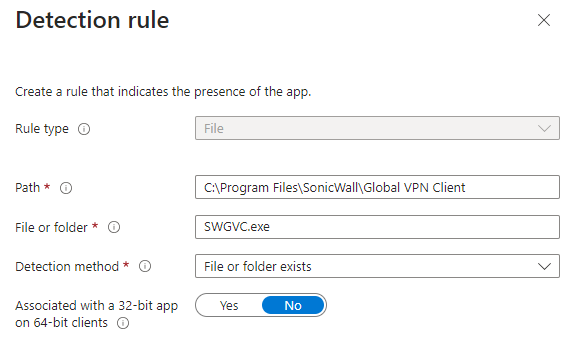
Add requirements and continue. For detection, I’ll use a simple file detection rule. Depending on how strict you want to be with this, you can edit to also look for the default.rcf file if you don’t intend to clean it up later.
Move on to your assignments and target your users/groups. This completes the setup of the VPN client and the config automatically being imported for the users when they launch the VPN client for the first time.
Clean up the default.rcf file after user config has been created
We don’t need the default.rcf file after the user launches the VPN client the first time. Remember, their config is built upon first launch using the default.rcf file and the PSK is encrypted in the user config. However, the default.rcf could technically be copied and imported on other machines. So, I will use a remediation to delete that file after the user’s config is created.
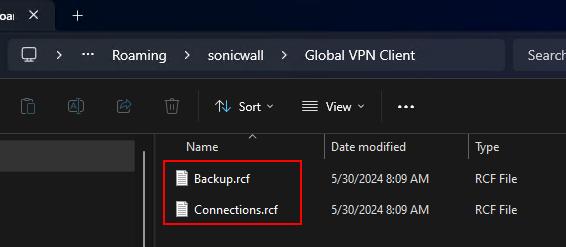
Since the user config files (backup.rcf and connections.rcf) exist in the user’s local profile, we need to detect if the config files in “%appdata%\sonicwall\global vpn client” exist. These are the files that are generated on first launch using settings from the default.rcf file. They will also exist if a user has manually added a connection. Once these exist, the default.rcf file is not used (unless these files are deleted).
Again, since our default.rcf file contains the PSK that can be imported by the GVC, we want to remove it after the user configurations exist in their profile. Although the PSK is not in clear text in our defauly.rcf file, someone could still copy it and import it to a GVC, which would eliminate them from needing to know the clear text PSK. By default, standard users don’t have permissions to delete contents of the “c:\program files\SonicWall\Global VPN Client” directory. They can read/execute, so they can copy the default.rcf, but without modify permissions, they can’t delete it.
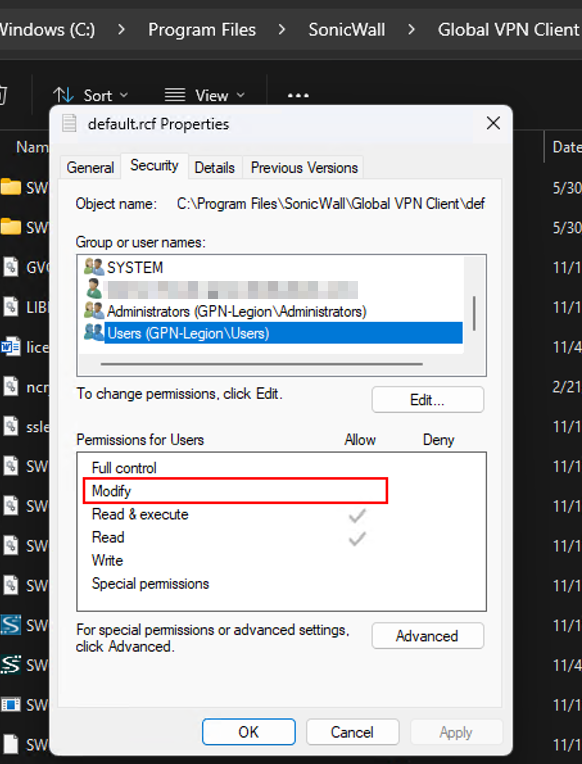
This is why the last line of our install script uses icacls to allow modify permissions for BUILTIN\Users on the default.rcf file.
icacls "C:\Program Files\SonicWall\Global VPN Client\default.rcf" /grant BUILTIN\Users:M Since our users now have modify permissions to this file, they can delete it. We need this because for our remediation (or win32 app if you don’t have remediation licensing) needs to run in the user context so we can detect if their VPN config files have been created. If so, then we will delete the default.rcf file.
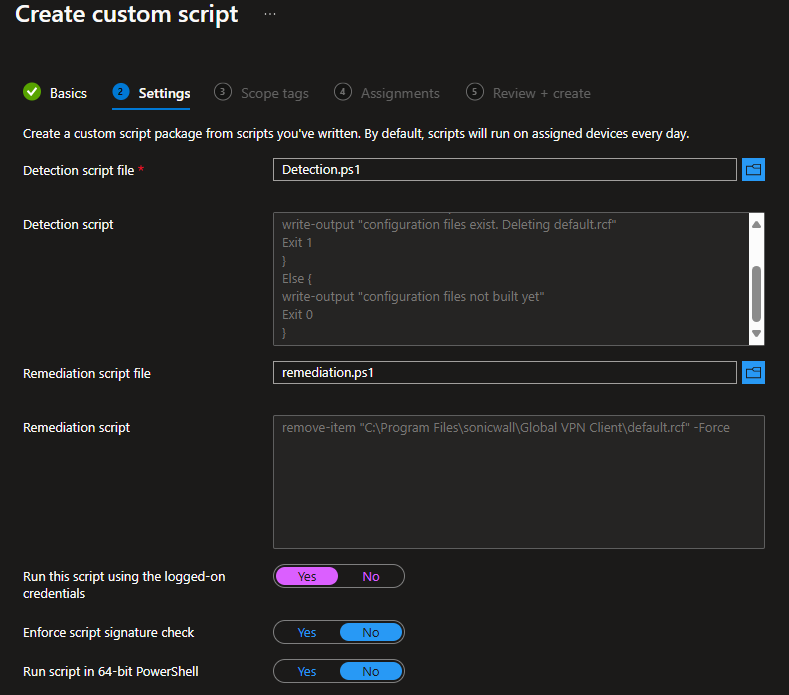
Here’s our detection script (also on github):
$connections = Test-Path "$env:APPDATA\sonicwall\Global VPN Client\connections.rcf"
$backup = Test-Path "$env:APPDATA\sonicwall\Global VPN Client\backup.rcf"
if ($connections -and $backup) {
write-output "configuration files exist. Deleting default.rcf"
Exit 1
}
Else {
write-output "configuration files not built yet"
Exit 0
}
And our remediation script (also on github):
remove-item "C:\Program Files\sonicwall\Global VPN Client\default.rcf" -ForceBuilding the remediation is simple. From Intune, navigate to Devices > Scripts and Remediations. Click Create to make a new remediation:
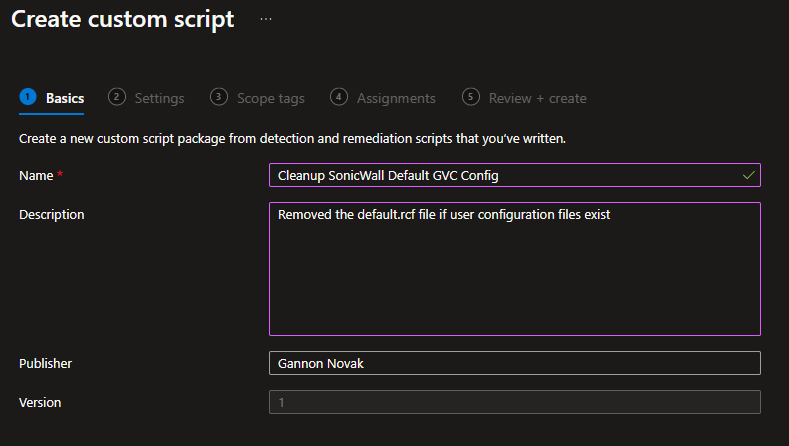
Specify your detection and remediation scripts from above. Make sure to run the script using the logged-on user’s credentials:
Proceed through to the assignments and your schedule. This will clean up the default.rcf file so it can’t be abused.