Several months ago, I made a post on how to deploy the Cisco Umbrella Roaming client with Intune. Well, just recently Cisco announced the end-of-life dates for the Umbrella Roaming Client, and April 2, 2025, is the end of servicing & support (End-of-Life Announcement for the Cisco Umbrella Roaming Client). The replacement software is the Cisco Secure Client with the Umbrella module (How do I install Cisco Secure Client with the Umbrella Module? – Cisco Umbrella). This post will walk through how to install all three of the recommended application components as a single Win32 app. If you’re still deploying the Cisco Umbrella Roaming client, you should start using the Secure Client with Umbrella module. Also, per the Cisco documentation linked above, the secure client will automatically detect if the Roaming Client is installed, and if so, it will migrate those settings to the Secure Client Umbrella Module and uninstall the roaming client. So, we can use this guide for fresh installs and environments that need to transition from the Roaming Client to the Secure Client.
Step 1 – Deploy the Umbrella Root Cert
Intune makes deploying the Umbrella Root Certificate very easy. In addition to using Intune, I also have a script here that you can push via an RMM if all your devices are not in Intune. It will check if the root cert exists on the device, and if not, it will download and install the cert in the proper store. To use Intune, use the below steps:
- Download the Umbrella Root Cert from this link – https://d36u8deuxga9bo.cloudfront.net/certificates/Cisco_Umbrella_Root_CA.cer
- From Intune, navigate to Devices > Windows > Configuration Profiles. Create a new profile for Windows 10 and later. Select Templates for the profile type, and select the Trusted Certificate Template.

- Provide a name for the profile and under configuration settings, browse to the certificate downloaded in step 1 and choose Computer Certificate store – Root as the destination store:

- Add your assignments and complete the profile creation. After deploying the profile, the Umbrella cert will be automatically added to the local machine’s trusted store:

That’s it. Now that we have the root cert installed on our machines, let’s install the Secure Client apps with Umbrella Module.
Step 2 – Install the Secure Client Apps
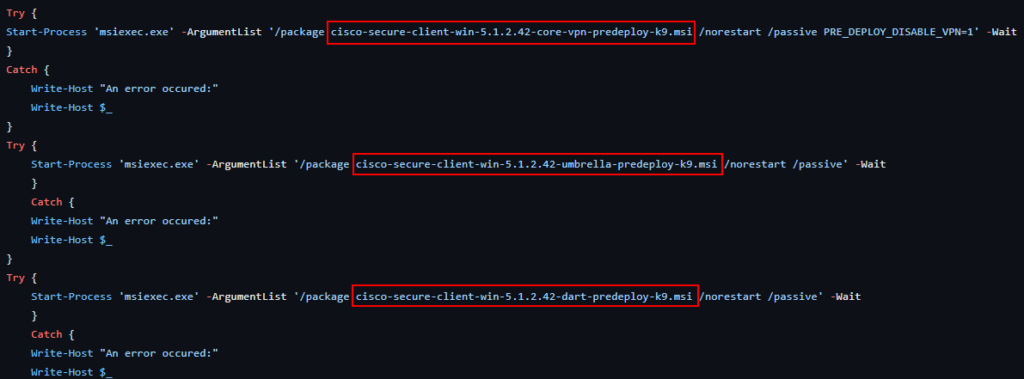
Cisco suggests deploying three total applications for Umbrella to function (Umbrella Module for Cisco Secure Client – Command Line installation and RMM reference – Cisco Umbrella):
- core-vpn-predeploy-k9.msi
- umbrella-predeploy-k9.msi
- dart-predeploy-k9.msi
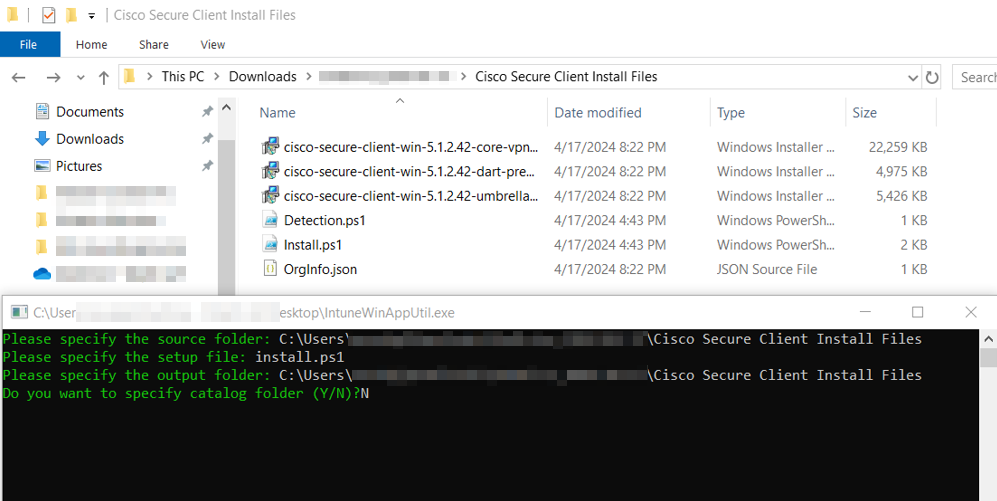
In addition to installing the three MSI files, we also need the OrgInfo.json file copied to the %ProgramData%\Cisco\Cisco Secure Client\Umbrella directory. This json file contains the tenant information for Umbrella, so the client knows which tenant to report to. The MSI files and json file can all be downloaded from the Umbrella tenant. The install script and detection script we will use for Intune are available on Github:
- MS-Cloud-Scripts/intune/Umbrella-CiscoSecureApp/Install.ps1 at main · gnon17/MS-Cloud-Scripts · GitHub
- MS-Cloud-Scripts/intune/Umbrella-CiscoSecureApp/Detection.ps1 at main · gnon17/MS-Cloud-Scripts · GitHub
The install script will install all three MSI apps, copy the json file to the necessary directory, and then restart the Umbrella service. The detection script checks to make sure the Umbrella and VPN services are installed, and that the OrgInfo.json file exists in the %ProgramData%\Cisco\Cisco Secure Client\Umbrella directory.
- First, we must build the package for Intune. Before we build the installer, verify the MSI file installer names are updated in the install.ps1 script. Open the install.ps1 script and update the file names to match the names of the MSI files for coreVPN, Umbrella, and dart installers we previously downloaded. The below screenshot names should match the downloaded MSI installers. Change them accordingly and save the changes.
- Place the install.ps1 script, the three MSI installers, and the OrgInfo.json file into a directory with no other files. Launch the Win32 Content Prep tool (if you don’t have this, download here). Specify the path to the folder containing our files. Specify install.ps1 as the setup file, and then specify an output file for the package. In this example we are using the same directory. Answer N when asked if you want to specify a catalog. Several seconds later, an “install.intunewin” file will be created in the output directory.
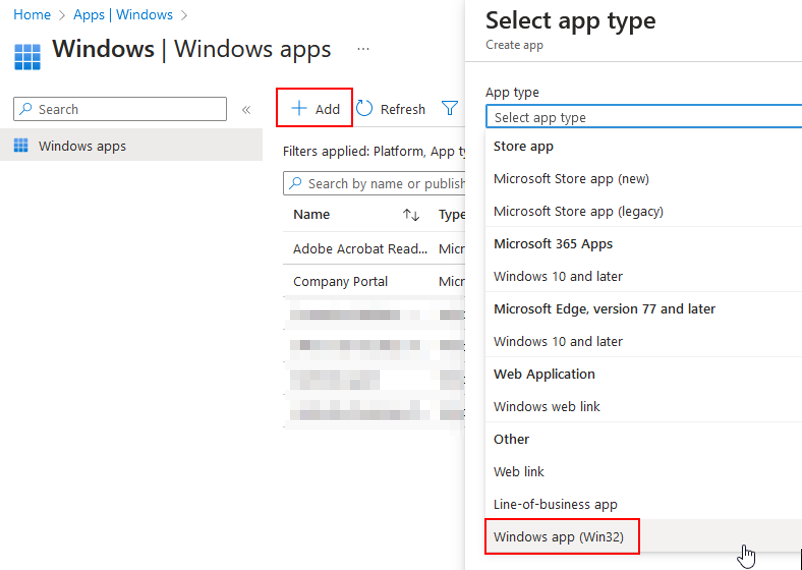
- Sign into Intune (https://intune.microsoft.com). Navigate to Apps > Windows and click the +Add button at the top of the page to create a new app. Select Windows app Win32.
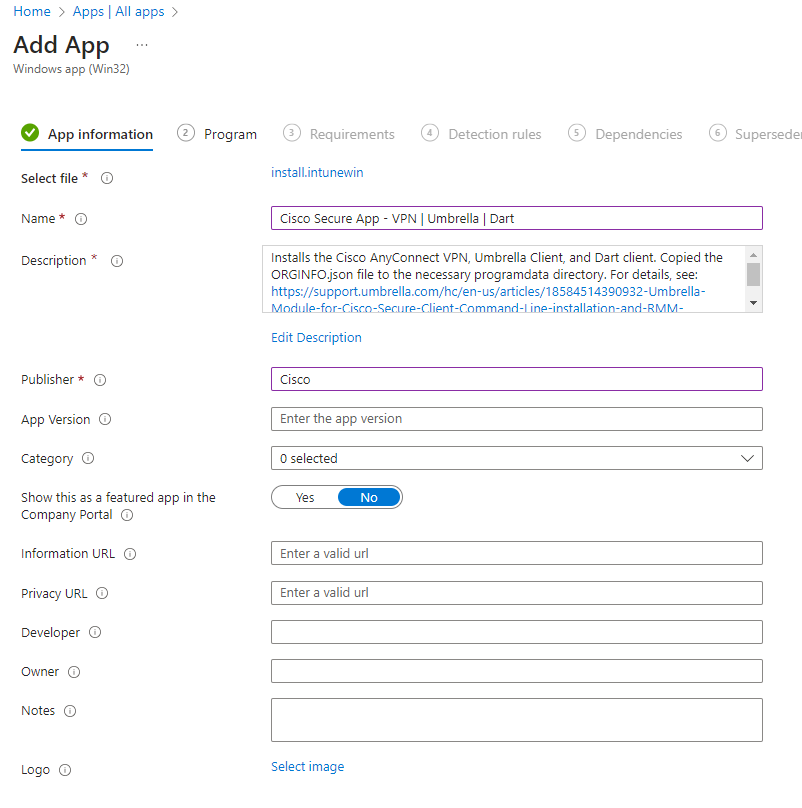
- You’ll be asked to select an app package file. Click the link and select the install.intunewin file we created in step 2. Complete the required information for Name, Description, and Publisher. Click Next when finished.
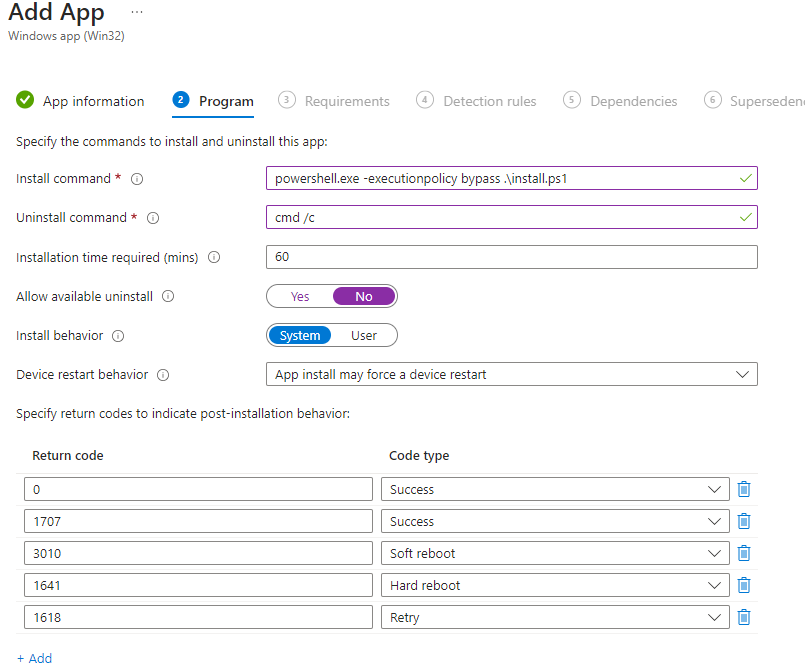
- For the program configuration, use the settings in the screenshot. The install command can be pasted from the string below. When finished, click next to proceed.
- Powershell.exe -executionpolicy bypass .\install.ps1
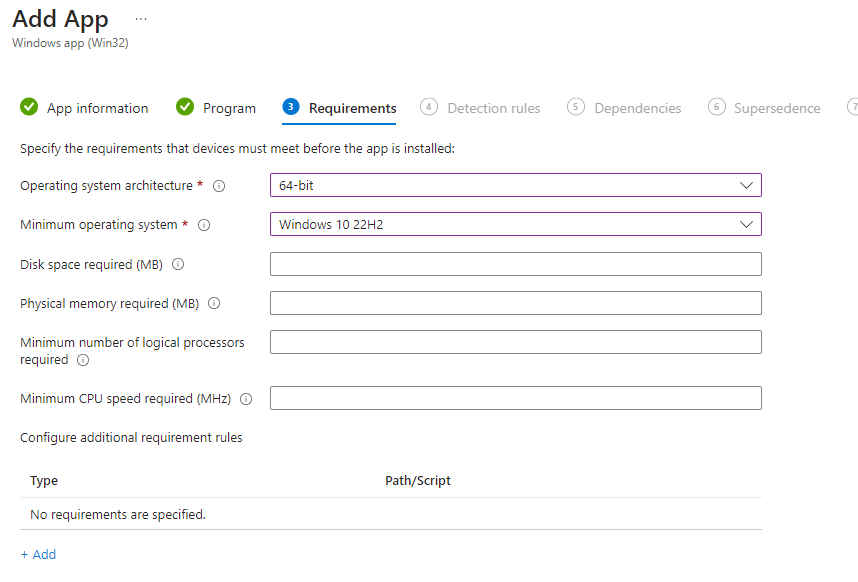
- Under requirements, specify 64-bit architecture, and select a Minimum version of Windows 10. Click next to proceed.
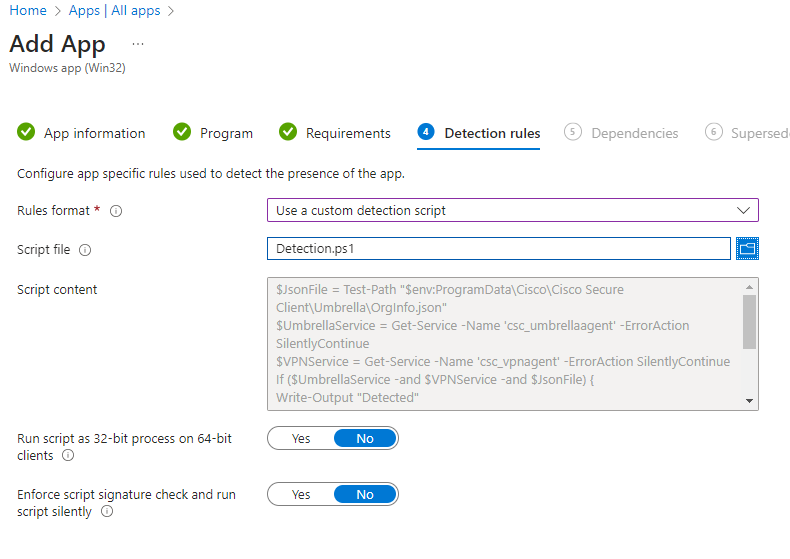
- For the detection rule, select to use a custom detection script. Browse to the detection.ps1 file we downloaded earlier (or available here). It should look like the screenshot:
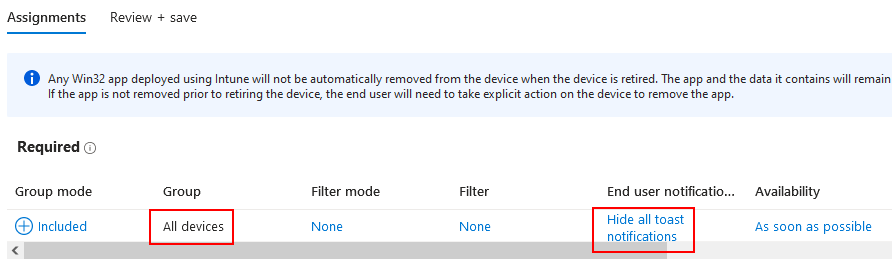
- Proceed through the rest of the sections until we reach the assignments. When you reach assignments, assign to the desired group, which is usually all devices. If this is being deployed to existing devices, you may want to suppress any user notifications by selecting “Hide all toast notifications”. Click Save to complete the app setup.
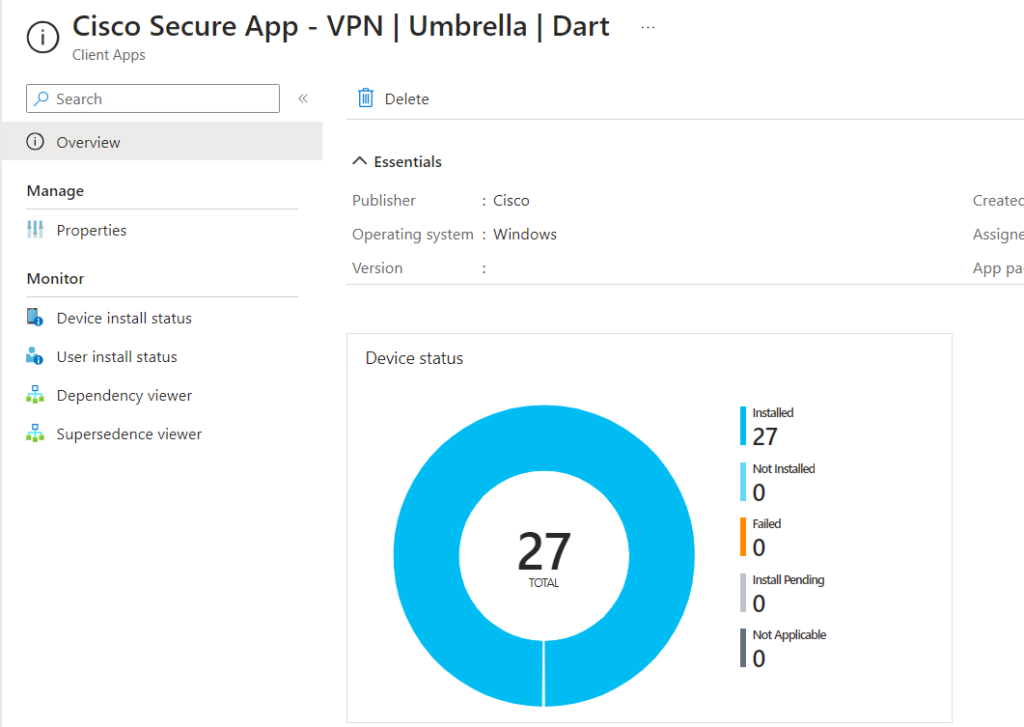
- After an hour or two, you should start seeing some successful installations, and those devices should be properly checking into your Umbrella tenant.
Hi, very nice!
But is there a way to do this on macOS too?
I’m not sure about this. I only have windows customers running Umbrella. I’ll post about it if I need to deploy to macOS.