Last updated on June 16th, 2022 at 02:26 am
I just came across this issue and figured I’d make a post about it. Before I begin, I am mostly anti-windows print server. There are cloud print solutions and ways to connect printers via IP port with intune. If you need to deploy printers via IP port to workstations, use Ben Whitmore’s post – https://msendpointmgr.com/2022/01/03/install-network-printers-intune-win32apps-powershell/. I have used this several times and it’s a great solution. However, if you have a situation where you need to deploy printers from a Windows print server to Intune managed devices, we can accomplish with the below steps.
The situation I ran into:
- On-prem domain and print server being retained in the short term
- Moving away from Hybrid setup, and move towards serverless AzureAD/Intune environment.
- PaperCut running on print server and need the FollowMe printer deployed
- All user identities synchronized with Azure AD Connect
- All new workstations/laptops will be Autopilot AADJ & Intune
In summary, we need AADJ machines connected to the \\printserver\followme printer, and we want to deploy with Intune. Since they are using azure AD connect, their user permissions are honored by on-prem domain resources. A couple additional items for this deployment method to work:
- Azure AD connect must be in use so user identities are synchronized
- Line of sight to the print server is necessary for the printer mapping app to succeed
Implementation
To do this without any user interaction and without loosening security settings, we need to deploy the driver to the workstations first, and then map the printer. We will create two Win32 apps – One that deploys the print driver, and another that connects the shared printer. The second Win32 app will have a dependency on the first app.
Driver Deployment
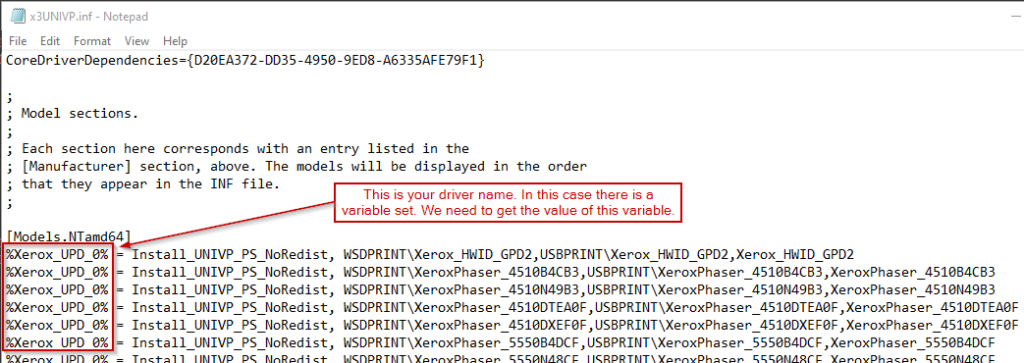
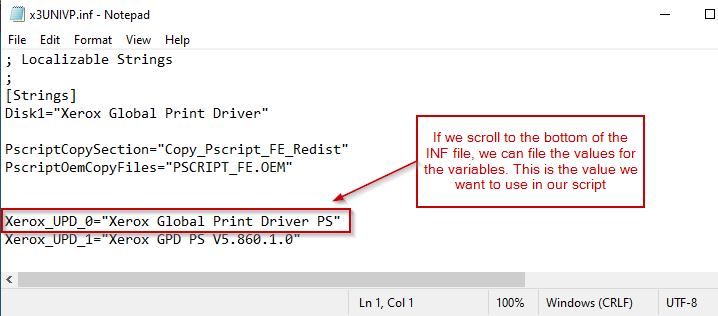
Identify the driver the printer is using on the print server. In this example, it’s a Xerox Global PS driver. Download the driver to your machine, extract, and locate the INF file. Open the INF file and locate the driver name. In this case, the INF has variables configured with the driver names.
Now that we have our driver name. We can edit our script. We will use pnputil.exe to install the driver on our target machines. Note that we are also using c:\windows\sysnative as the path to pnputil.exe. Refer to my other post here if you are not familiar with this. Put the script in the parent folder where you extracted the driver, and then use the path from that directory to the INF file in the script. Change the $drivername variable to your driver name from the INF file. In our example we are using the Xerox Global Print Driver PS. We also have an uninstall script that removes the driver. They’re both available on my github here.
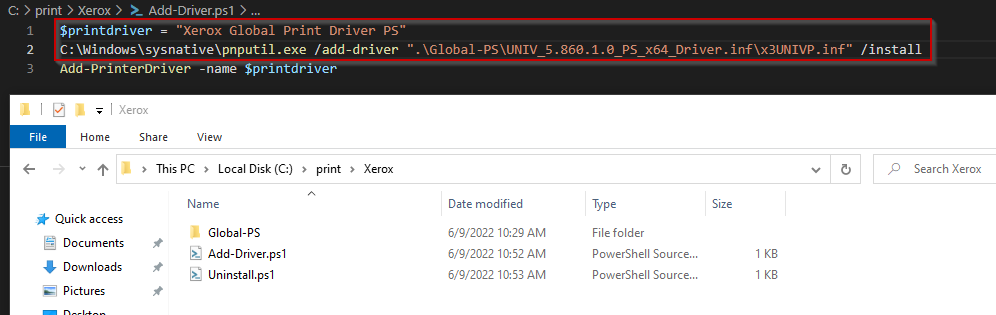

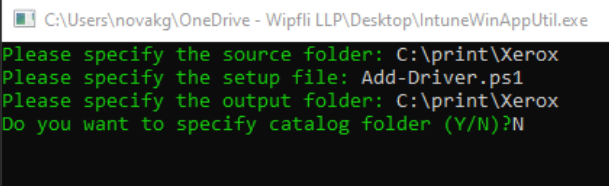
Package the script as a Win32 App with the Add-Driver.ps1 script as our setup file. Make sure you use the parent folder (in this example c:\print\xerox) so we have the driver files contained in our Win32 app package.
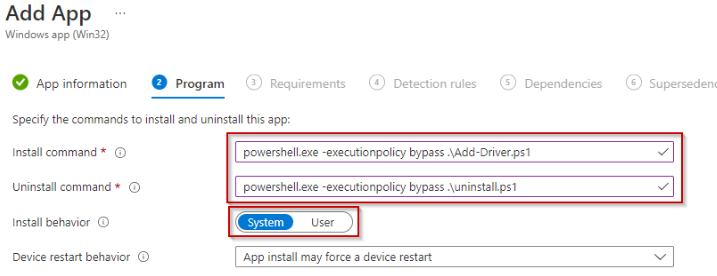
Create a new Win32 application in Endpoint Manager. When we get to the Program section, use settings in the screenshot below. Make sure install behavior is system and make your install/uninstall commands like this:
- powershell.exe -executionpolicy bypass .\Add-Driver.ps1
- powershell.exe -executionpolicy bypass .\uninstall.ps1
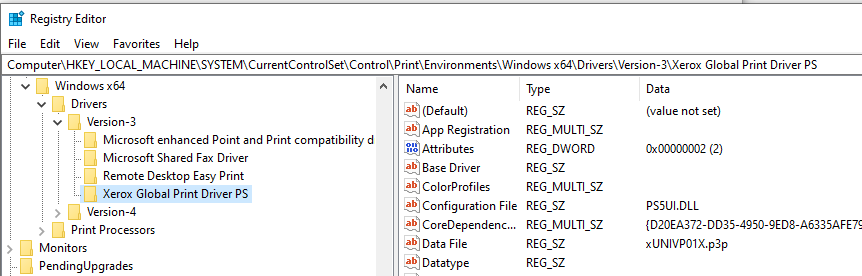
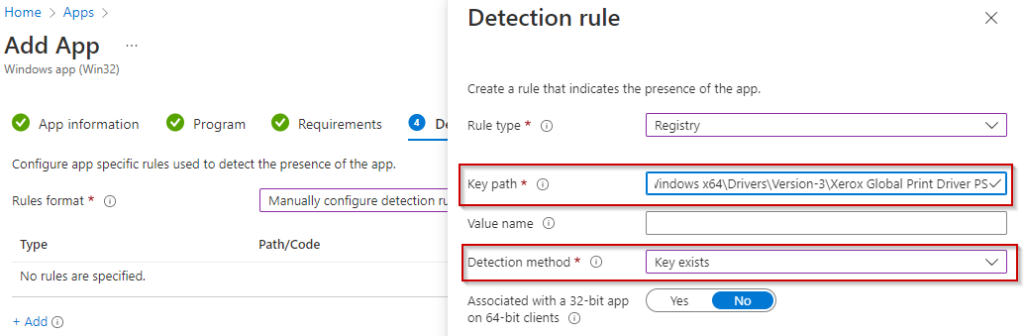
Complete your requirements and create the detection rule below using your driver name. If you are using a version-4 driver, you will have to modify your path. The detection method is for “Key Exists”
Computer\HKEY_LOCAL_MACHINE\SYSTEM\CurrentControlSet\Control\Print\Environments\Windows x64\Drivers\Version-3\Xerox Global Print Driver PS
Complete the rest of the Win32 app creation, and assign to your target machines. Successful deployments should start populating.
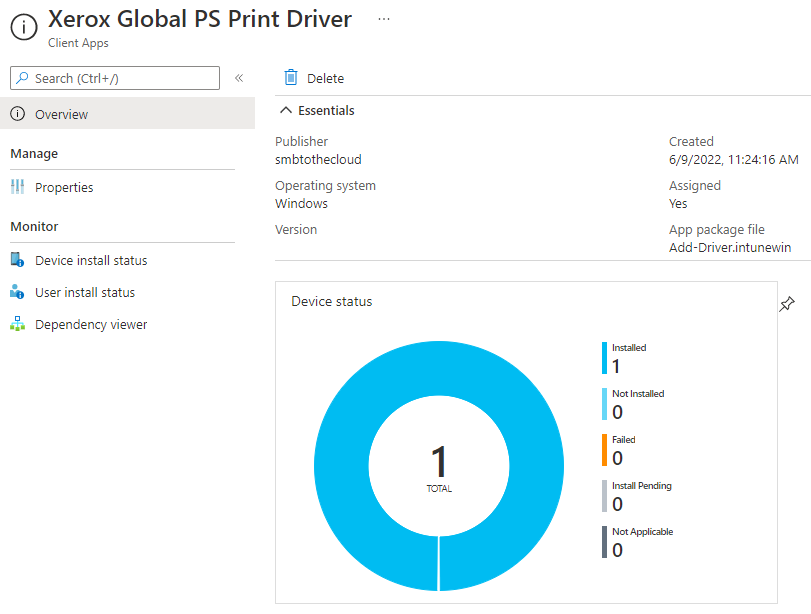
Printer deployment
The printer deployment script is simple. We have simple install and uninstall scripts below that can be found in the github link posted earlier.


Package these into a Win32 app, and specify the mapsharedprinter.ps1 as the install file.
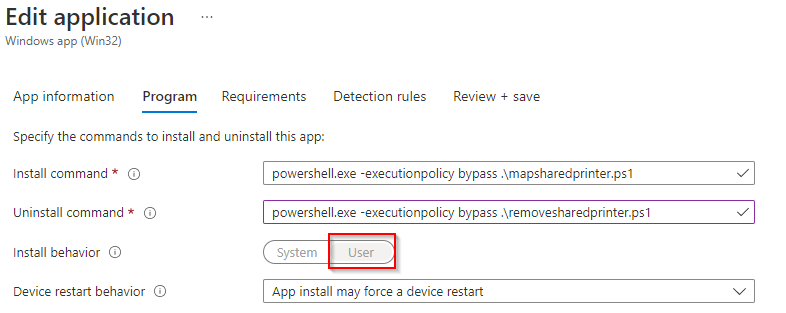
Create a new new Win32 app and specify install/uninstall commands like below. Make sure the install behavior for this is set to USER.
powershell.exe -executionpolicy bypass .\mapsharedprinter.ps1
powershell.exe -executionpolicy bypass .\removesharedprinter.ps1
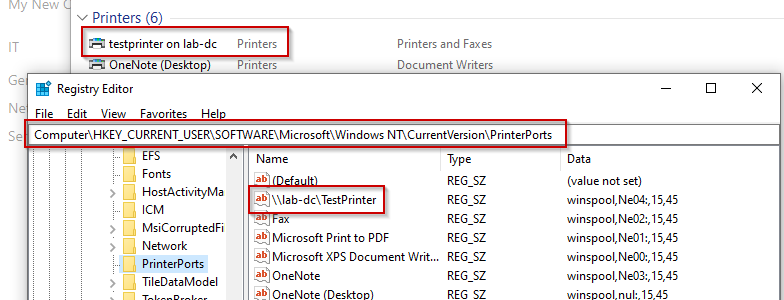
For our detection rule, we will use the registry key and value below, where the value is the full name of the printer:
HKEY_CURRENT_USER\SOFTWARE\Microsoft\Windows NT\CurrentVersion\PrinterPorts
Value = \\server\printer

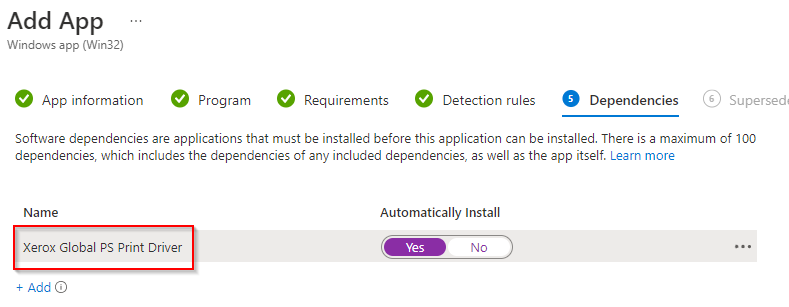
Lastly, we will make this app have a dependency on our previous driver install app.
Assign to your target groups and wait for the printer to show up! Here is a test printer I deployed in my lab environment: