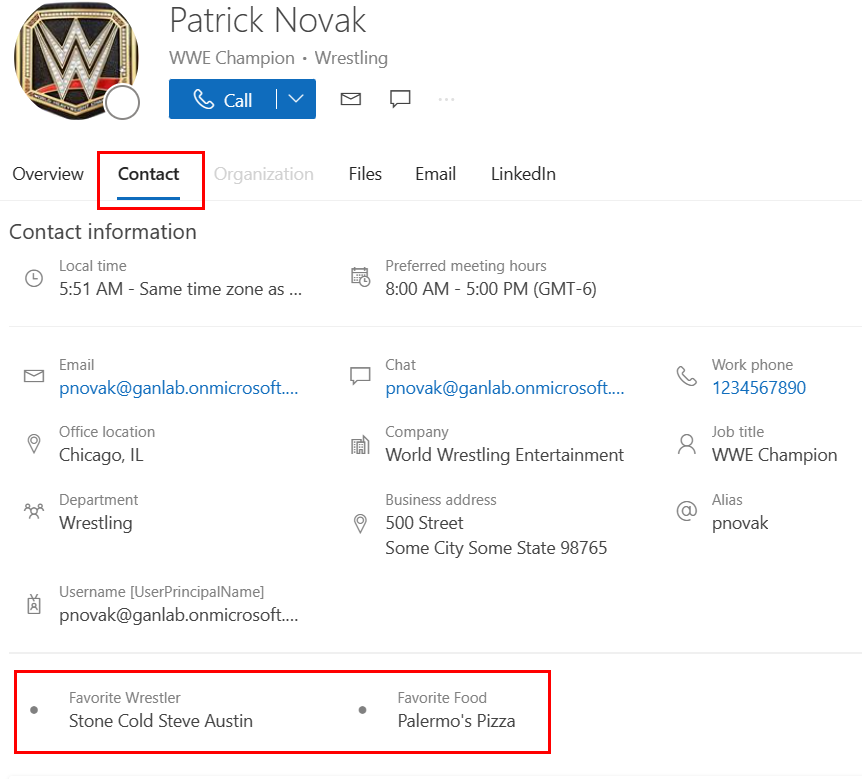
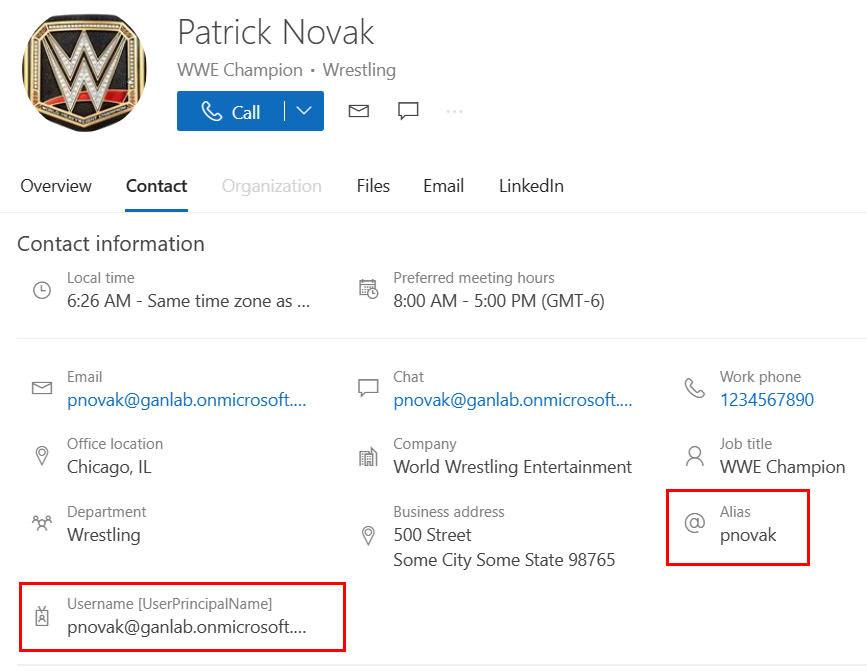
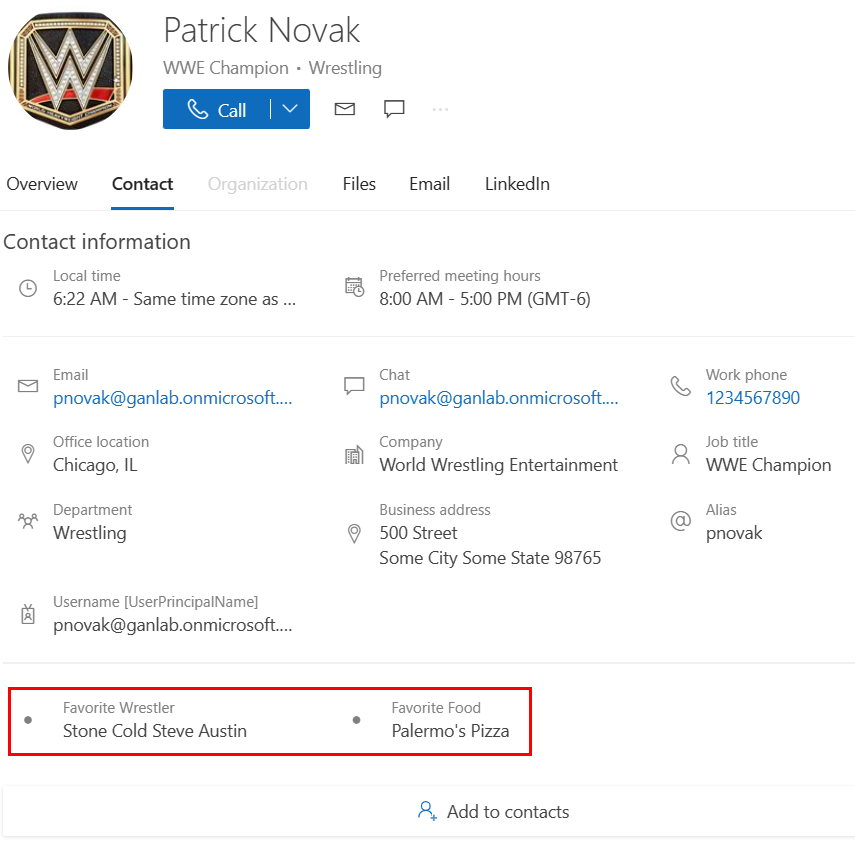
I came across an interesting Microsoft learn page about using custom attributes on a user’s profile card a couple of weeks ago and did some testing. I felt the MS Learn article was a bit confusing, so I made this post to help clarify some things. Extension Attributes are essentially custom values you can add to your users. This can be very useful for things like adding/excluding specific subsets of users from dynamic groups for Intune policy/profile/application deployments. Additionally, we can customize information on user contact cards. An example with some custom fields is below for my Favorite Wrestler and Favorite Food:
Adding existing supported AAD attributes:
So, how do you add these custom fields? We first need to add them to out organization’s Profile Card Properties via graph API. Microsoft allows you to add a few objects that are already pre-configured if you’d like. For example, you can add the user’s Alias or UPN. These are simple adds that already have corresponding values in Azure AD. A complete list of these can be found here. Navigate to the Graph Explorer and authenticate. Make sure you have your tenant ID recorded, also. Select Post, and enter the below string in the request field, replacing TENANT-ID with your AAD tenant ID:
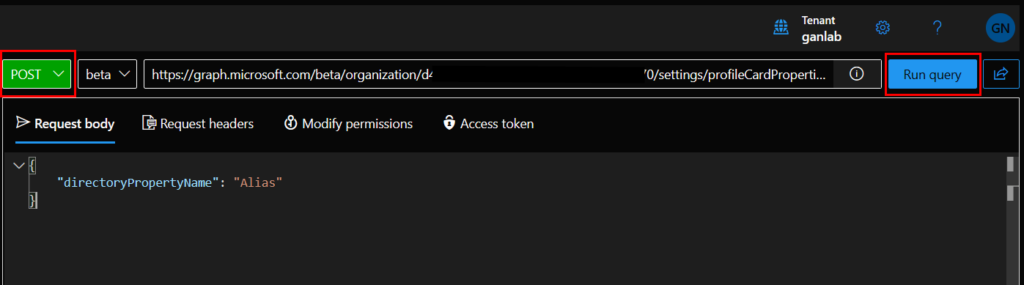
https://graph.microsoft.com/beta/organization/TENANT-ID/settings/profileCardPropertiesIn the request Body enter the AAD attribute from this link you want to be visible on your profile cards. In this example, we will use Alias:
{
    "directoryPropertyName": "Alias"
}
Your whole request should look like the below image. Click Run Query to add the attribute to the profile card:
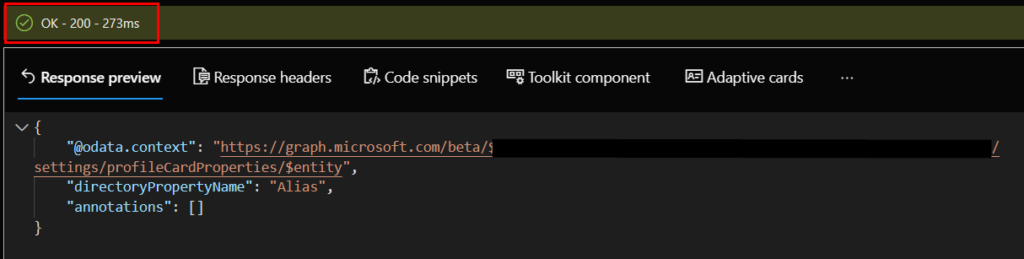
If all goes well, you’ll see a response similar to this:
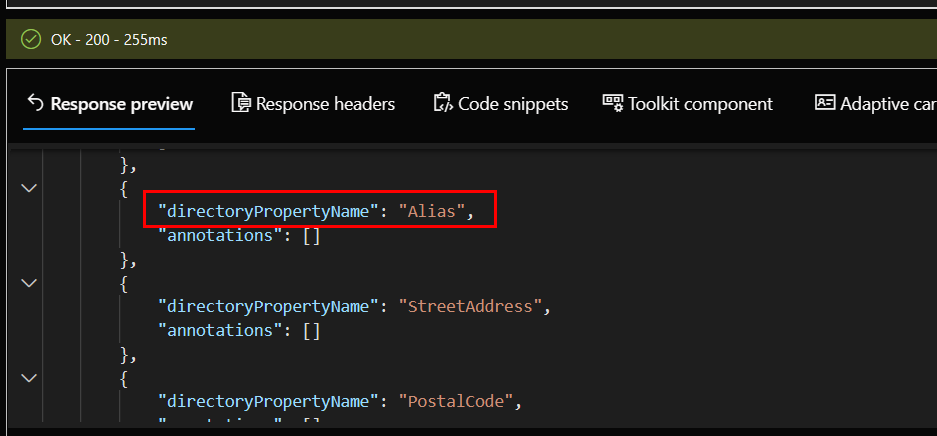
Next, let’s check to see if the value was properly added. If we change our request to GET, using the same request string, we can view all properties of our profile cards:

And in the results, we can see Alias is listed:
As noted in the MS learn document These changes can take up to 24 hours before they take effect. I can tell you, everytime I did this and changed something, I literally waited almost 24 hours before the change was reflected. So, be patient and just wait until the next day before checking. Here we can see our Alias attribute for our users. I also added UPN following the same method as above:
Adding your own custom attributes and values
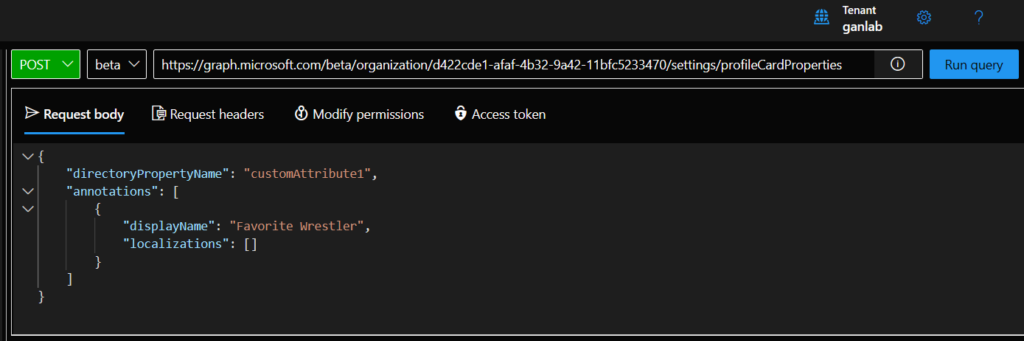
Adding existing attributes is easy. But what if we wanted to add our own custom fields? Such as, Favorite WWE Wrestler and Favorite Food? It follows the same method, but we also need to add custom attributes to our user accounts. If we reference this section of the MS learn document, we can see that the Azure AD custom extension attribute values can be referenced by the directoryPropertyName “customAttribute#”. This gets slightly confusing because you assign a name to be displayed on the profile card for CustomAttribute1. For my example, this will be Favorite Wrestler. Then, the user’s extensionattribute1 VALUE, will be their favorite Wrestler since extensionattribute1 is mapped to customattribute1. Let’s make sense of it by adding one. Go back to the graph explorer and use the same string for the request field we used previously. The only change will be our request body, which will use this:
{
    "directoryPropertyName": "customAttribute1",
    "annotations": [
        {
            "displayName": "Favorite Wrestler",
            "localizations": []
        }
    ]
}
The complete request looks like this in Graph Explorer:
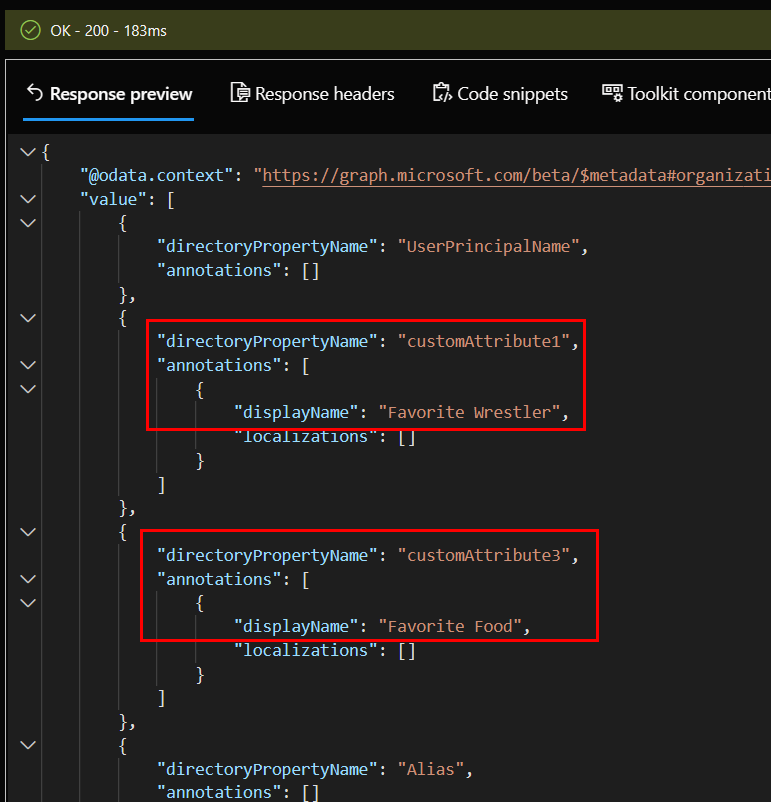
Run the query. I also added customAttribute3 for Favorite Food. When finished, delete everything in the request body, change the method to GET, and run the query again so we can see if our customAttributes were added to the profile card. You should see customAttribute1 and customAttribute3 with the displaynames you entered:
Now that we have those fields identified we need values entered to the corresponding ExtensionAttribute1 and ExtensionAttribute3 fields for our users. If your user identities are cloud managed, this is very easy. I’ll touch on identities synced with AD Connect after this section. For now, we will focus on AAD managed identities. We have four ways to add extension attributes to users. I’ll cover them in order from slowest to fastest.
The slowest method – Add via Graph Explorer Manually
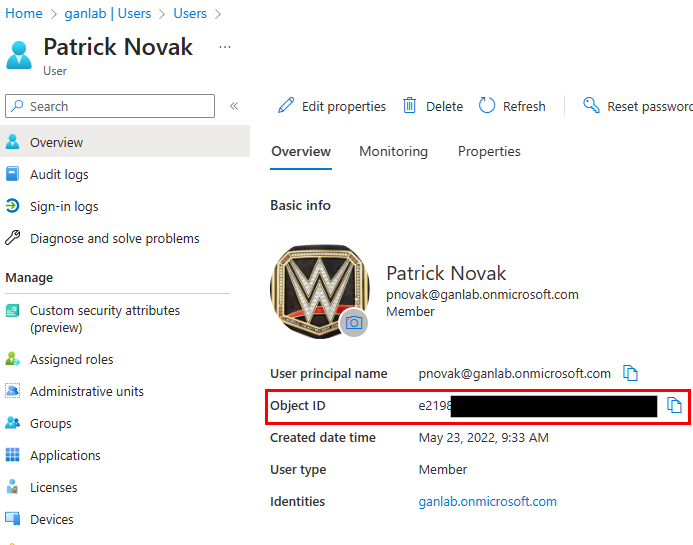
We can add these attributes through the Graph Explorer, but I don’t recommend this unless you only have a few users you’re doing this for. First, we need to get the user’s Object ID. You can grab this from the Azure AD user’s overview, or from the Graph Explorer:
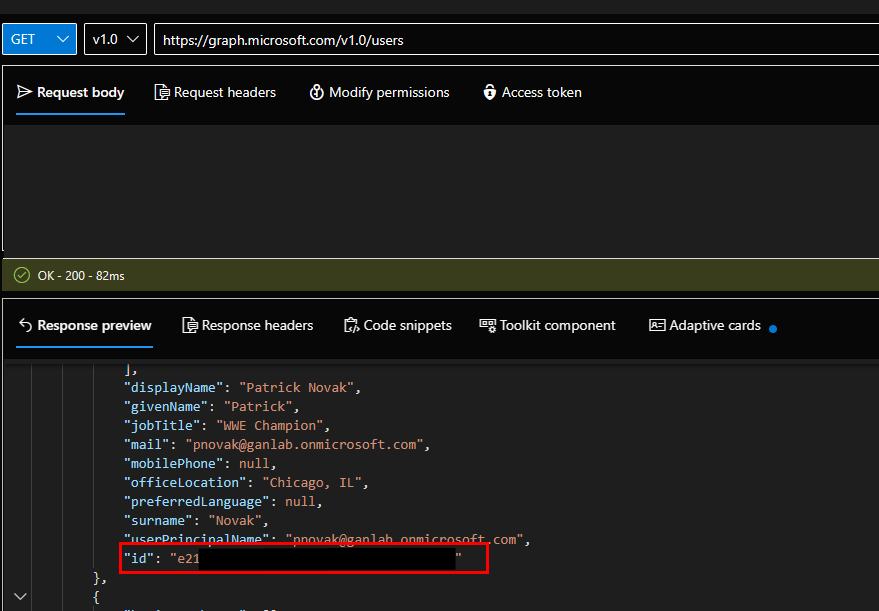
Once you have the user’s ObjectID, we can use a PATCH request with the request field:
https://graph.microsoft.com/v1.0/users/OBJECT-IDAnd the request body:
{
    "onPremisesExtensionAttributes": {
        "extensionAttribute1": "Stone Cold Steve Austin",
        "extensionAttribute3": "Palermos Pizza"
    }
}
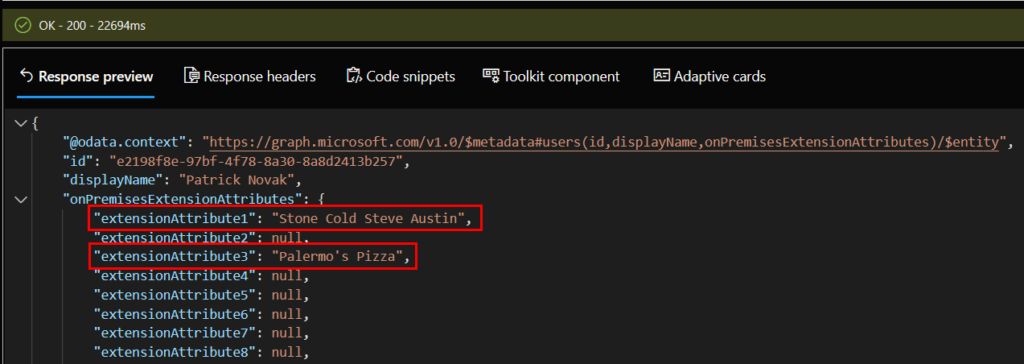
And to make sure it worked, we can change out request to GET, and use this as our request, replacing OJECT-ID with the user’s ObjectID:
https://graph.microsoft.com/v1.0/users/OBJECT-ID?$select=id,displayName,onPremisesExtensionAttributesIf you wanted to get the extentionattributes for all users, you could use this:
https://graph.microsoft.com/v1.0/users?$select=id,displayName,onPremisesExtensionAttributesHere we can see the two attributes we just added, but remember they’ll take up to a day before they show on the user contact card.
The next day, we can see out attributes on the contact card:
Another slow method – Adding from EAC
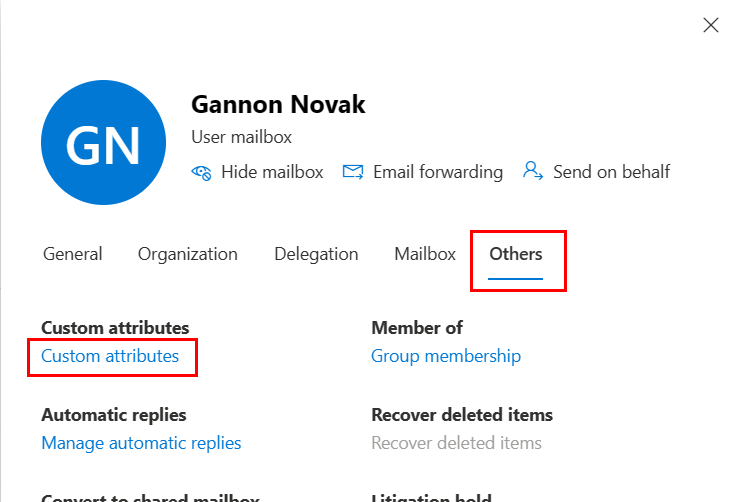
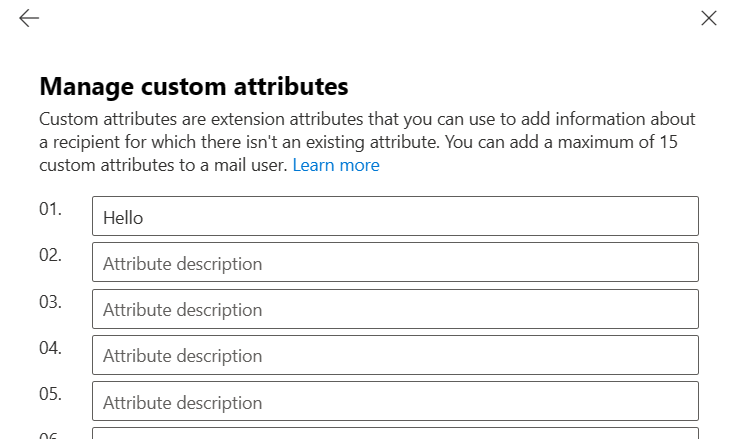
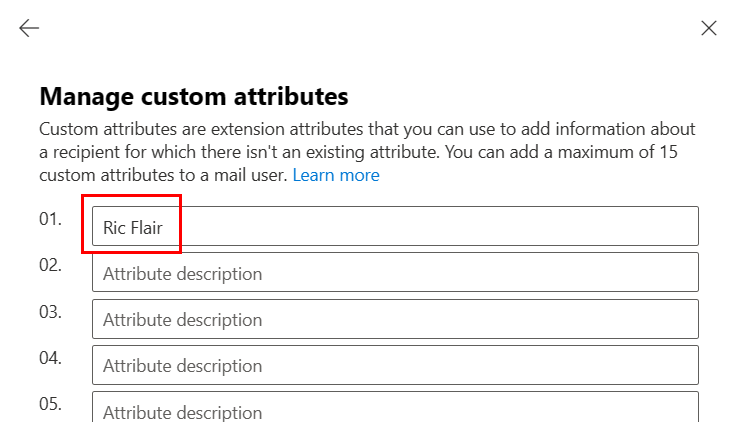
If you didn’t already know, these attributes are originally part of the Exchange AD extended schema. The Extension attributes can be viewed in Azure AD, but if you want to manually add them through the M365 GUI, you need to use the Exchange Admin Center. Sign into admin.microsoft.com and open the exchange Admin center. Select Recipients > Mailboxes and select one of your users. Navigate to the Others tab, and select custom attributes:
Here you can manually add values for the 15 extensionattributes:
A faster method – Importing from a CSV
Again, this only applied for cloud native identities (non-AD synced users). If you happen to already have the values for your users, you can easily import them with a CSV file. You’ll want your CSV formatted like this:
| identity | customattribute1 | customattribute2 | customattribute3 | customattribute4 | customattribute5 |
| draye | Mankind | Pizza | |||
| gpnovak | The Rock | Spaghetti | |||
| jnovak | Triple H | Hot Dogs | |||
| saustin | Undertaker | Cake |
And the PowerShell script that will do the heavy lifting in the background:
Connect-ExchangeOnline
Import-CSV c:\temp\attributes.csv | ForEach-Object {
Set-Mailbox -Identity $_.Identity -CustomAttribute1 $_.CustomAttribute1 -CustomAttribute2 $_.CustomAttribute2
    }
If you wanted to clear the attribute values using PowerShell, you’ll want to specify the value for an attribute as “$null”
An automated Method – Microsoft Form + Power Automate
Let’s say you have thousands of users. Or perhaps your client or business is in an industry where there is a lot of employee turnover where users are being offboarded/onboarded multiple times per month. Or maybe you just don’t want to worry about doing any manual work to get these attribute values added. Whatever your case may be, this is definitely the most hands-off approach. One more thing to remember – this method will only work for Azure AD Cloud identities. We will touch on synchronized Hybrid user identities after this section.
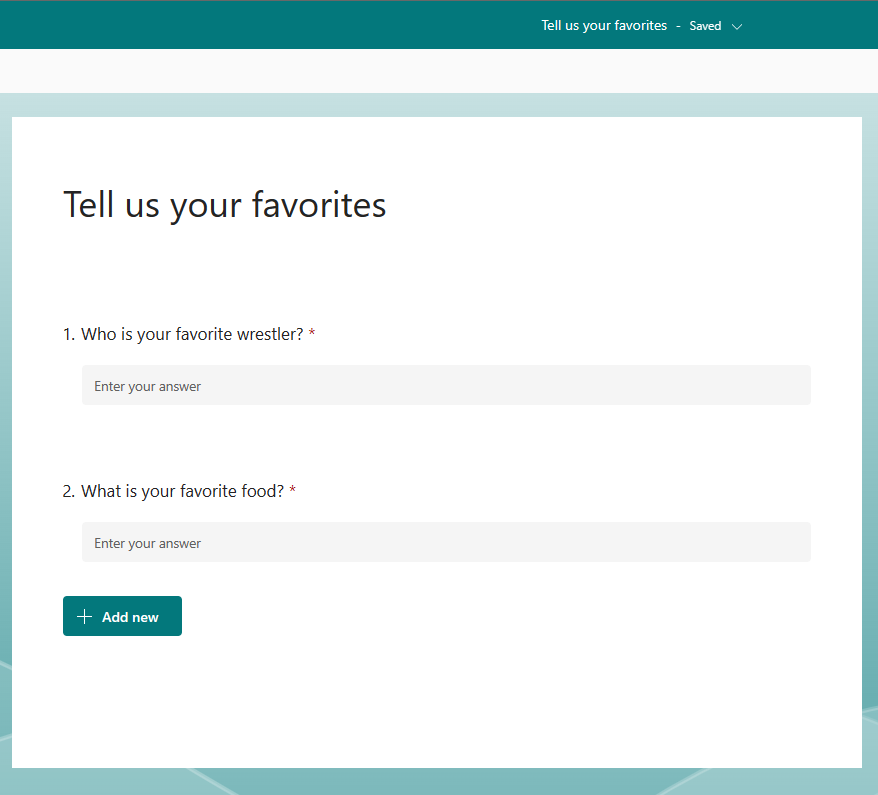
First, we need to make a simple Microsoft Form. Customize this to your liking, but I’ll stick with what I’ve been using as Favorite Wrestler and Favorite Food. Creating a Form is simple, open Forms from portal.office.com, and make a new Form. Fill in your questions and give the form a name. Here’s mine:
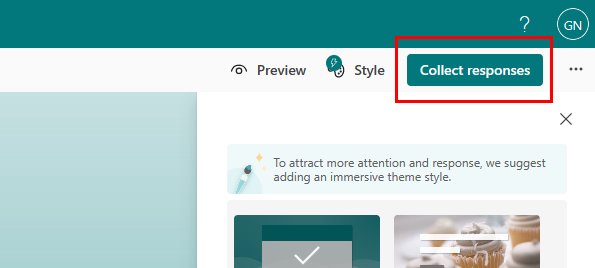
When you’re finished, click the collect responses button in the top right of the Window to get your URL and share it with your users:
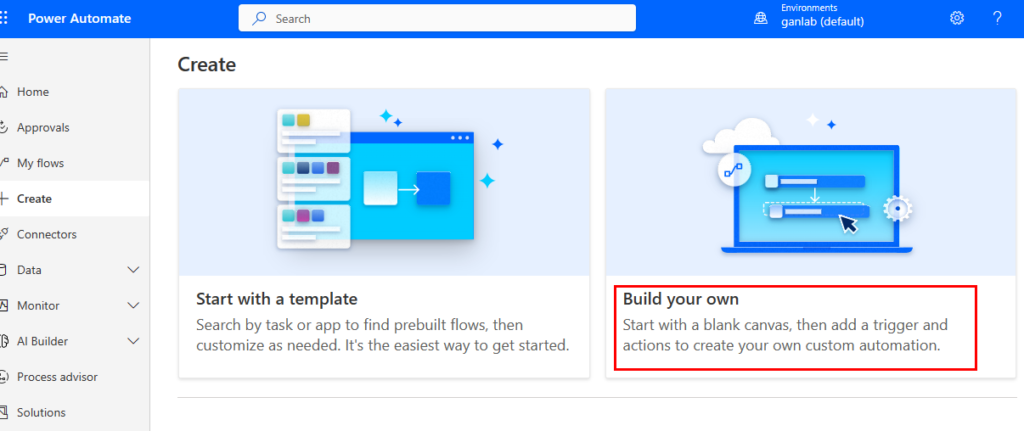
Before you share this with your users, we need to make our Power Automate Flow. Open Power Automate from your browser and create a new flow. Select build your own.
We need to do three things with our flow – Trigger the flow when a response is submitted, Get the responses from the form, and update the user in Azure AD with their response values. Here are our first two steps. Add these two steps to begin and select the form you created earlier in the Form ID field:

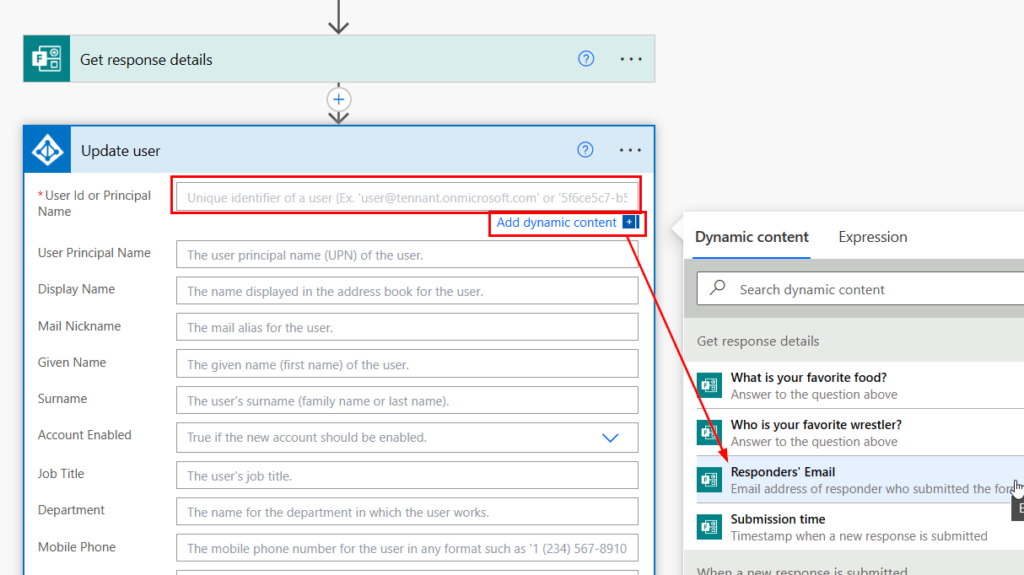
Next, we need to add a step for “Azure AD Update User”. For the User ID or UPN, we will use the responders’ email from our Form (this should be your UPN).
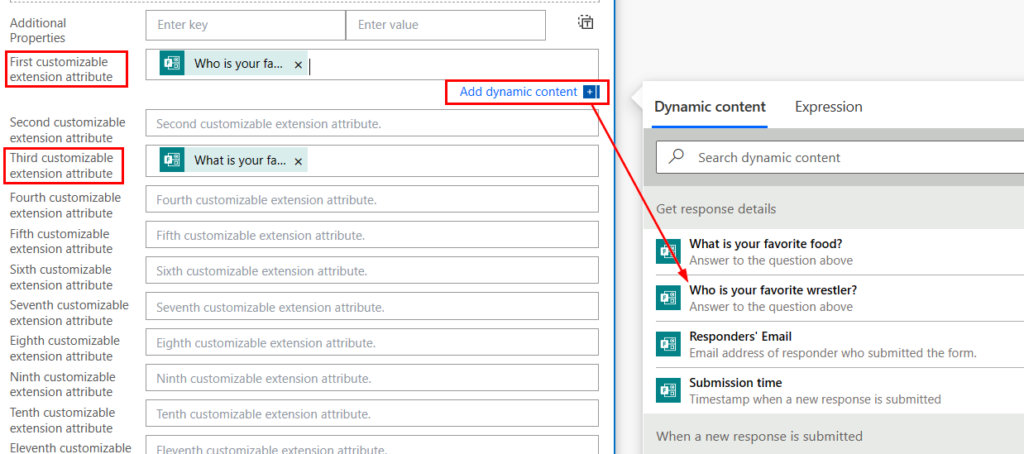
Scroll down in the Update user properties step and find the “customizable extension attributes”. Add the responses to your extension attribute fields that correspond to the contact card categories. For this example, attribute1 is Favorite wrestler and attribute3 is favorite food:
If you click Test, we can test the flow and complete the form with a test user to verify it’s working properly. Here is an example with a test user, and you can see the Flow is successful, and the attributes are added to the user in Azure AD:
That wraps up how to customize your user contact cards with custom fields, and a few ways to get those values added. However, those methods only work for cloud-managed identities. If you’re still syncing users from on-prem AD, and you previously used on-prem exchange, your AD Schema is already extended for Exchange, and these attributes will exist for your users.
Adding Extension Attribute values with Active Directory
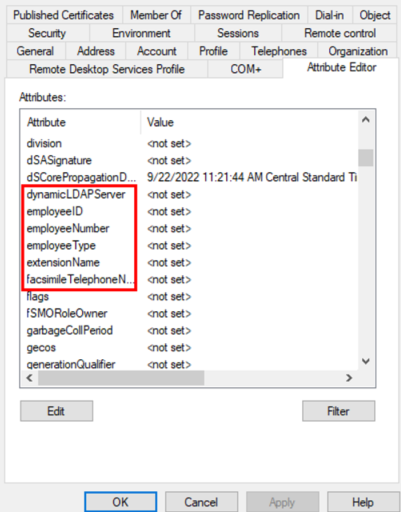
If you have never had on-prem exchange, these attributes likely don’t exist in your AD environment. Your user attributes probably look like the screenshot below with no extensionattributes. If you don’t have these attributes, we first need to add them to our AD schema. Here’s an example of AD with no extensionattributes:
However, if we open Azure AD Connect’s synchronization service, we can see the 15 extensionattributes as attributes to sync:
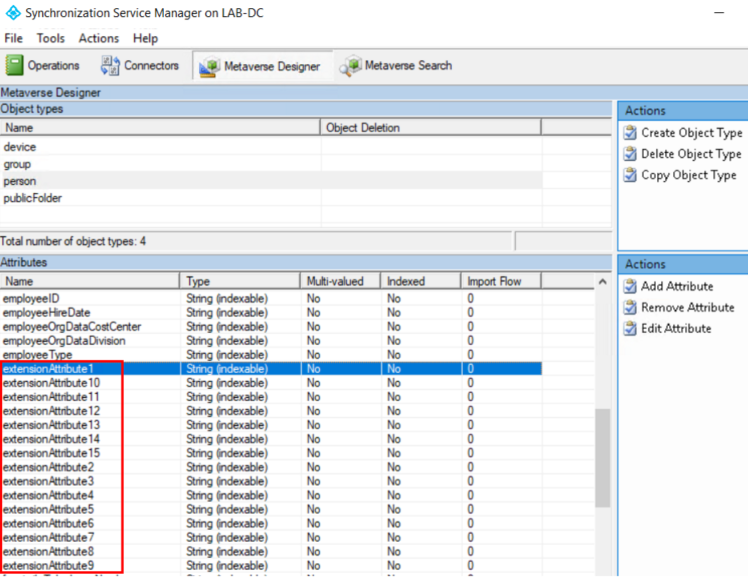
So, how to do we add them? We have two options. First, we can manually add the desired extensionAttributes. The second option is to use an Exchange .iso and extend the AD schema to include all Exchange Attributes.
Manually Adding Extension Attributes to AD
I should warn you that to my knowledge, there is no way to manually delete an attribute from AD. So, if you start down this road and add extensionattribute1, there will be no way for you to remove it and then extend the Schema for Exchange. It will fail because that attribute already exists. Also, this is comparable to editing your registry. I recommend you have good backups in place just in the event something goes wrong. Now that you’ve been warned, let’s start.
Since I had never added a custom attribute, I followed this simple guide by Surender Kumar. No need for me to go into detail here since Surender covers all of this in his post, so use the link and follow the instructions. It’s basically a two-step process. Generate a unique OID for the attribute, and edit the script he provides to add “extensionattribute1” and any others you want to add. When you’re finished, you’ll see the extensionattribute fields in AD like the below screenshot. You’ll need to manually add each extensionAttribute number you want to exist..
You’ll also notice that even though you’ve added the extensionAttribute, and you’ve run a Delta Sync, the value isn’t syncing. There is one additional step we need to do. Open Azure AD Connect and Refresh the directory schema:
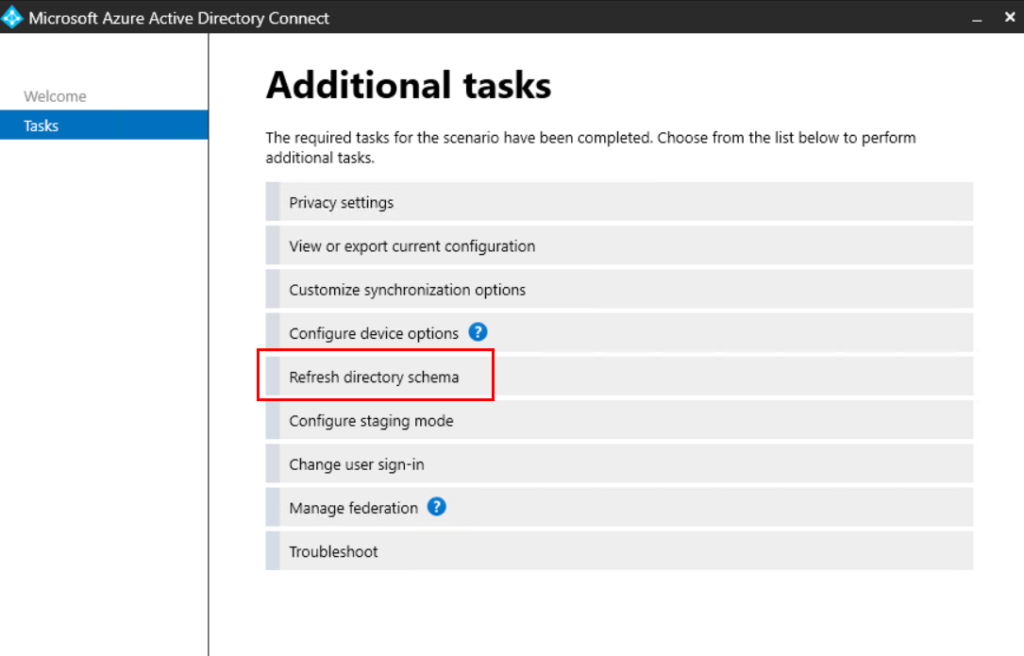
After refreshing the directory schema, run another Delta Sync and you’ll see your attribute is now syncing to Azure AD:
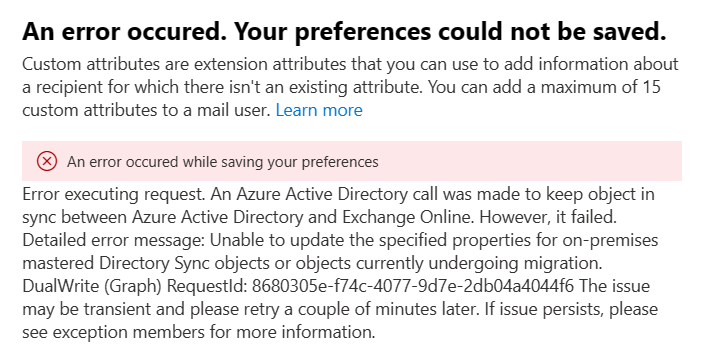
And if I try adding or deleting a synced user’s attributes from EAC, I get an error since the object is synced from AD:
Extend AD Schema to include Exchange Attributes
This is actually rather simple. Download the ISO for Exchange here. Mount the ISO, and open a command or PowerShell terminal. Navigate to the directory of the mounted iso, and issue the below command:
setup.exe /PrepareSchema /IAcceptExchangeServerLicenseTerms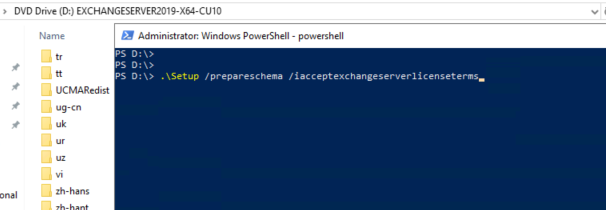
This will not install exchange, but it will extend the AD Schema to include all Exchange attributes. When complete, you’ll have all 15 extensionAttributes in addition to all other attributes added by Exchange. Also, don’t forget to open AD Connect and Refresh the Directory Schema as we did in the previous section.
How else this be useful – Dynamic Groups
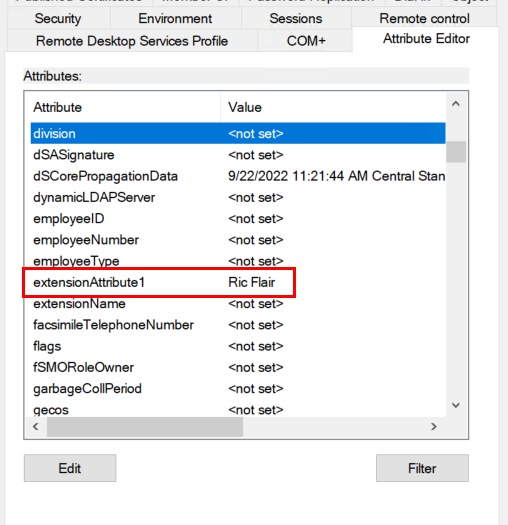
If you did not know, we can also use extensionAttributes to create dynamic groups. This may be extra useful if you need to make a custom dynamic user group for things like Intune app deployments, profiles, or security policies. Here is a dynamic group query at its most basic form:
(user.extensionAttribute1 -eq "Ric Flair")You can also use these to exclude or include members from a more complex dynamic group. Here is an example for all enabled users with an Intune license. We will exclude any user who has Ric Flair set for extensionAttribute1:
(user.assignedPlans -any (assignedPlan.servicePlanId -eq "c1ec4a95-1f05-45b3-a911-aa3fa01094f5" -and assignedPlan.capabilityStatus -eq "Enabled")) -and (user.extensionAttribute1 -ne "Ric Flair")If we validate the rules, we can see the user with Ric Flair set to extensionAttribute1 is excluded from the group even though they have an Intune license assigned:

That’s all. Hope this helps!