Teams is my go-to collaboration application, but the popularity of Zoom makes it a necessary app for many organizations. If you have clients using AVD or Windows 365 personal desktops, there is a specific VDI installer for Zoom so your users get the best possible experience. The way Zoom VDI works is pretty neat. The Zoom VDI client gets installed on your VDI solution (AVD hosts or Windows 365 Virtual PC), but that’s not all it requires. There is also a Zoom media plugin that should be installed on the local device making the connection to the VDI session. In this demonstration it will be a Windows PC, but there are plugins for a variety of platforms. The plugin works with the VDI installation to negotiate the most optimal paths to the Zoom servers using resources on the local node and the VDI host. When working as expected, the video/audio encoding and decoding happens locally (not using VDI resources) and is sent directly from the local device to Zoom. Other information, such as your authentication to the Zoom client, is all performed at the VDI level. In Zoom’s own words:
The VDI Client supports three different connection modes with the Zoom meeting infrastructure. The most common mode is the Direct Optimized experience, where both the VDI Client and plugin establish unique connections to Zoom and independently render their own portion of a Zoom meeting for a seamless experience.
The VDI Client is also capable of working in alternative connection modes — UDP/Channel Optimized, and Fallback Mode — to fit varying workflow or security needs.
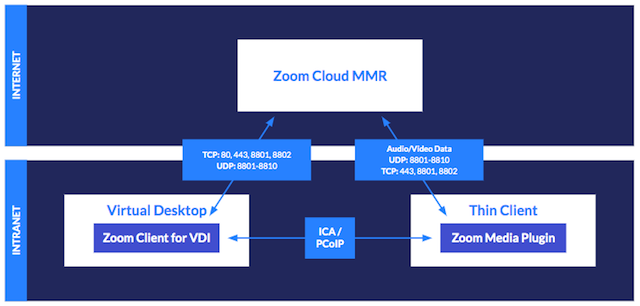
How Zoom VDI is optimized:
In the most optimal case, the media plugin will offload video encoding and decoding and communicate over the network directly to the Zoom cloud, bypassing the VDI infrastructure. Control information such as authentication and window location is always sent over the VDI channel.
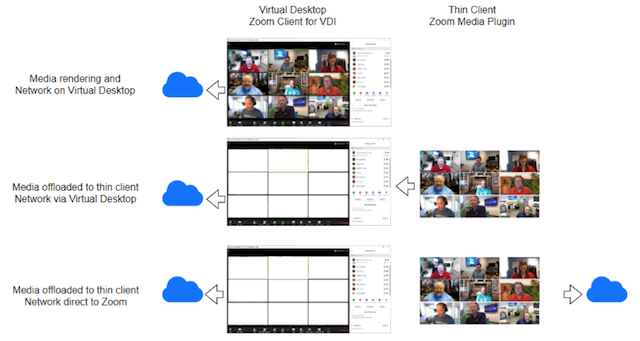
The optimal method is below, where the media plugin performs the audio and video tasks and sends them direct to the Zoom cloud:
One quick note – Zoom VDI is not compatible as a remote application. The user must be using a full session desktop for this to function properly. Now that we understand the importance of the plugin and how it works with the VDI installation, lets walk through the installation process.
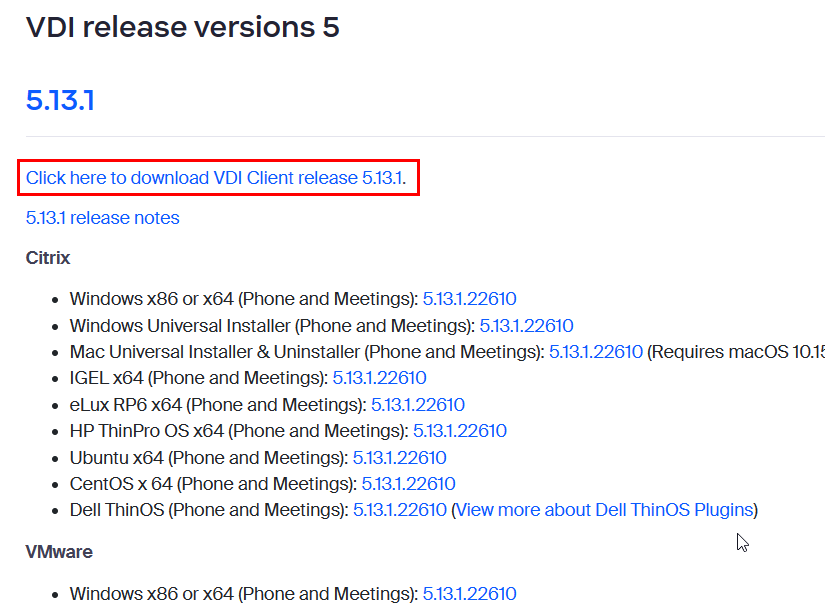
- Install the VDI client host installer (.MSI) on AVD host. This can be downloaded from Zoom here – VDI releases and downloads – Zoom Support.
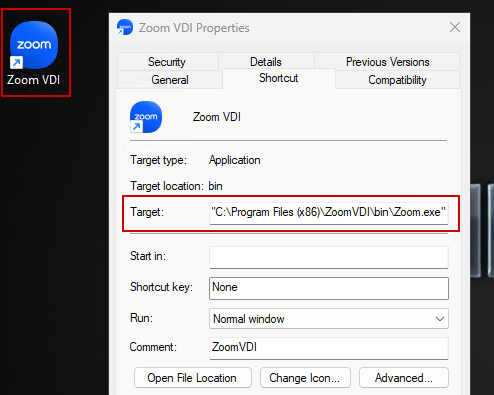
Run the installer on your AVD session hosts or Windows 365 virtual desktop. You’ll notice a desktop Icon labeled “Zoom VDI” when completed:
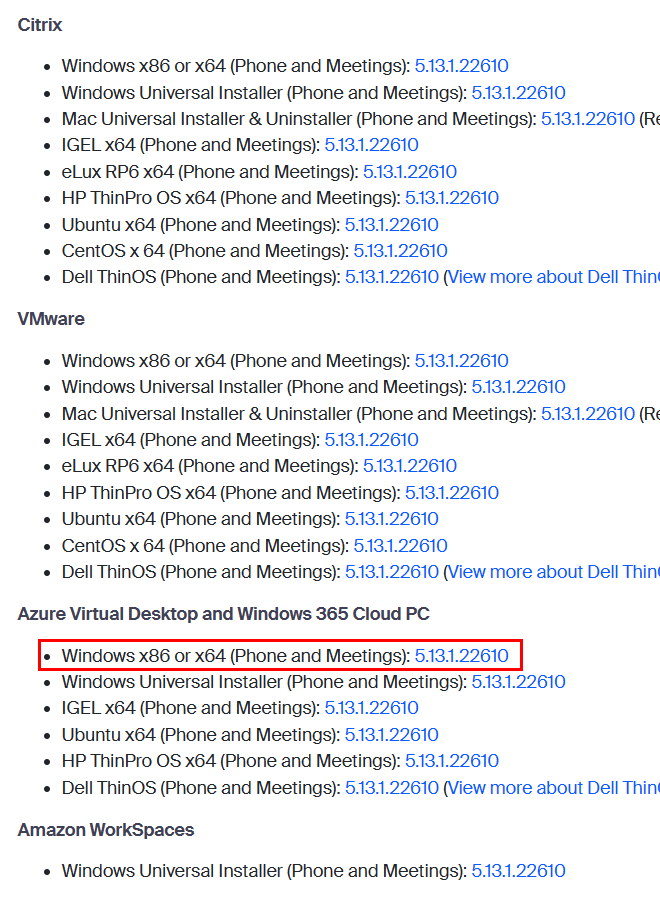
Next, we need to install the Zoom media plugin on our devices being used to access our AVD/W365 desktop. In this example, it’s a Windows device. However, Zoom provides plugins for almost every platform out there. At writing, here are all the supported platforms with the Windows version highlighted:
Install the plugin on your local device. The install is quick and you can see an entry for the plugin in your installed programs when completed:

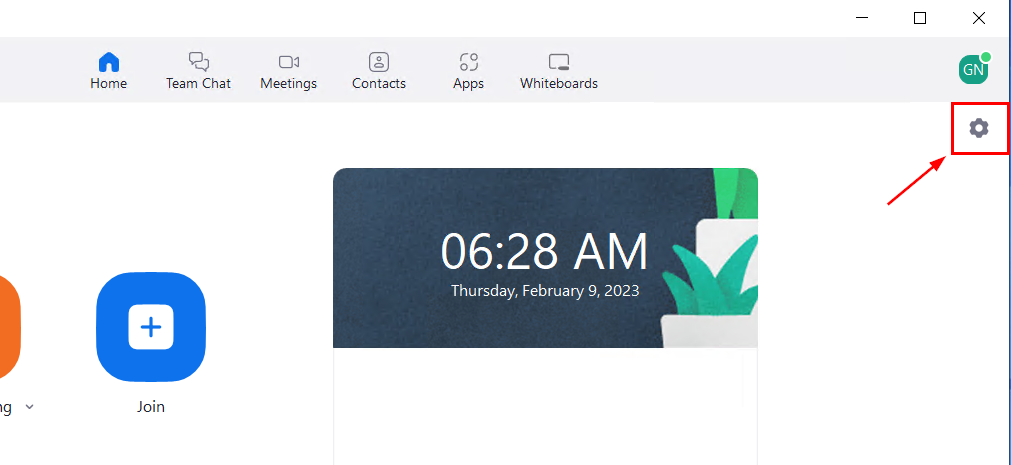
After Installing the plugin and host installer, sign in on your VDI session, launch zoom and select settings:
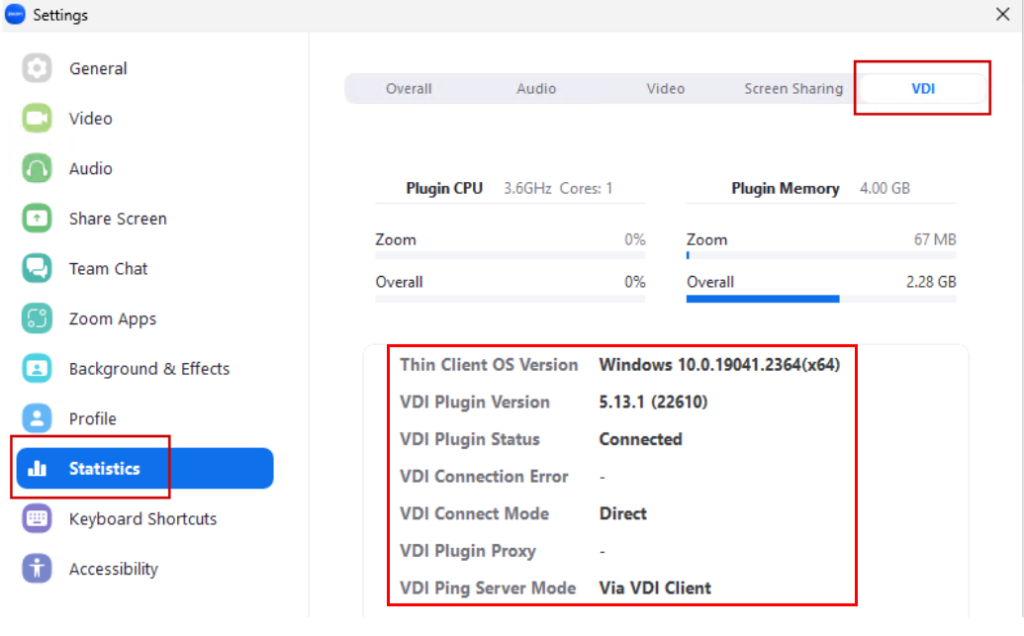
If all is working properly, you should have a VDI tab under statistics (the VDI tab only shows if Zoom VDI is installed). If the plugin is properly installed and detected on your local device, you can see details of the plugin connection to the VDI application:
Zoom VDI if you connect to your VDI from a device without the plugin installed:

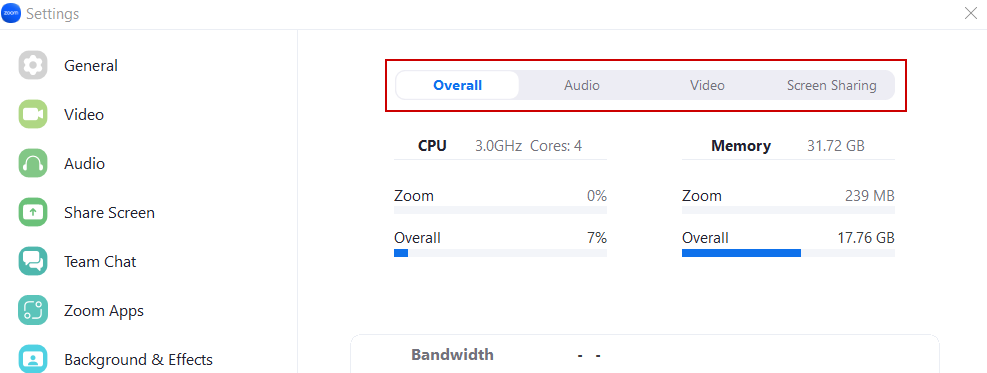
For comparison, with a typical Zoom (non-VDI) installation, you won’t see the VDI tab:
That’s all. When everything if functioning properly with the VDI install and plugin, no one will ever know the difference if they’re using Zoom through AVD/W365 or a local device.