If you’re reading this, you probably know what Azure Site Recovery is (ASR). At a high level, ASR is a disaster recovery solution that replicates workloads on your Azure VMs or Physical on-prem servers to a secondary Azure Region. This allows you to failover your production workloads to the secondary region with minimal downtime. Configuring ASR is relatively easy and this post won’t get into that. Instead, we will look at cache storage accounts, churn rate, and how to deal with high churn rate servers. Specifically, how to change a server that has high churn rate to a supported cache storage account.
We will summarize a few things beforehand. First, what is the cache storage account? The cache storage account temporarily holds changes from the source disks (production VMs) before replicating them to the destination ASR disk. It acts as a middle-man, ensuring consistent replication by storing changes locally before they are sent to the target site. Next, what is the churn rate? Churn rate refers to the amount of data that changes on the source disks per unit of time. It determines the rate at which ASR must replicate changes to the destination location to ensure data consistency.
OK, now that we know the cache storage account’s purpose and churn rate, let’s look at the limitations. All the specific details can be found here – Azure Virtual Machines disaster recovery – High Churn support – Azure Site Recovery | Microsoft Learn. To summarize, your VM SKU, amount of disks, and size/performance of disks all determine the supported maximum “normal” churn rate. The absolute maximum level of Normal Churn for a single VM is 54 MBps. But again, this is probably lower when you consider the three variables we just mentioned. For example, see the error below where in this case, the VM has exceeded its normal churn rate limit of 20 MBps. When this happens, we must move the machine to use a higher-performance storage account. If you’re using standard storage accounts for your cache storage, only normal churn is supported. You’ll need to use a premium block blob storage account to move to a high churn cache storage account.

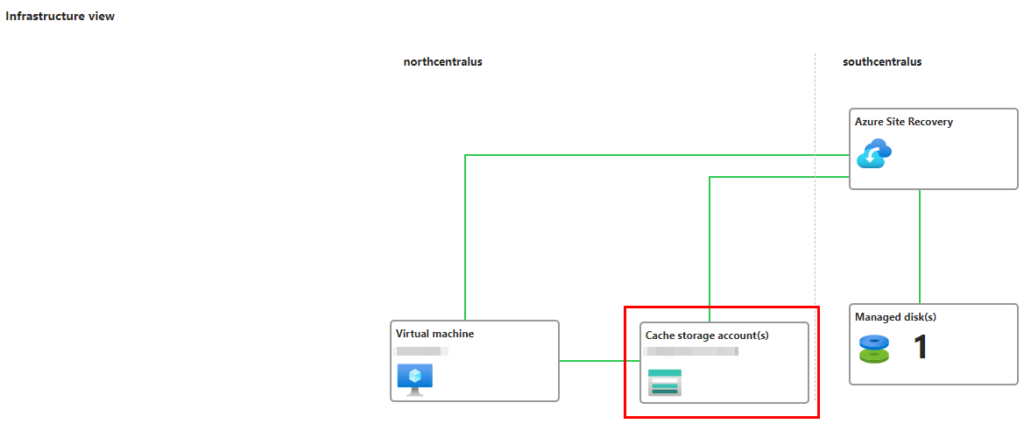
To view the cache storage account a server is utilizing, select the server and navigate to the Disaster recovery tab:

Under the infrastructure view, you can see the cached storage account. This will reside in the same region as the native region for that server:

Next, to enable high churn for our VM, we need to create a premium storage account so we have a target cache storage account that supports high churn. When you make your storage account, select premium with an account type of block blobs. Make sure you disable soft delete for blobs when making the storage account, or you’ll receive an error when trying to enable replication in the next steps. Soft delete for a cache storage accounts is not supported.

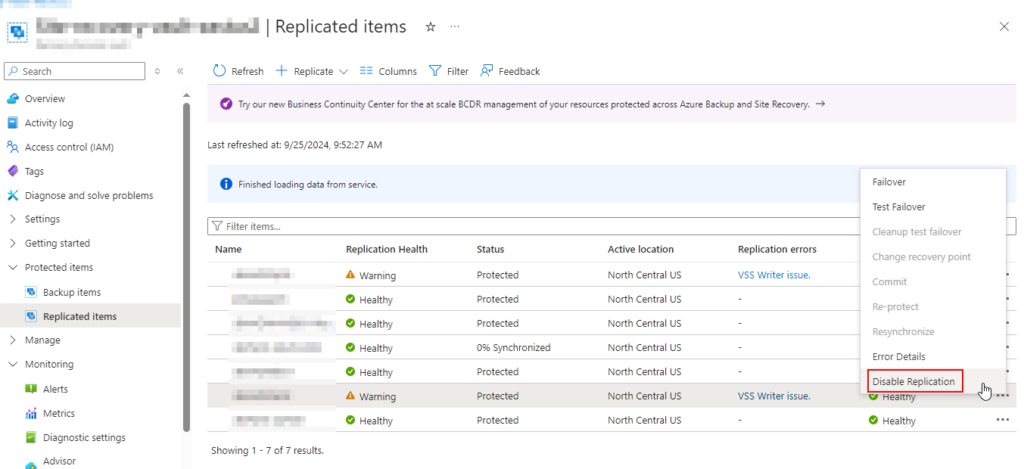
Then disable replication on the target VM. You can do this from the Disaster Recovery tab in the VM, or the Recovery Services Vault (shown below). You can’t change the VM to use a cache storage account while it’s already replicating. The only supported method is to disable replication, then re-enable replication and select a high churn cache storage account.

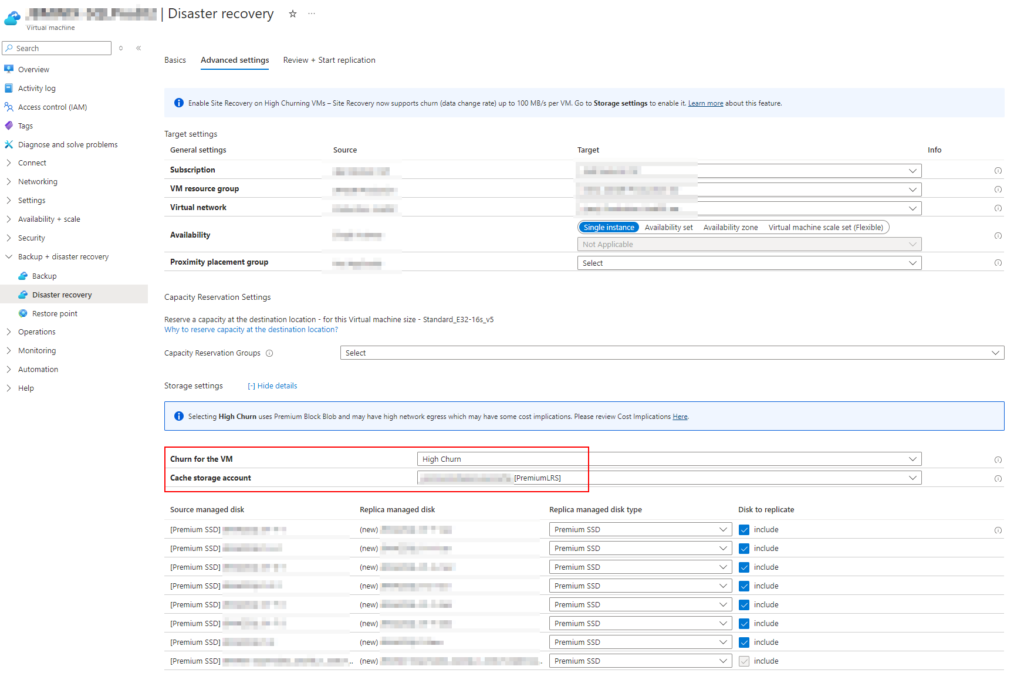
Then, reenable replication for that VM. Use all the same settings it previously used except for the storage settings. Expand storage settings and under the churn for the VM, select High Churn and then select the premium storage account we just created.

Your VM will start replicating and no longer throw errors that it’s exceeding the normal churn rate.
