If you’re a Microsoft CSP, you’re hopefully using Partner Center and GDAP to help manage your clients. If you’ve inherited a messy partner center, or you need to make new GDAP assignments for all your customers, this post will help. Before we start, if you need to get a handle on your current GDAP assignments, see this post – Generate Partner Center GDAP Role assignment Reports for Each Client – SMBtotheCloud which contains a script on how to pull your GDAP role assignments for each client.
To give a very high overview of how GDAP works – it’s essentially giving users from your tenant role-based permissions to a client tenant. This happens based on role assignments on security groups in your tenant. For example, Group A in your tenant may have the User Administrator and Helpdesk Administrator roles in the client tenant, and Group B may have the Intune, Exchange, and Teams administrator roles assigned for the client’s tenant. This is why it’s called GDAP (granular delegated admin privileges). You can granularly assign specific roles to different security groups, so members of your organization have least privilege role access to the client’s tenant. The pre-requisite before roles can be assigned is establishing an Admin Relationship with the client. When an admin relationship is requested, you choose which roles you want to be available to assign to your security groups. The Client can then accept or decline the admin relationship. If they accept it, then you can begin assigning any of the roles that were accepted to your security groups. For specific details on all these steps from start to finish, see this – Granular delegated admin privileges (GDAP) introduction – Partner Center | Microsoft Learn.
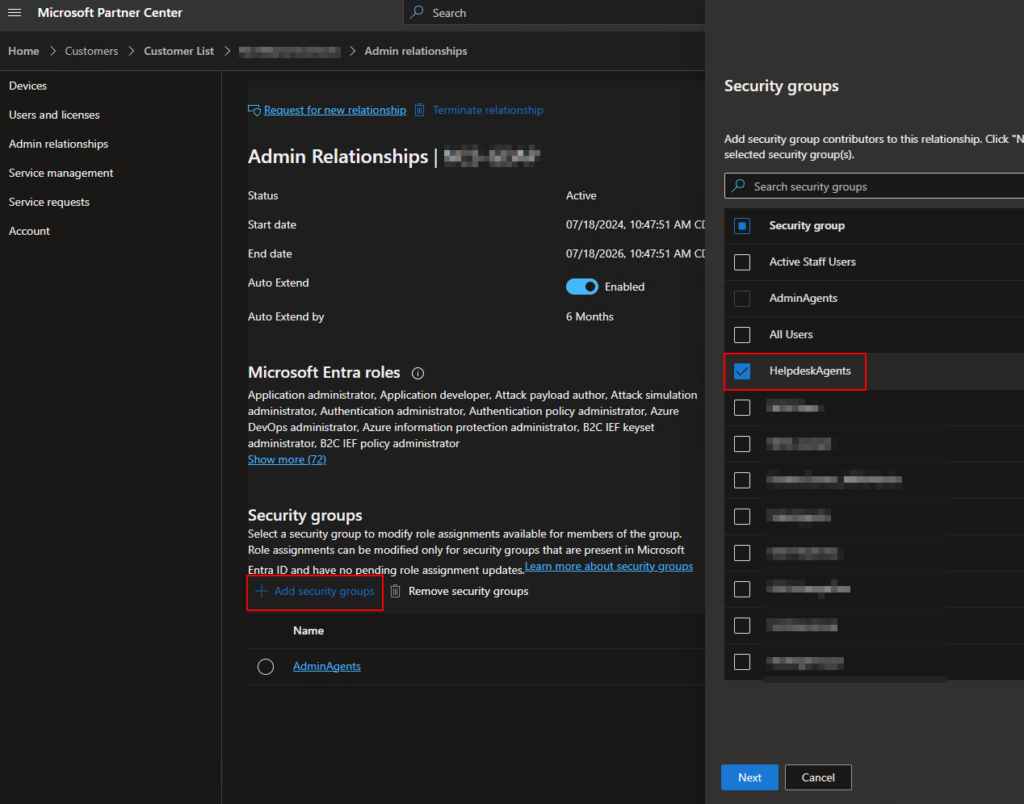
Once an admin relationship is established, you’d typically assign GDAP roles through the partner center site under Customers > Customer List > “customer name” > Admin Relationships. Click Add Security Groups, then select the security group you want to grant GDAP roles for:
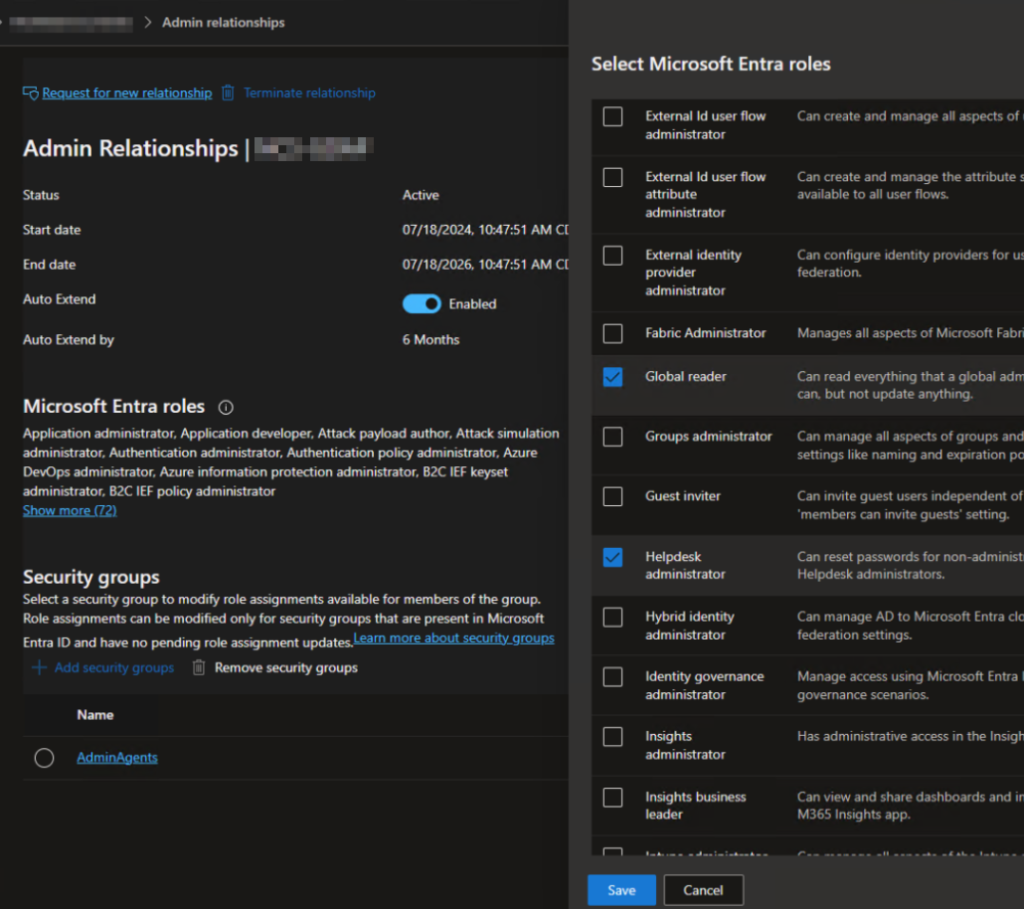
After clicking Next, you’ll be asked to select the roles you want to grant that group:
Pretty simple. If you only have a few customers, adding new GDAP assignments won’t take long this way. However, if you have hundreds or thousands of clients, manually adding a new GDAP assignment for all customers is not a good use of time. Especially if you have multiple groups to add. I wrote a script to add these assignments in bulk to all your Partner Center customers. A few things to be aware of:
- You can only target customers with an active admin relationship. This should go without being said, but make sure you’re staying on top of the expiration dates for your admin relationships. The script skips any customers with no admin relationship, or an expired one.
- The roles you’re assigning must have been consented to by the client in the admin relationship. If the customer didn’t consent to the roles you’re trying to assign, the GDAP assignment will fail.
The script can be found on GitHub here. Part of it is also shown below so we can point out what you need to modify. Since you’ll be adding your own GDAP assignments, there are a few things you’ll need to change.
- The $securitygroupname variable – This is the name of the security group you’re assigning GDAP roles to. This is simply for the output, but if you’re keeping the logs from the script, it saves you the step of looking up the group ID if you forget which group you were assigning roles to.
- The $group variable – This is the Entra security group ID, which can be found in Entra under the group properties.
- Edit the hash table to include the Role IDs for all the GDAP roles you want to assign to your security group. In the template, I have the IDs for Authentication Administrator, Privileged Role Administrator, Cloud Application Administrator, Global Reader, Reports Reader, Teams Administrator, Security Readers, Directory Writers. A list of the Builtin Entra role IDs is found at the bottom of the script in Github. It can also be obtained here – Microsoft Entra built-in roles – Microsoft Entra ID | Microsoft Learn.

$securitygroupname = "YourSecurityGroup"
$Group = "xxxxxxxx-xxxx-xxxx-xxxx-xxxxxxxxxxxx"
$params = @{
	accessContainer = @{
		accessContainerId = $group
		accessContainerType = "securityGroup"
	}
	accessDetails = @{
		unifiedRoles = @(
			@{
				roleDefinitionId = "c4e39bd9-1100-46d3-8c65-fb160da0071f"
			}
			@{
				roleDefinitionId = "e8611ab8-c189-46e8-94e1-60213ab1f814"
			}
            @{
				roleDefinitionId = "158c047a-c907-4556-b7ef-446551a6b5f7"
			}
            @{
				roleDefinitionId = "f2ef992c-3afb-46b9-b7cf-a126ee74c451"
			}
            @{
				roleDefinitionId = "4a5d8f65-41da-4de4-8968-e035b65339cf"
			}
            @{
				roleDefinitionId = "69091246-20e8-4a56-aa4d-066075b2a7a8"
			}
            @{
				roleDefinitionId = "5d6b6bb7-de71-4623-b4af-96380a352509"
			}
            @{
				roleDefinitionId = "9360feb5-f418-4baa-8175-e2a00bac4301"
			}
		)
	}
}

#Connect to Graph
Connect-MgGraph -scope "DelegatedAdminRelationship.Read.All","DelegatedAdminRelationship.ReadWrite.All", "Directory.Read.All"

#Grab active admin assignment relationship IDs
$delegatedAdminRelationshipIds = Get-MgTenantRelationshipDelegatedAdminRelationship | Where Status -eq Active | Select -ExpandProperty Id

#Assign GDAP roles to group for all active relationships
ForEach ($delegatedAdminRelationshipId in $delegatedAdminRelationshipIds) {
Try {
$AdminRelationshipName = Get-MgTenantRelationshipDelegatedAdminRelationship -DelegatedAdminRelationshipId $delegatedAdminRelationshipId | Select -ExpandProperty DisplayName
Write-Host -ForegroundColor DarkYellow "Assigning GDAP group roles to $securitygroupname for $AdminRelationshipName"
New-MgTenantRelationshipDelegatedAdminRelationshipAccessAssignment -DelegatedAdminRelationshipId $delegatedAdminRelationshipId -BodyParameter $params
}
Catch {
Write-Host "An error occurred:"
Write-Host $_
}
}
Disconnect-MgGraph
Stop-Transcript
After you’ve made the changes to include the Role IDs you want to assign, and input your security group name and ID, it’s ready to go. 👍