Usually, when I’m working with Google Workspace, it’s to help migrate away from Google Workspace and into Microsoft 365. However, I recently had a client who was already using the full M365 suite but needed to create a Google Workspace tenant so they could also manage Google Workspace IDs. This is not a common scenario, but certainly one that makes sense in certain situations. For example, if your organization deals with other organizations or vendors operating in Google Workspace, a Google account may be required to collaborate and use some of the Google Workspace apps. We wouldn’t want our users creating personal Google accounts for work purposes (especially if they’re tied to our organization’s domain).
We also don’t want to manage two separate Identity platforms. So, in this situation, we can use Entra as the primary identity provider, so Google Workspace syncs users from Entra and uses Entra as the IDP and SSO provider. There is some documentation already out there from Google and Microsoft, but I felt like it was out of order or missing some information – especially when it comes to user provisioning on the Google Workspace side. So, this post walks through the setup for SSO and automatic sync for user provisioning/deprovisioning. We will start with configuring SSO and then get into the automatic user provisioning.
Configure Entra as the IDP and SSO for Google Workspace
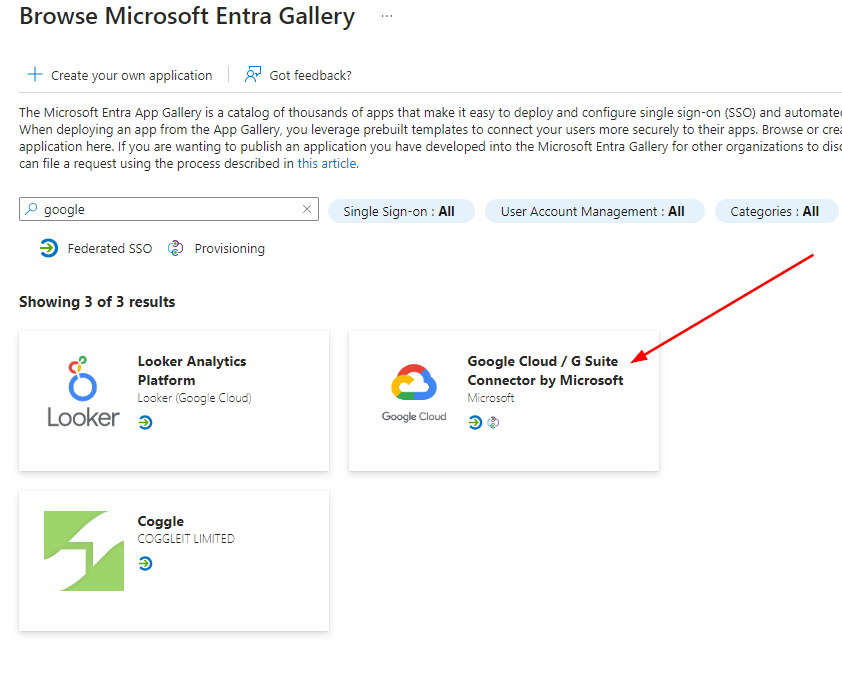
In Entra, navigate to Enterprise apps, add a new application, search for and select the Google Cloud / G Suite Connector by Microsoft:
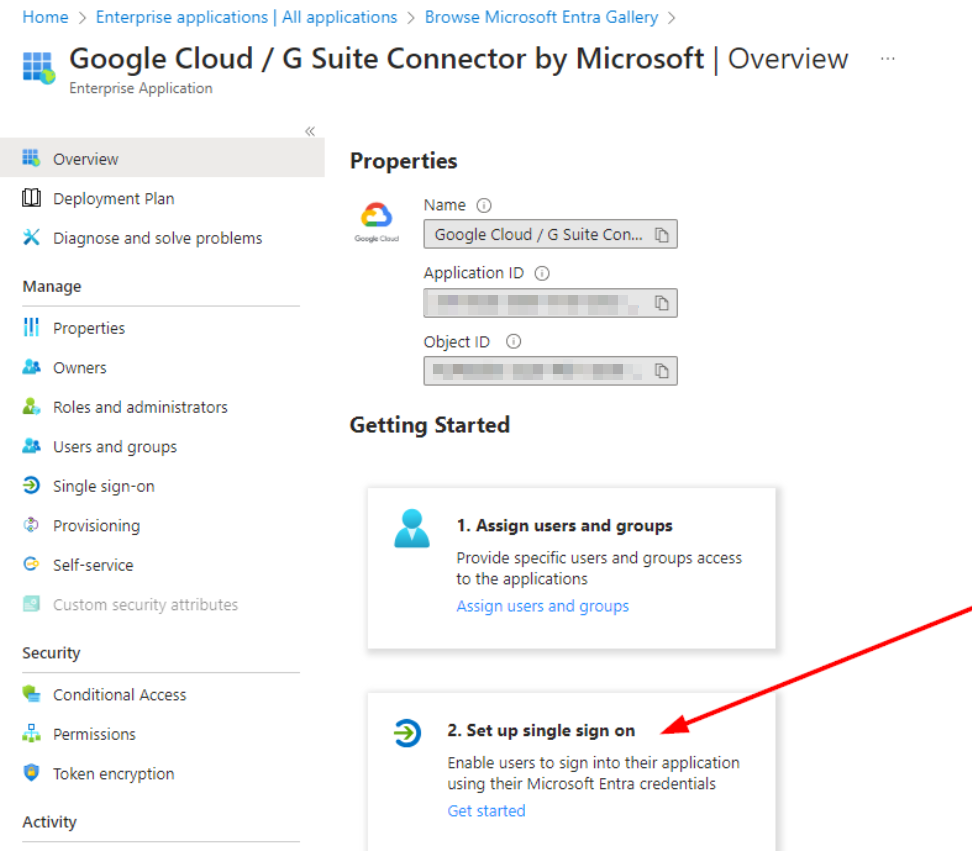
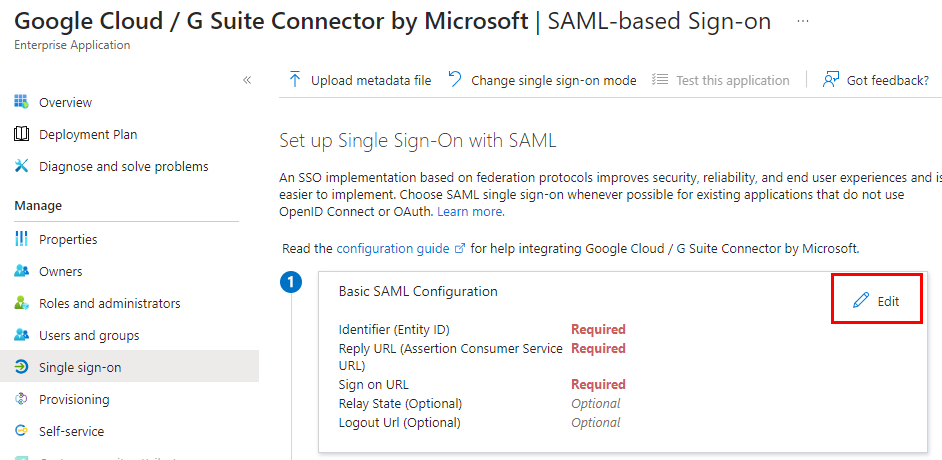
Once the app is added, we need to configure SSO. Navigate to the enterprise app we just added (Google Cloud / G Suite Connector by Microsoft). Select Set up Single sign on:
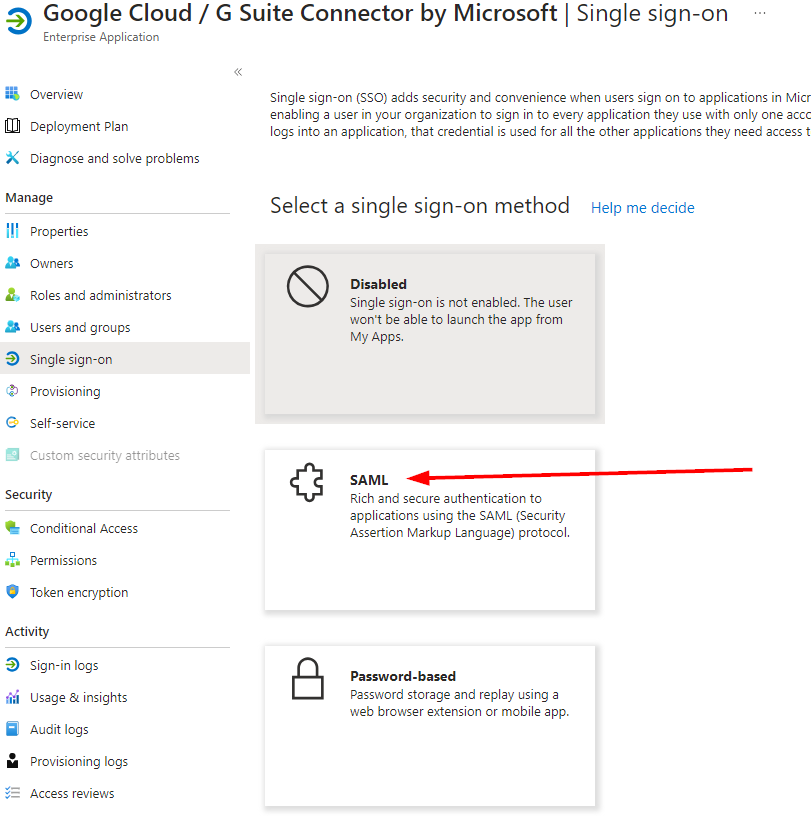
Then select SAML:
Edit the Basic SAML information:
Complete this like this for Gmail/Google Workspace, where your domain is entered after the “/a/”.
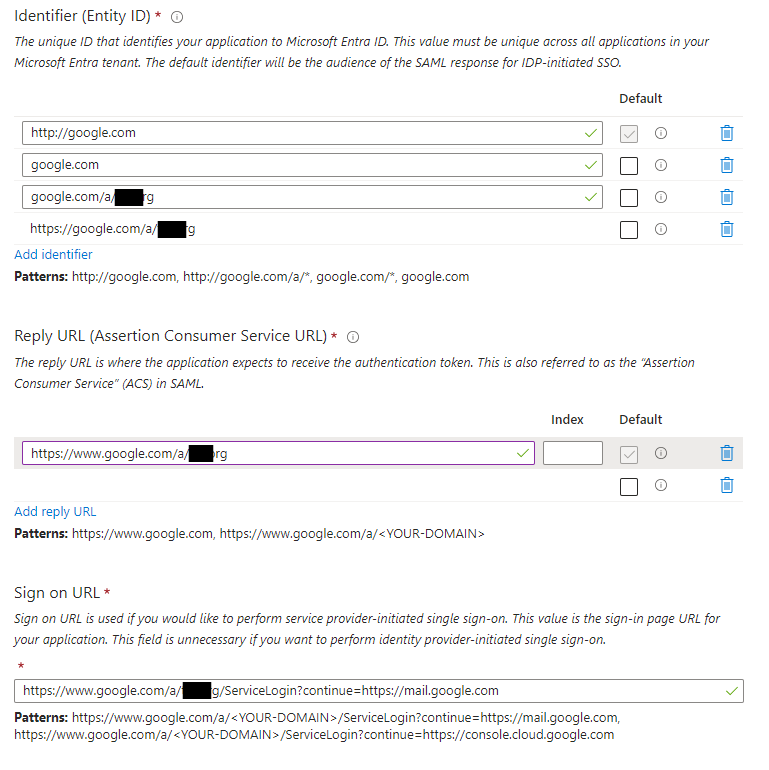
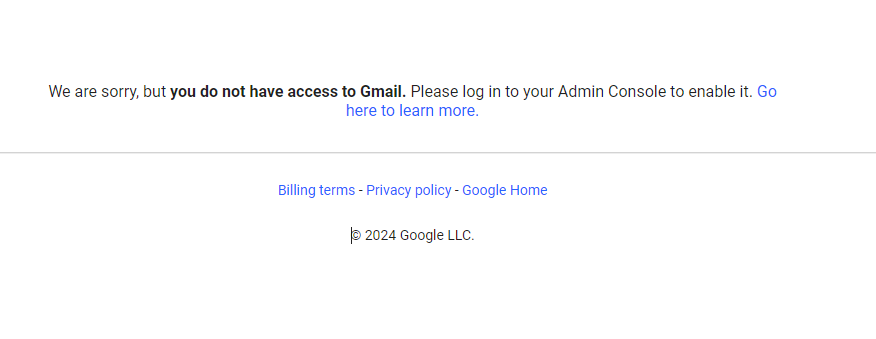
The Documentation states that you should use “https://www.google.com/a/yourdomain.com/ServiceLogin?continue=https://mail.google.com” as the sign on URL. If, for some reason, you’re using Gmail as your email provider but using Entra for authentication, you can use this. However, if you have Gmail disabled in Google Workspace (you should if you’re using M365), then users will see this screen after trying to sign in with SSO to Google Workspace:
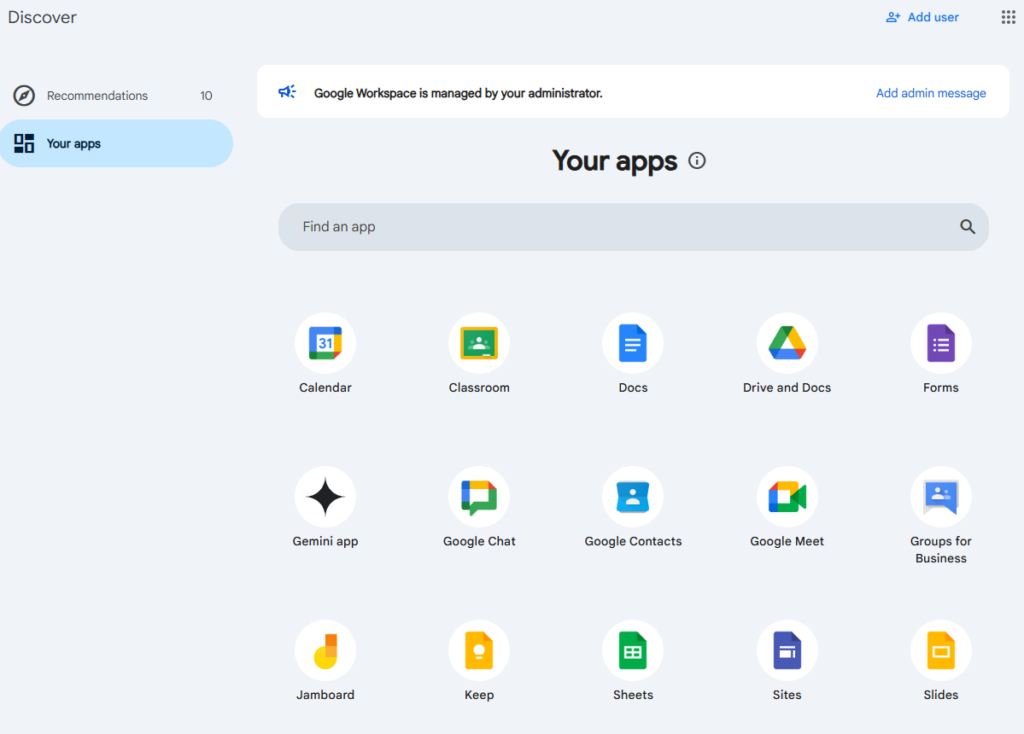
So, if you’re not using Gmail, change your Sign on URL to https://www.google.com/a/<yourdomain>/ServiceLogin?continue=https://workspace.google.com/dashboard like the screenshot below:

Users will be brought to the apps dashboard if we use the URL ending in workspace.google.com/dashboard:
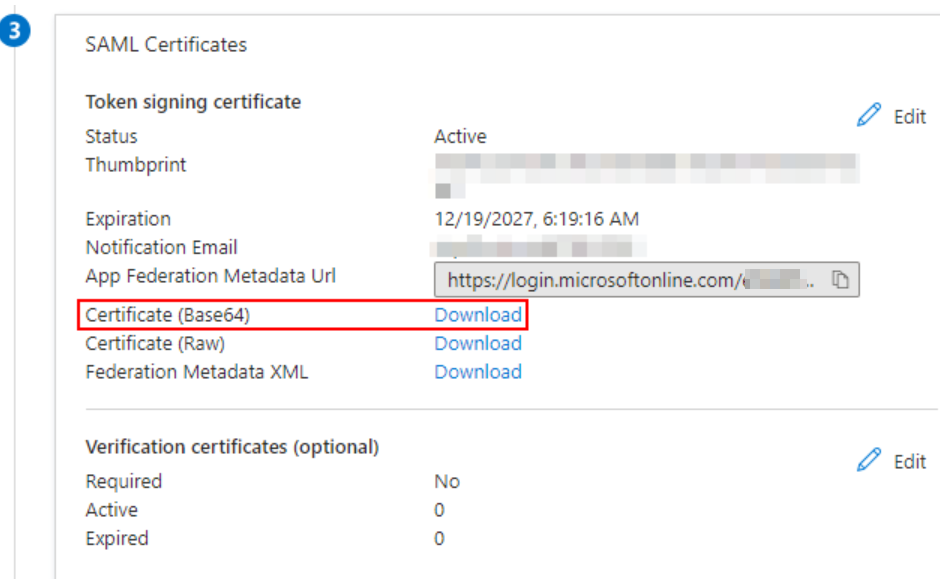
OK, so back to our configuration. There’s no need to change anything in the attributes & claims. Next, in the SAML certificates section, download the Base64 certificate:
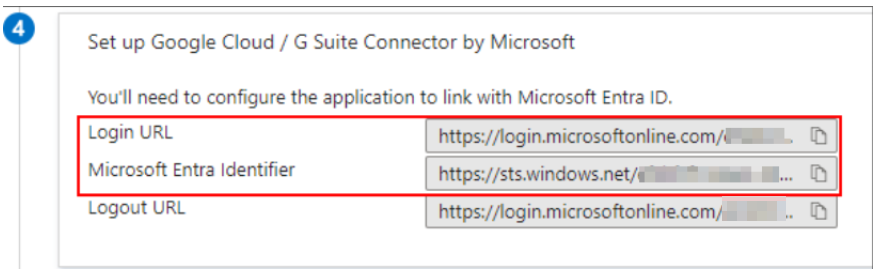
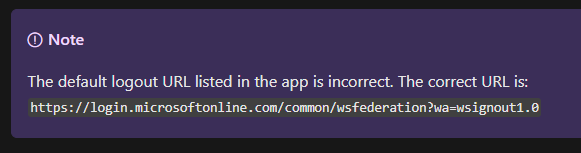
Copy the Login URL and Microsoft Entra Identifier in step 4 (shown below). Don’t copy the logout URL. Instead, use https://login.microsoftonline.com/common/wsfederation?wa=wsignout1.0 for the logout URL
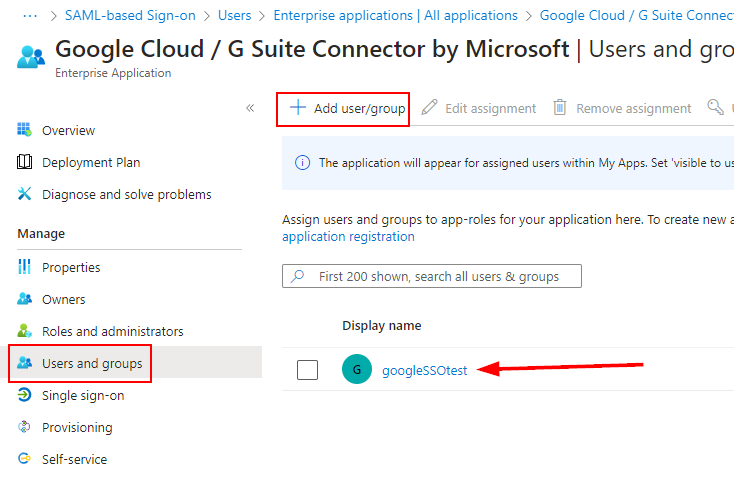
Next, if you want to test before rolling out to production users, create a test user and add to the enterprise application’s Users and Groups.
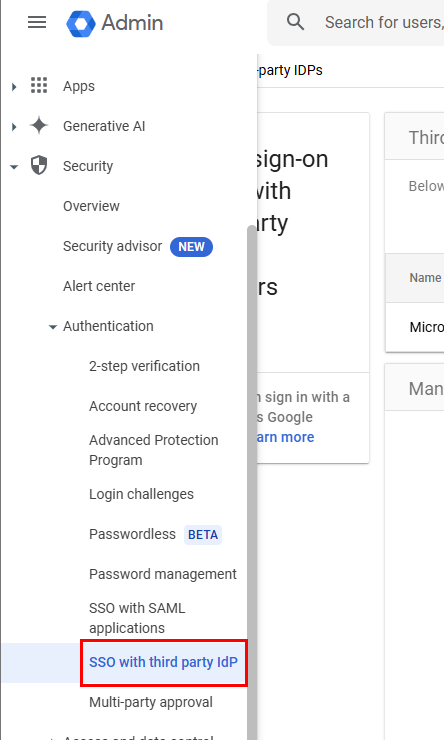
Next, sign into your Google Workspace Admin center and select Security > Authentication > SSO with third party IdP:
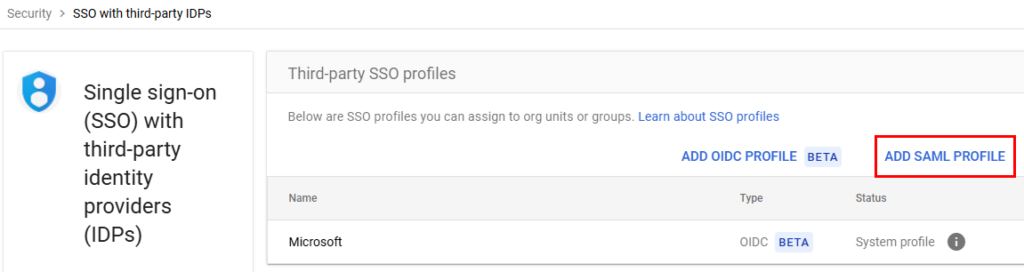
Click Add SAML profile under third-party SSO profiles:
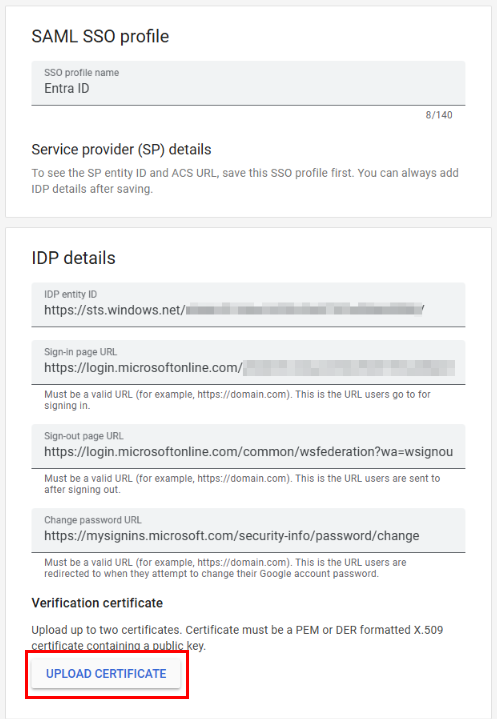
Name your profile and then enter the following IDP details, some of which were copied from Entra previously. The Login URL and IDP Entry ID should be copied from the previous step:
- For change password URL: https://mysignins.microsoft.com/security-info/password/change
- For sign out page URL: https://login.microsoftonline.com/common/wsfederation?wa=wsignout1.0
Don’t forget to upload the certificate we downloaded previously from the Enterprise App setup in Entra
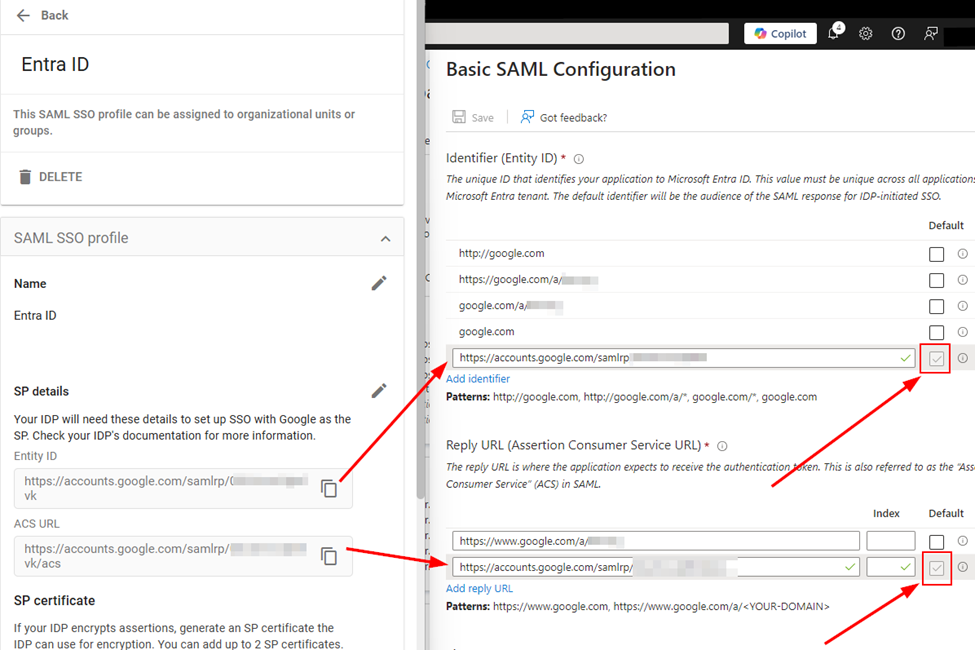
We must also add the Entity ID and ACS URL from the Google SAML SSO profile to the SAML configuration in Entra. This part is not in the MS documentation. See below:
When finished, you should see a status of Complete for your entry in Third Party SSO profiles:

Provisioning Users in Google Workspace
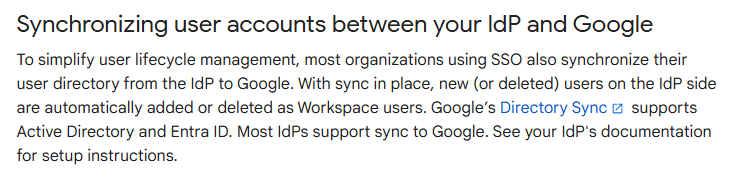
We are ready to start testing, but you’ll want to sync or auto-provision users from Entra -> Google since Entra is the IDP. You have two options: Automatic User Provisioning or Directory Sync. I highly recommend Directory Sync, but we will walk through both methods. If you use automatic User Provisioning from the Entra App, users won’t be disabled/deleted in Google Workspace if they’re removed from Entra. So, to summarize, use Directory Sync unless you do NOT want users automatically disabled in Google Workspace after they’re disabled or deleted from Entra.
Enable Automatic User Provisioning (not recommended)
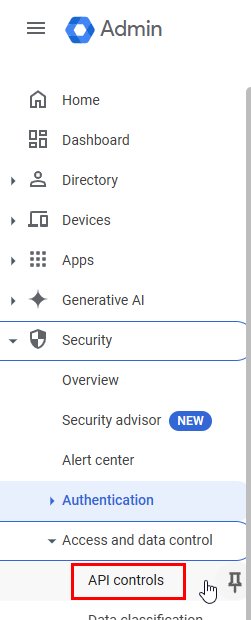
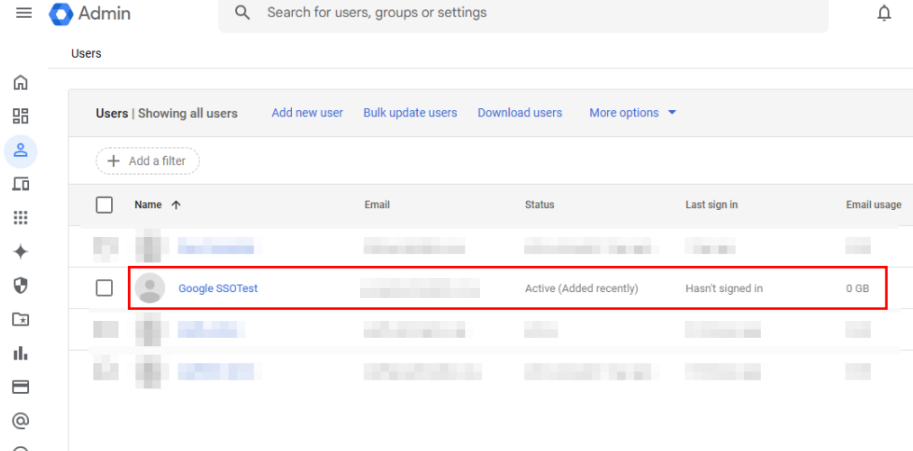
We will show this using the test user we created earlier (googlessotest) in Entra. To enable automatic user provisioning, from Google Workspace Admin center, navigate to Security > Access and data control > API control:
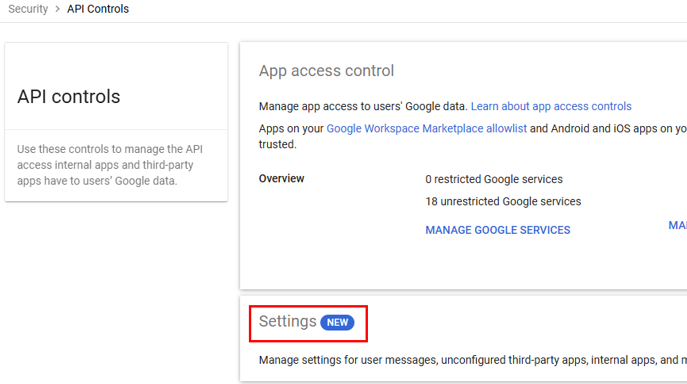
Select Settings:
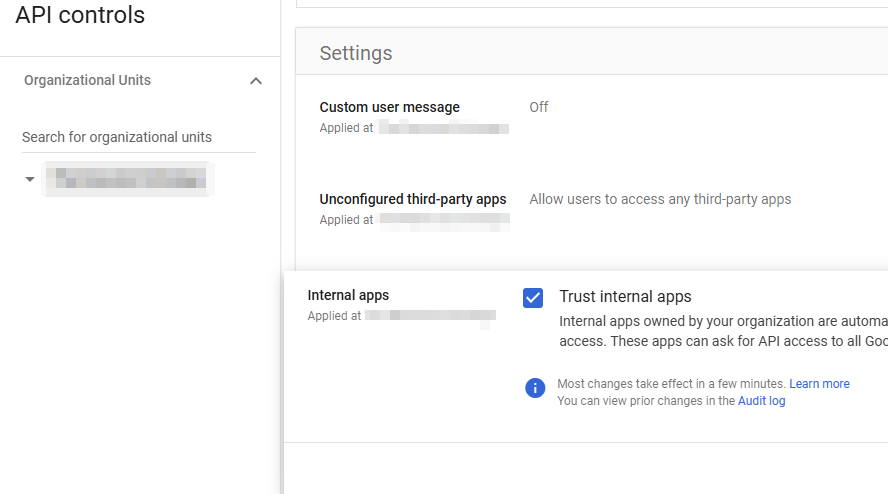
Verify that the box is checked to trust internal apps:
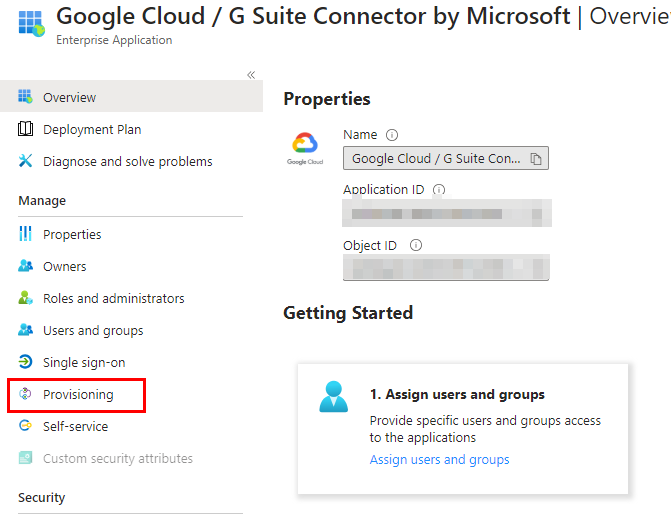
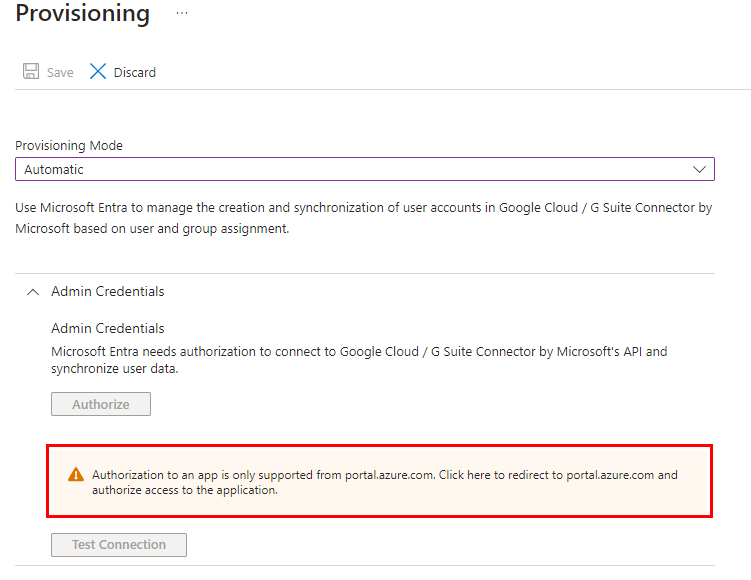
Now go back to the enterprise app in Entra. Select provisioning:
Change the user provisioning mode to Automatic. If you are unable to save the changes and see a banner that says Authorization is only supported from portal.azure.com, click the banner to be directed to the correct URL
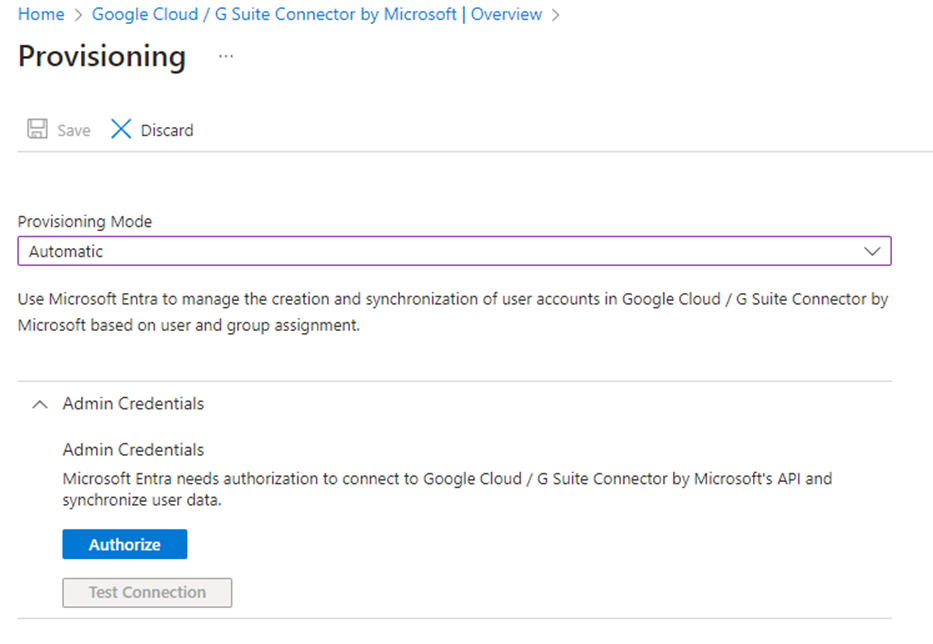
Ensure you have an admin account in Gsuite that is authorized for all Admin API privileges. This account will be used for auto-provisioning. I created a separate admin service account for this. You can also use a super admin account from Google Workspace, Click the Authorize button:
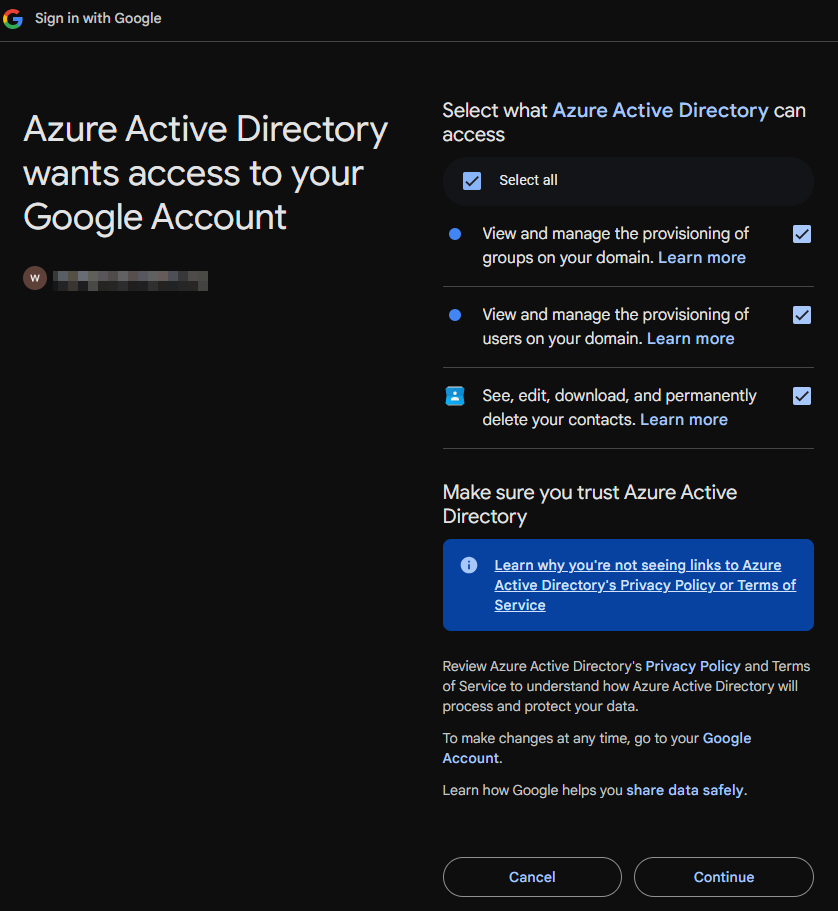
Make sure you allow access when prompted after signing in:
If successful, the provisioning mode should be changed to automatic, and testing the connection should result in success:

The default mappings should be sufficient, but if you want to review or change them, see this – Tutorial: Configure G Suite for automatic user provisioning with Microsoft Entra ID – Microsoft Entra ID | Microsoft Learn.
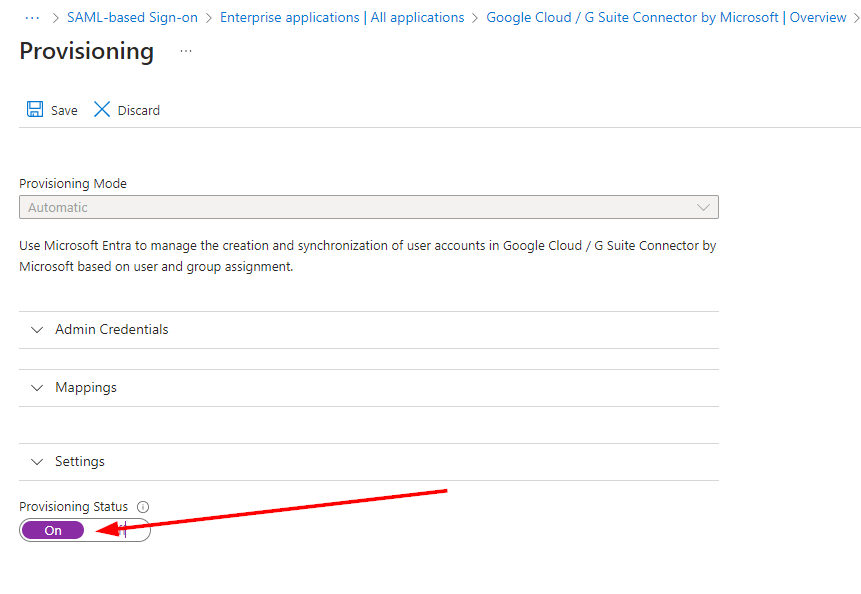
Lastly, make sure we turn provisioning ON. Go back to the enterprise app and select Provisioning. Click Edit provisioning:
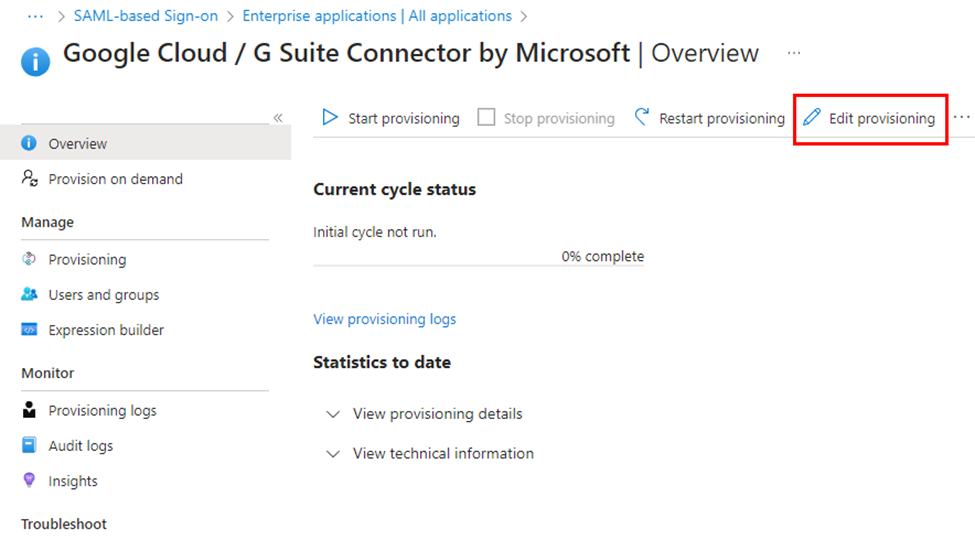
Turn provisioning ON and click Save
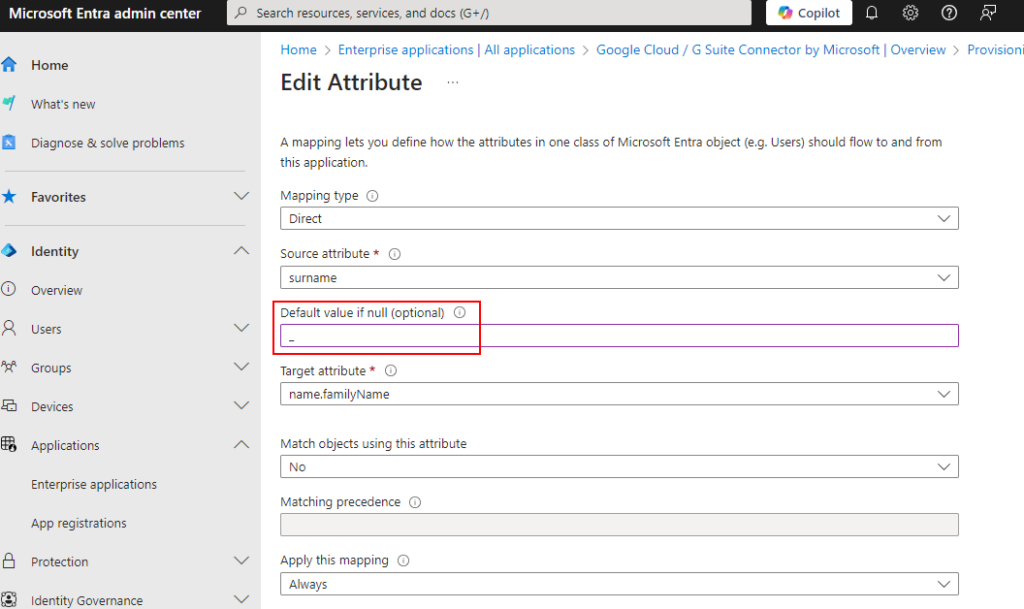
This will initiate the first provisioning cycle. Your test user should be created in Google Workspace shortly. If you did not add your user’s first and last name, it will fail to provision. You can also run a provision on demand to verify. If many of your users don’t have First or Last name attributes set, you can edit the mapping attribute for for surname and givenname to be an underscore or other character:
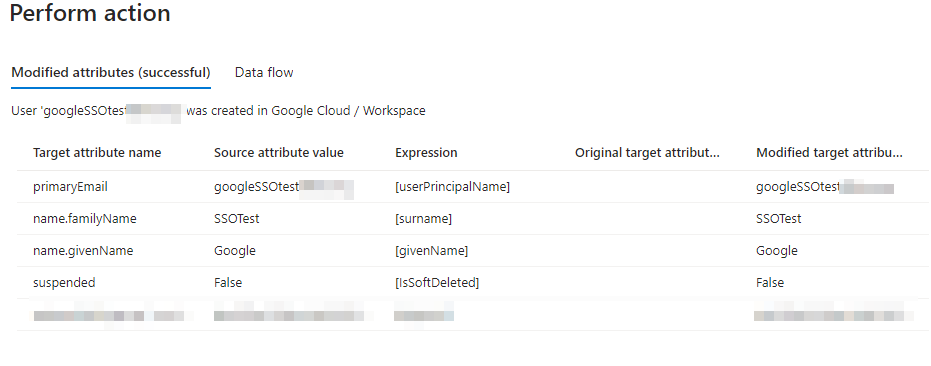
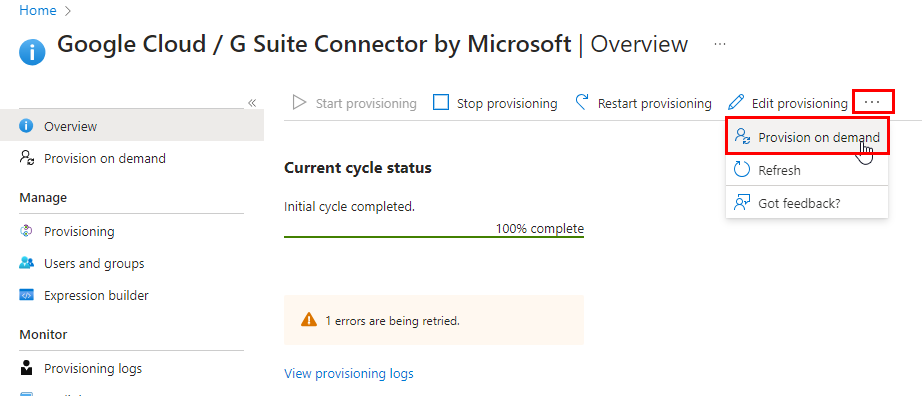
Provision on demand can be found from from the options under the ellipses if its not appearing on the top banner:
Back in the Google Workspace Admin center, we can see our user was provisioned:
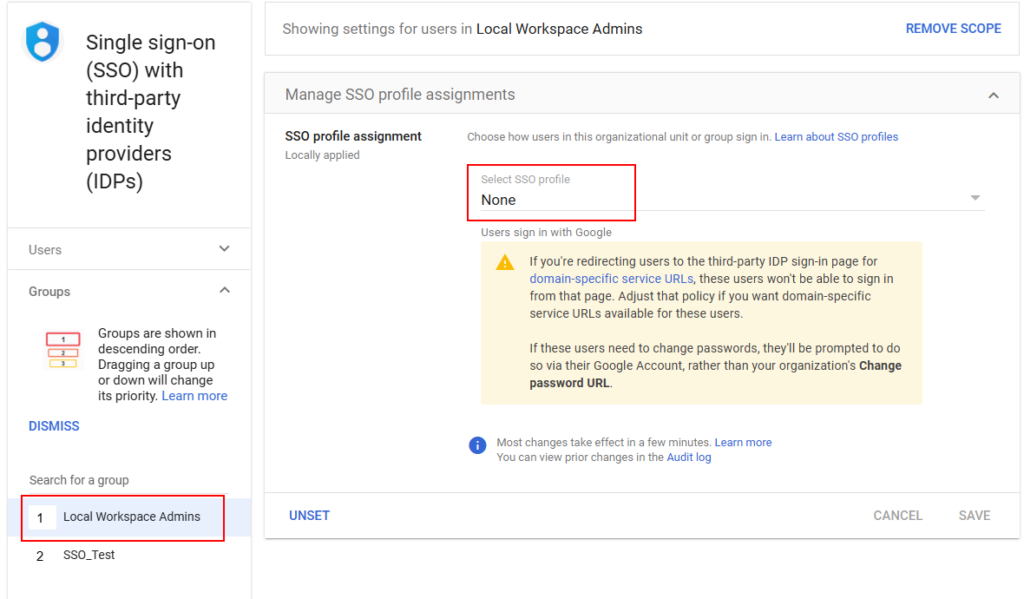
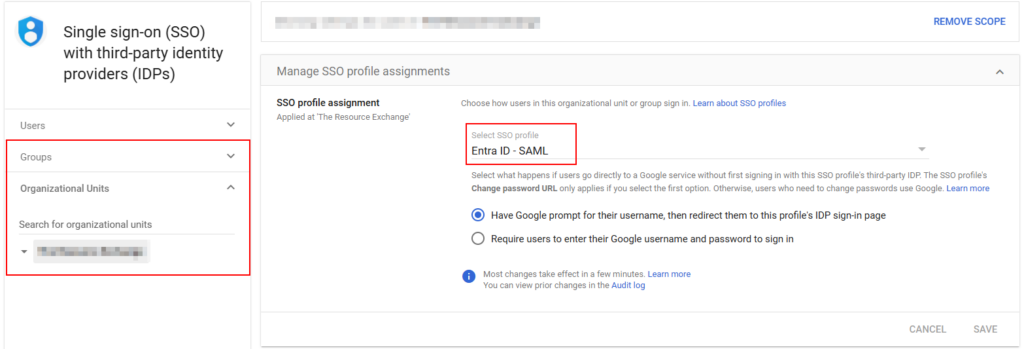
Lastly, we must ensure that the SSO profile is assigned in Google Workspace. Go back to Security > SSO with third-party IDPs. If you want to test this, you can create a security group and place the users who are assigned in the Enterprise App. You can also exclude users and groups from SSO. Any super admin cannot use SSO with a third-party IDP. This is so you’re not completely locked out of your Workspace tenant if the IDP goes down or the SSO configuration breaks. In the screenshots below, we can see that a local admin roles group is excluded. You’ll want to select your test group and assign the Entra-ID SAML SSO profile.
When you’re finished testing, target more users with your enterprise app and then extend the Google Workspace config to the corresponding group on that side. In this example, it will be at the top-level OU:
Configure directory sync (recommended)
Directory sync is exactly how it sounds, and the MS documentation does not mention it. This is probably because it’s a Google App, but it’s a superior user provisioning method compared to the automatic user provisioning we just went through. Directory Sync is the recommended method, and you should use this to provision and sync your users to Google Workspace over using the automatic user provisioning method in the Enterprise App. In the Google documentation, you will see this:
Instructions from Google are pretty straightforward and can be found here. We will walk through this with screenshots below.
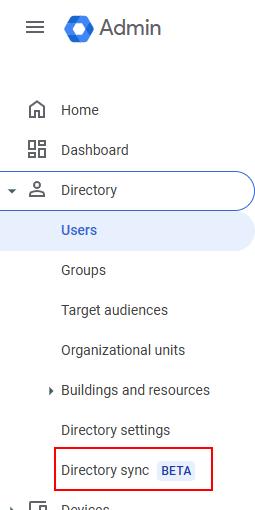
- From the Google Workspace Admin center, navigate to Directory > Directory Sync:
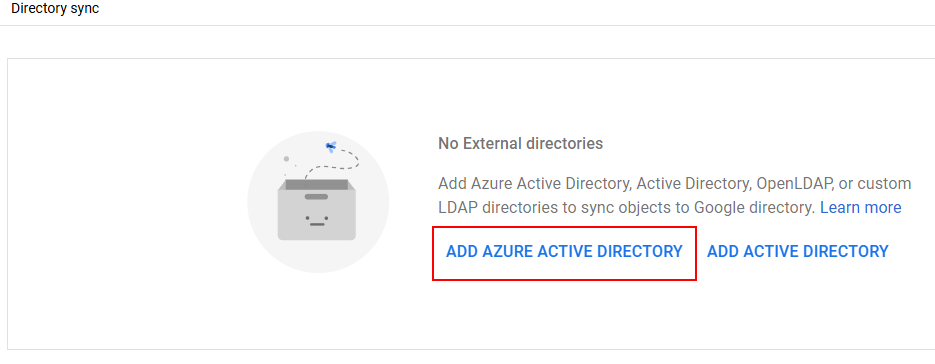
- Select Add Azure Active Directory:
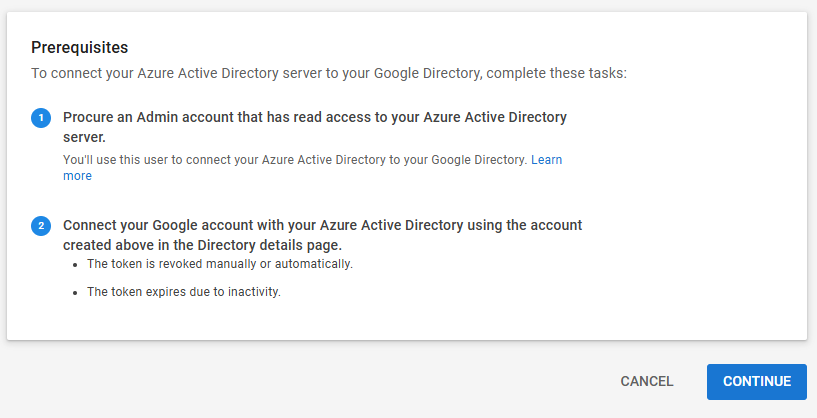
- Click Continue on the prerequisites window
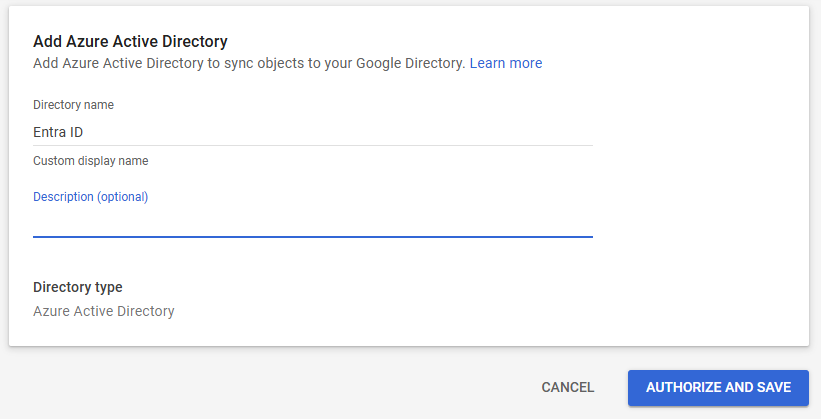
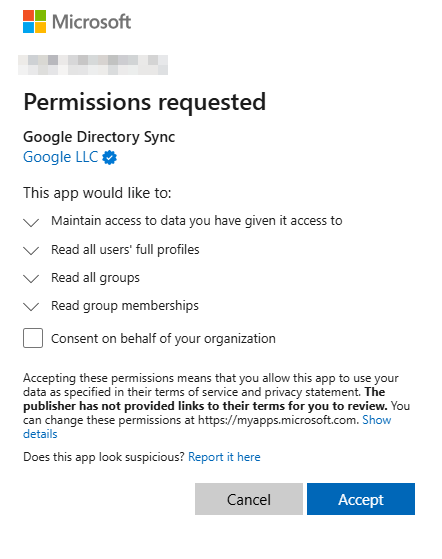
- Add a Name and click Authorize and Save. You’ll be prompted to sign into Entra and consent to the required permissions. You will need a Global Admin or Cloud Application Administrator identity to complete the sign in:
- Accept the permission request:
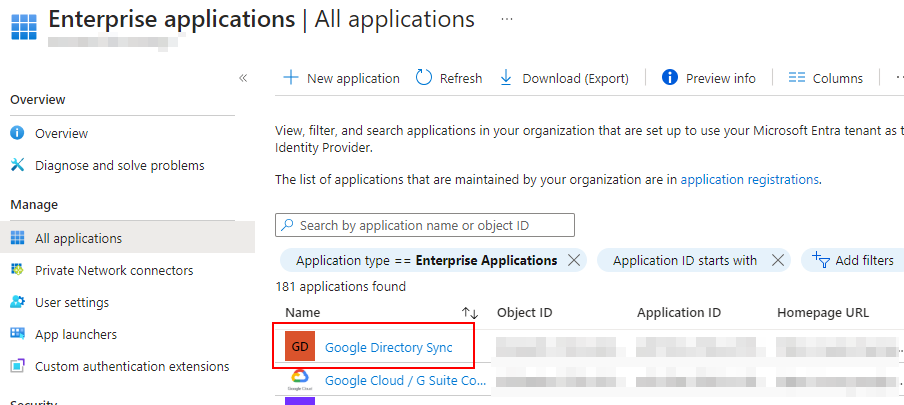
- Back in Entra, you’ll notice a new enterprise app has been created named “Google Directory Sync”
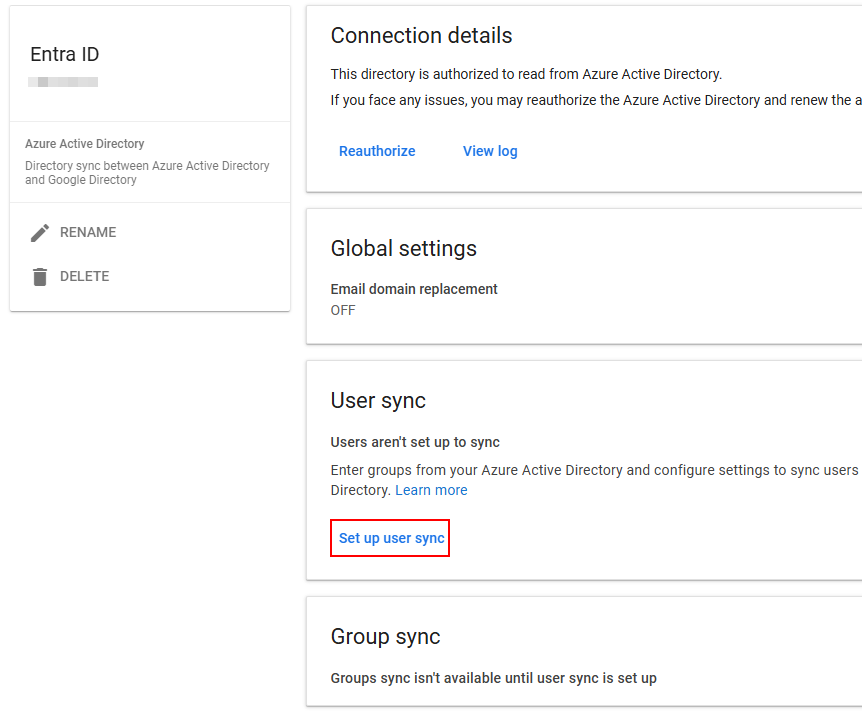
- Now, we can configure user sync. Back in Google Workspace Admin center > Directory > Directory Sync. Select the External Directory we just created. Select set up user sync:
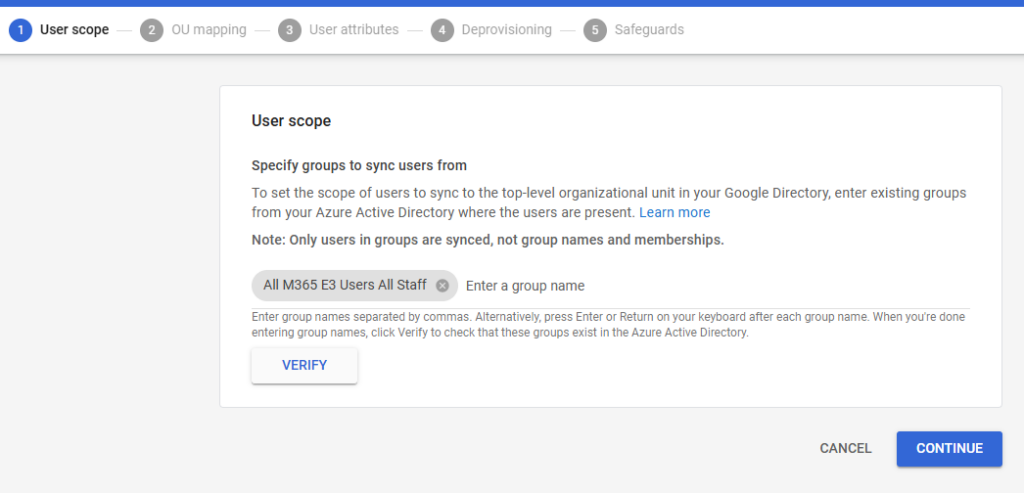
- You must select an M365 user group or groups for the users you want to sync. After entering your group or groups, click Verify, then continue. If you are just getting started and want to test with a small group of pilot users, create a pilot group in Entra.
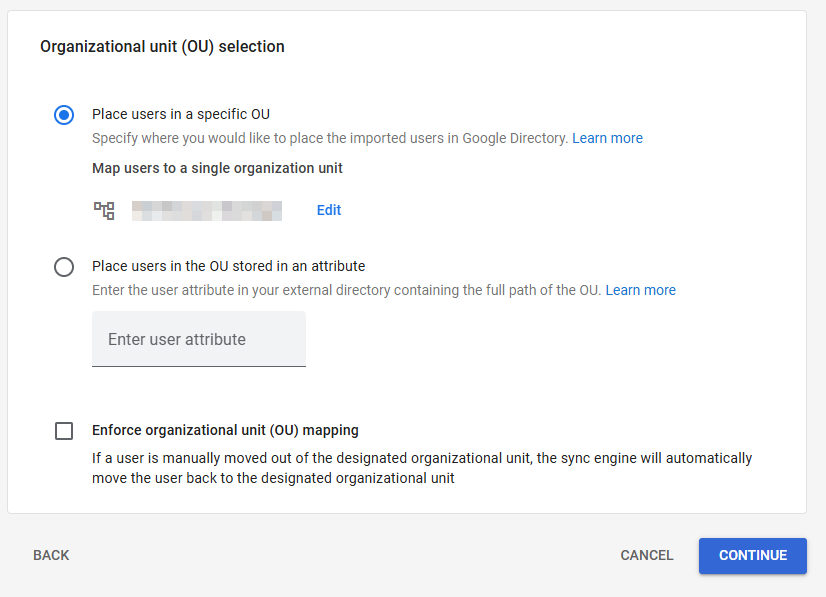
- Select the OU where you want users synced in Google Workspace:
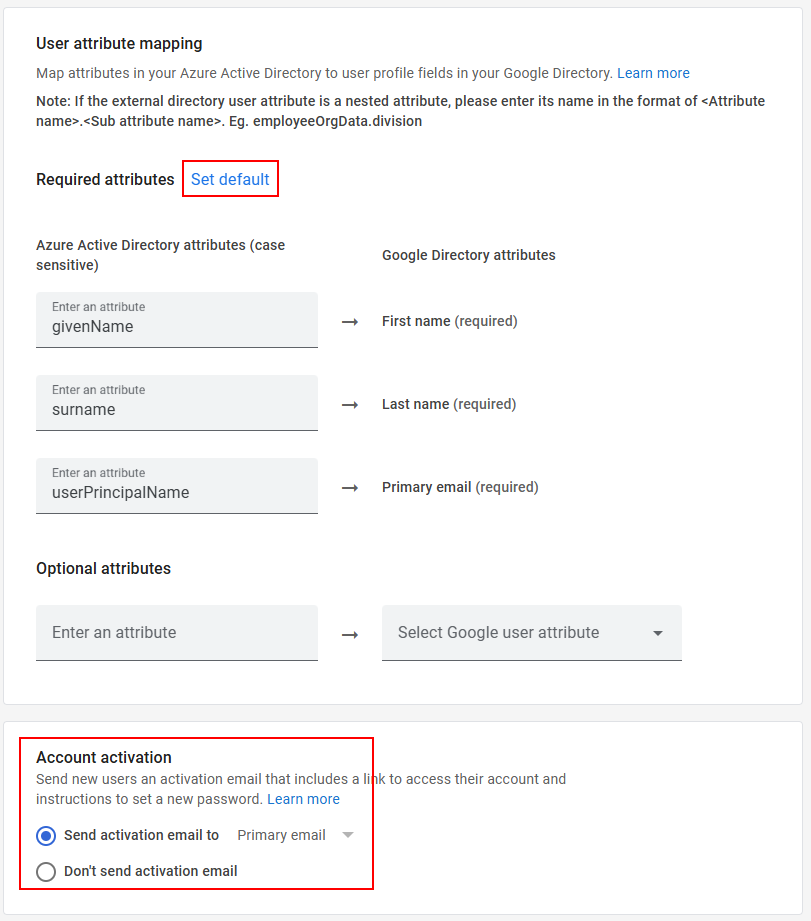
- Edit the User Attribute mappings (if needed) or click set default to use the default mappings. First Name, Last Name, and Primary email address are required fields in Google Workspace. Choose whether you want to send the users an activation email, then click continue. If you already have existing users in Google Workspace, they will not be duplicated as long as the UPN in Entra matches the Primary Email in Google Workspace.
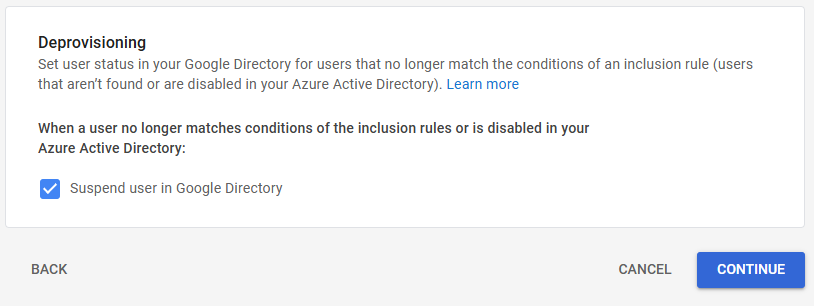
- Set the action for user de-provisioning and click continue. Suspend is the default and is equivalent to disabling a user in Entra.
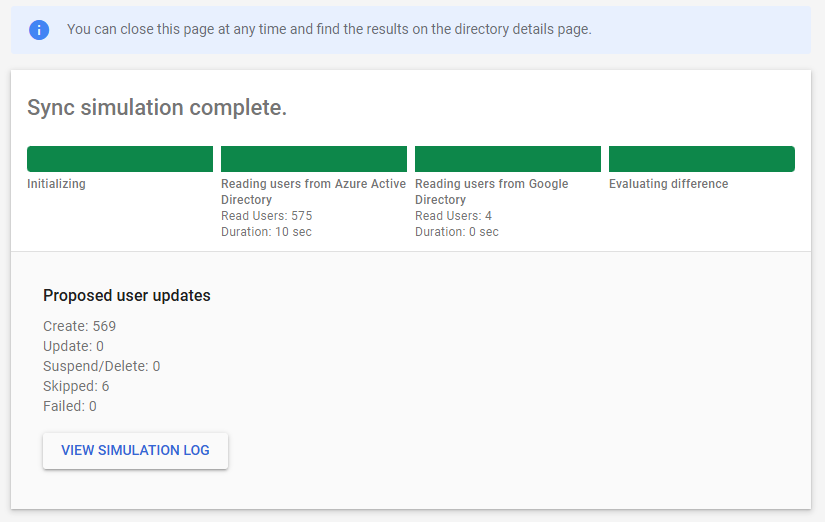
- Continue to run the simulated sync:
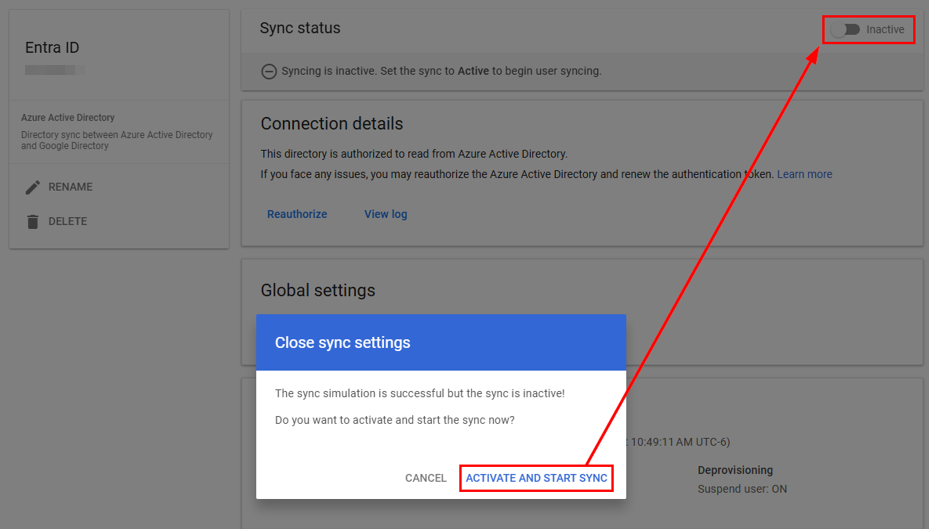
- After closing the simulated sync, if successful, you’ll be asked if you want to activate and start sync. If you decide not to activate and start syncing now, you can come back to the sync directory and activate it under sync status:
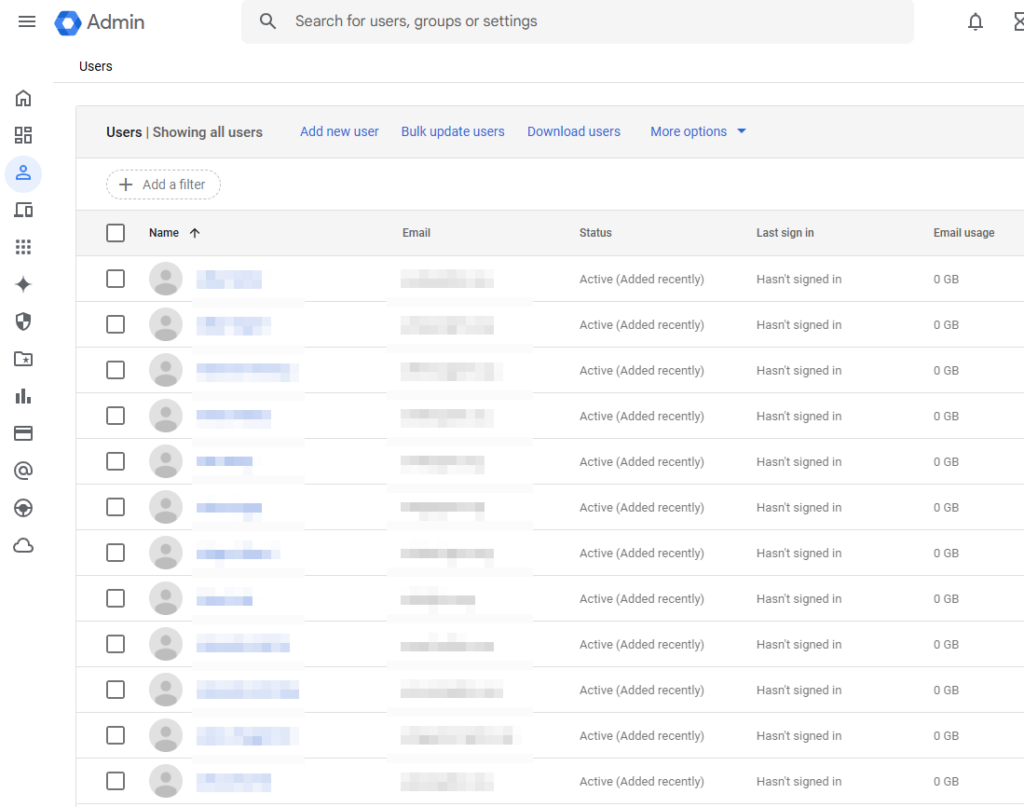
- After your sync finishes, all your targeted users should be added to Google Workspace:
- We also need to ensure the SSO enterprise application in Entra targets the same group that our Directory Sync is using. This group should match the sync group we targeted in step 7.

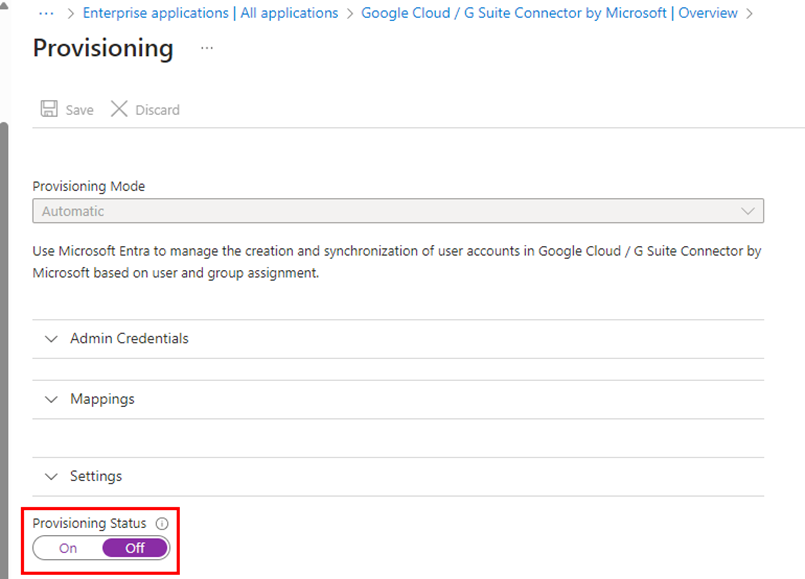
- If you previously configured automatic user provisioning on the Enterprise App, or did testing with it, change the provisioning status to disabled since this is being handled by directory sync:
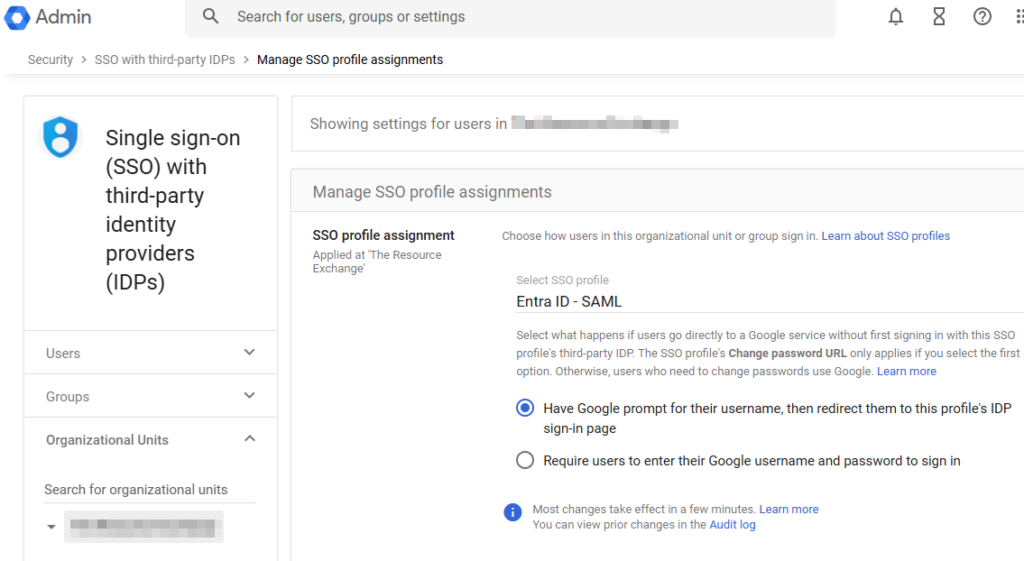
- Lastly – Go back into the Google Admin center under Single Sign-on with Third-party IDPs. Select your SSO Profile, and then scope it to the organizational level or a larger group, which will encompass all the users we just synced and all users who are assigned to the SSO enterprise app in Entra.
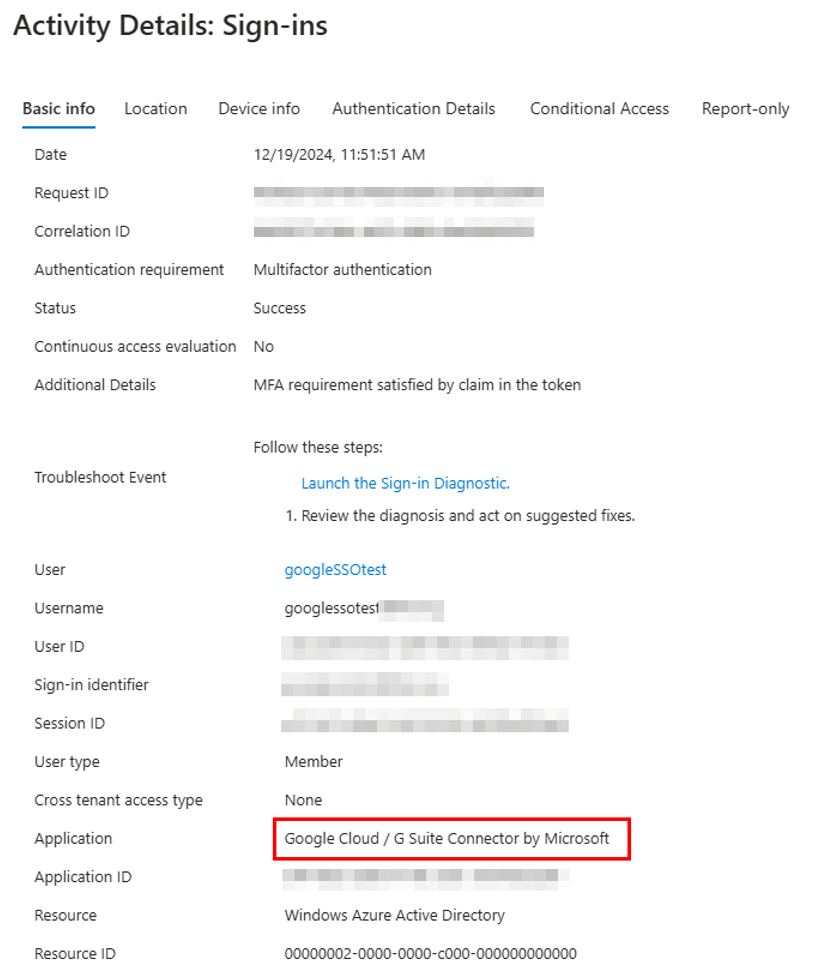
User Experience and Sign-in Logs
When users try to authenticate to Google Workspace, they’ll be directed to complete SSO via Entra:
And in the Entra Sign in logs, we can see the authentication against the Google Cloud / G Suite Connector application: